Showing posts sorted by relevance for query star. Sort by date Show all posts

Wednesday, May 2, 2012

Finish #4: Big Star Quilt! Updated

This is what I've been working on during this first week of 'vacation'.

I'm linking up to: http://freemotionquilting.blogspot.com/2012/05/vacation-link-up.html

I finished the binding on the big star quilt!

Front of the finished Big Star
Back of the Big Star
 I put the binding on the front by mistake, realized it after I turned the second corner so decided to just keep going.

For the finish of the binding, I decided to use clear thread in the machine and beige in the bobbin.  For most of the the stitching the thread stayed on the star background so that was fine.  It took about an hour to do the final round of the binding.  I forgot to keep track of how long it took to cut the strips, join them together, and sew on the first round....

I had purchased a special pen to write on fabric, so after it was done I wrote the label on the binding.

Label written on binding - "A long road for this quilt! Began piecing with the help of my MOM in the late 1960's.  Finished May 2012 for my husband, Bernie.  XXOO     4th Quilt by June Dodge"
I wrapped it up, put a bow on it and placed it at the table at Bernie's spot.  He was very happy to see the gift.  He wondered if he had forgotten an anniversary of something!  He took it down by the chair he sits in in the den - after a little while he put it on his lap while he was watching TV.

As I wrote on the label, this is my fourth finish.  My first was tied and given to my son, the 2nd and 3rd were FMQed (after finding Leah site) made for Quilts for Kids, and this one for my husband!  (I'm not counting the practice quilt or the little mug rugs I've made.)

Thank you, Leah! Without your help and encouragement I would not have been able to do this.  I have such a sense of accomplishment, and excitement to continue finishing quilt projects.

More on the Big Star Quilt


Binding Steps

These are notes to help me remember how I did this!

Binding Step 0 - Apply binding to the back of the quilt,  At the corners move the fabric so it's a little less then 1/4 inch - then it will be easier to do the corners (I did for the last two corners, worked well).  I like narrow binding so strips are 2 inches wide.

Binding Step 1 - Sew the folded fabric with about 5 inches of tail on both sides.

Binding Step 2 - Smooth the fabric and fold at the intersection of the two ends of the binding.

Binding Step 3 - draw the creases for both ends.

Binding Step 4 - pin the quilt away from the area.


Binding Step 5 - Fold to find out which way the fabric should be
facing, then put pin thru the intersection of the lines, Move so
it's at 90 degrees and pin so the fabric won't move.  Added:  The right sides will be facing each other!  Leah Day has a good video to help with this too: https://leahday.com/pages/how-to-bind-a-quilt-by-machine

Binding Step 6 - Sew, test to be sure it's correct, trim and finger press flat.  Sew on the quilt.


Tuesday, April 24, 2012

Sew 15 Minutes a Day

I'm linking to:
http://kate-life-in-pieces.blogspot.com/2012/04/15-minute-challenge-april-24th.html


Tuesday - April 17 - No sewing.  Spent the day with my son and mom and finishing up tax stuff.  Went to Beverly's to get tulle needed for SewCalGal.

Wednesday - April 18 - about 1.5 hours FMQing my big star quilt

Thursday - April 19 - About 2 hours FMQing my big star quilt

Friday - April 20 - About 2 hours FMQing my big star quilt  Went thru a few boxes - my DH did too - we put some in trash and some by the front entry to donate.

Saturday April 21 - Attended quilt workshop.  Made a little mug rug to practice sharp stipplng and making binding.

Sunday April 22 - No Sewing.  I did cut pieces to make squares for FMQAYGQAL.  I pressed the material I will use for the binding of the big star - but did not cut it.  Went thru several boxes in garage and sorted to trash, donate, and moved a few things into rooms.

Monday April 23 - Sewed four more squares for the FMQAYGQAL project.  I may end up with an extra row to my project!  Got the pieces ready so they are sandwiched and ready for me to outline the square (something done to all before the design pattern is quilted.  I did one square but it was too late and didn't come out a close to the seam as I prefer so decided to stop.....

Energy: I think I have the pollen allergy under control now.  I have cut back on my outside walking - and take a pill whenever my throat just starts to feel scratchy or I am congested. That mostly then nips it in the bud and it doesn't zap my energy as much.  Of course there are other things to do that.  This week the assisted living place for my mom told me - when I went to pick her up for her class Tuesday - that she had fallen out of chair the previous weekend.  Non of it made sense as she had a seat belt to be used in her chair - and has had it for years.  I will never get a straight answer on what really happened, but I discovered that the doctor's order for the belt had not been copied into the current list of prescriptions for her and since the state? county? inspector has been visiting they had tucked the belt away.  Who knows why they didn't mention to me on one of my three times a week visits!  That's pretty zapping of energy....

I still need to figure out how to post the photos from my retreat and class, do the binding of my big star, and work on my LibRR2!  Then for work or home need to finish putting in Nov and Dec info into Quickbooks and get 2012 into the system too! And post my photos on the inspiration site too!


Friday, February 3, 2012

The Free Motion Quilting Project: Week #5

Week #5: Stippling in Blocks Directions
Filled in star - approx 1/4 inch design
I peeked at the entries made my others people and can see that indeed I need to do more - and I need to try more to love what I'm working on.  Leah mentioned that recently in one of her entries - it's hard to love these sample pieces done on scraps though - so I'm looking forward to seeing her ideas on what we can do with these samples.

It was pretty quick work to fill in the outlined star - I had used beige thread for the outline.  Once I was done I decided to go back and outline again in red so it stands out more.

I'm getting more comfortable with doing this stippling - still haven't found my unique pattern though - and can't picture doing it as an all over pattern in a quilt.... and oh my gosh I can't see myself actually doing this in the large three inch scale!

Retraced the outline - front
After I did the smaller scale star, I made another outline and intended to fill it with a larger scale design.  I think I really need to finish some quilts so I can get the concept/reason for having the stitching so far apart.  Like the other people working on this I'm having more trouble with the large scale stitching - so again more practice is needed.

Retraced the outline - back
In the middle of this practice my bobbin ran out so I switched to the green thread that I will be using for the FMQAYGQAL and had the strangest thing happen with the thread.  It broke but when I was fixing things I could see it seemed to have a strand shear off and then build up on the bobbin? - or maybe it was the top.  I don't remember where I saw it - and don't remember ever seeing this before with the thread I have been using.  There was one place on the back where the thread didn't look right.  I don't remember feeling or hearing any warnings - this would have been so sad if it was a 'real'quilt.  The only thing that was changed was the thread...


Another star filled in larger scale design - front
Star with large design - back with threads
The last part of the assignment was very difficult for me - and it was the part that really wasn't covered in detail in the lesson....  We were asked to draw a design she gave us, quilt it, and then put more stippling inside and around the design....

I had a heck of a time figuring this out.  First I only have a regular pencil to use as marking as that's difficult to see and I think the professional pencil must have softer lead as I felt I was scratching the fabric.  But then it's mainly for me just the matter of being able to see the pattern.  But I sure had a hard time picturing and drawing this design....


Almost the whole time I was remembering the test they gave my mom to see if she had Alzheimer's - that was such an unfair test for her as she can barely see or hear.  But they gave her a piece of paper with two figures that were next to each other and asked her to draw it.  No modifications were made for her - it was a small one inch drawing with light ink....  


First I did the outside outline - then I did the inner outline - then I broke thread for each of the triangles and lines to show the weaving of the squares....


After doing one triangle, I flipped the material so I could remark the design on the plain fabric - then sort of got in a rhythm  for sewing the finishing touches.


The stippling was easy after that!


Added Feb 8:  I peeked at a link to Jeanne's practice for the week and see she was much more sensible and just used a simple heart for her design to practice putting stippling in and around.  It didn't even occur to me to change the design for the practice...  I made it harder than it needed to be....  


I am doing this as part of Leah Day's Quilt Along Wednesdays on the Free Motion Project.  The directions to this (and much more) are there for you to learn.  To help support the project I have purchased some of my supplies from the Day Styles Design Quilt Shop.

If I had to pick two things that I really use, I would pick the table for the sewing machine and the cheater needles.  I feel quite smart each time I take that needle off the pin place and hide the threads...  Here is the link to her  video on the how to hide threads...

But really the bobbin washers and the gloves make things go much smoother.  I rarely even have to think about my bobbin now, and putting those gloves on made me feel so much more relaxed but also so much more in control of the fabric. 

I have a long way to go, but truly appreciate the time that Leah Day has devoted to all her training and instructional posts and videos.

I am coding my entries regarding this challenge with Leah2012 so clicking on that will display those posts with the most recent on the top.

I have been working thru the beginning designs that are also on her site - taking photos and notes as I go.  It's already been helpful to me to go back and remind myself of the designs and what I thought as I did them.

Wednesday, May 9, 2012

Sew 15 Minutes a Day

Linking up with:
http://kate-life-in-pieces.blogspot.com/2012/05/15-minute-challenge-may-8th.html


The Fabric Version


T May 1 - Started sewing binding on Big Star Quilt
W May 2 - Finished sewing binding on Big Star Quilt - a Finish! Practiced FMQ for SewCalGal
Th May 3 - Nothing with fabic
F May 4 - Picked out backing for tumbler, sewed it together for the backing.
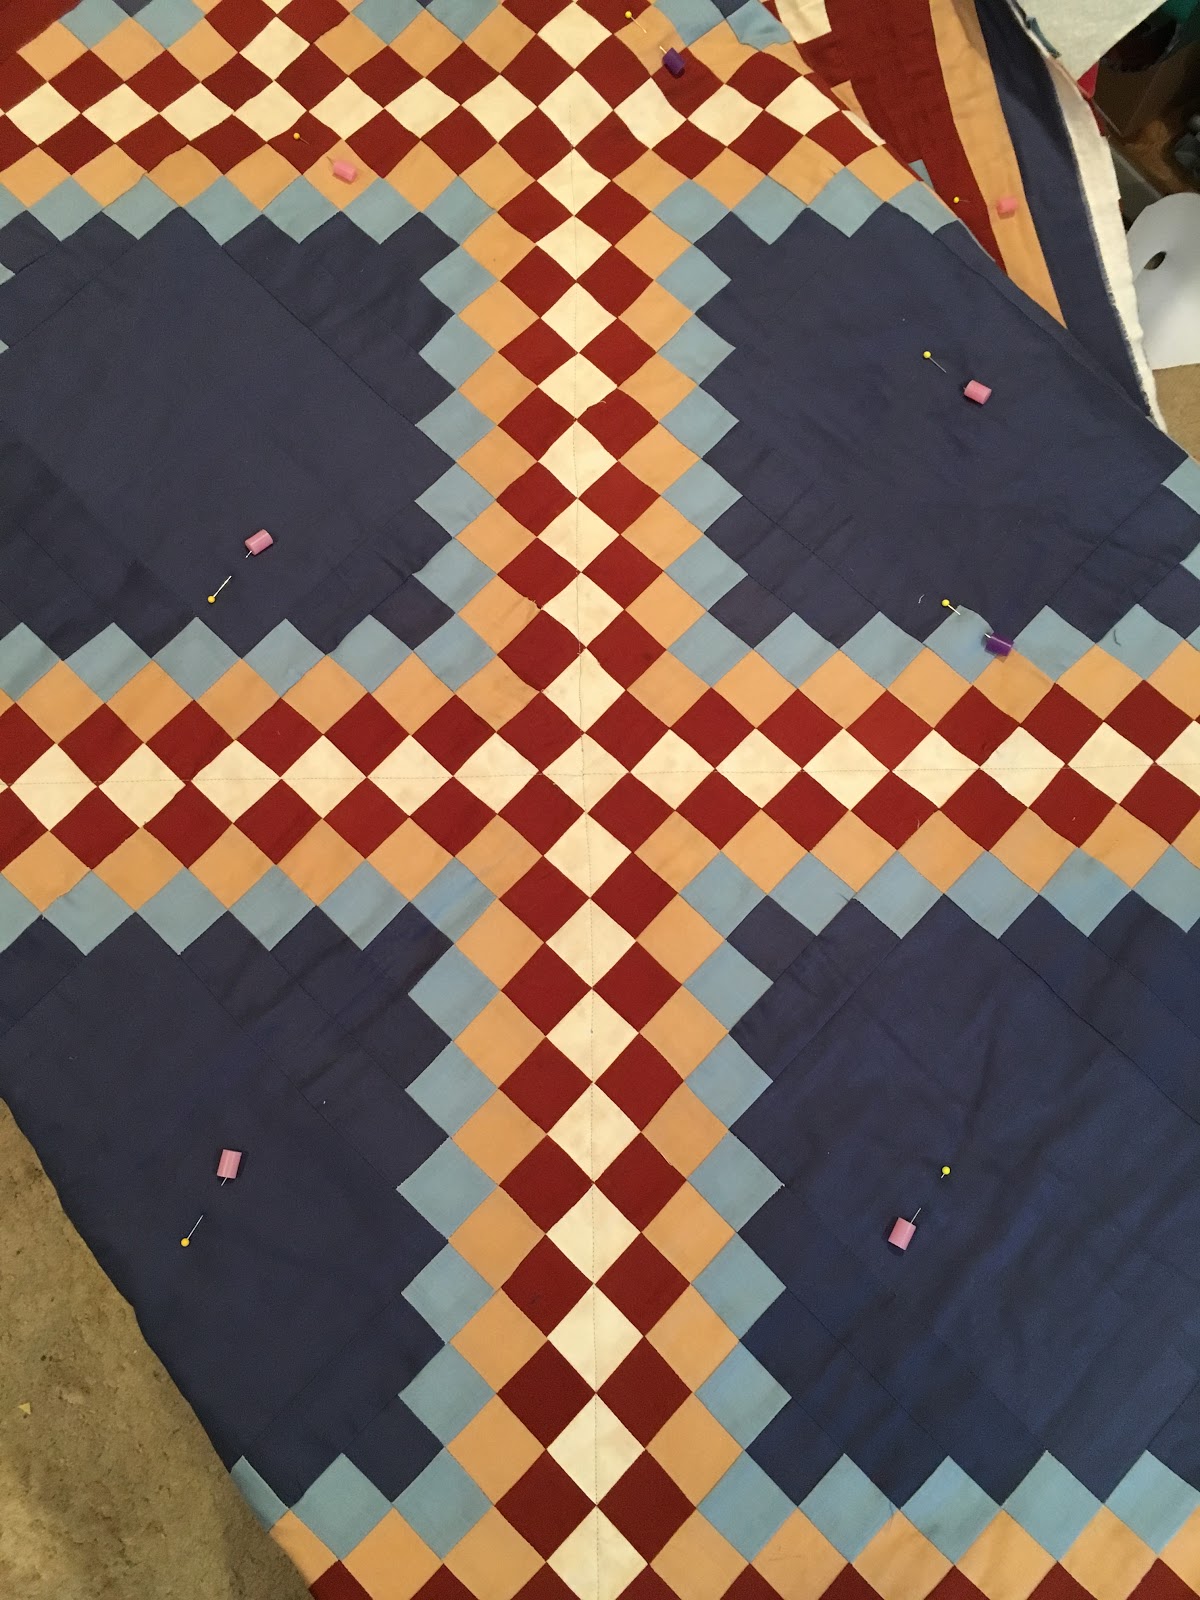
Sa May 5 - Basted the tumbler!
Su May 6 - Nothing with fabic
M May 7 - Nothing with fabic


The Long Version of my Week


Tuesday May 1 -  I took my mom out for exercise and then to have her manicure and pedicure.  I treated myself to a manicure too.  When I got home our son was there so had some time to chat.  We had pizza delivered for dinner, that was a treat for him.  After he left I reread how to do a binding and sewed the binding on - the front of the quilt by mistake!  I guess I had spent so much time thinking about and then trimming up the sides I just had the quilt facing up.  I had just the other day found my clear thread so that will save the day for the quilt. Spent a bunch of time doing emails for my computers in education organization before going to bed.

Wednesday May 2 - I finished the binding on the big star quilt!  The clear thread was a good choice - I put beige in the bobbin and in most cases the beige was on the beige background of the star so doesn't stand out at all.  Two of the corners are perfect, the other two aren't.  But I have now my first real finished FMQing quilt that we get to keep at home.  I gave it to my husband - just my 4th finish.  Did a quick test of the new Leah Day designs as part of SewCalGal's FMQing challenge.  Easy and great looking!  I moved some of the fabric that was in the living room to my elva drawers in the garage - getting things out of the living room/dining room as we have house guest in a week.

Thursday May 3 - No fabric today.  Took mom to foot doctor (waited 30 minutes, he didn't introduce himself, and he started making a list of things for me to do - without even looking at her feet - and three of the things on the list of five items were for me to google things!).  I could have just done that to begin with and it wouldn't have cost me an hour and a half!  Returned her so she could have lunch, son was late so I picked her up again for her exercise program.  He and I had lunch.  He took her for hair shampoo and set and I went to store to get dinner.  There I met the nicest man - a visiting professor from Germany - ended up driving him to campus with all his fresh fruits he had purchased.  My son and I watched another episode of Pasta in Love (a Korean soap opera we are watching on Netflix).  We had chicken on top of a vegetable salad.

Scraps in piles by color - sort of!
Friday  May 4 - On Fridays my son and I attend a cooking class.  Today's recipes were all winners - there were almost no leftovers we all liked it so much!  Kabuchi Soup, Sweet and Sour Chicken, Pork Buns (he and I made these), and scones.  Sort of an off combination, but we all liked the dishes.  The buns didn't rise as much as expected - but then all the teams didn't have rising buns - either it's that we all handled the dough too much or there is something amiss with the recipe.  We are going to test again and see!  After class he came over we watched our Korean soap opera - then took a nap - then watched another episode - he left then.  I mowed the back lawn - still feeling okay so that is good!  I just had a PB&J for dinner.  Later I picked out fabric for the back of my tumbler quilt and sewed enough together for the backing.  I also pulled out my scraps and put them in stacks by color....


Saturday - May 5 - To quilting class - it's not really a class to me - but a place to sew with others - and they have a terrific table to do basting on!  So I basted my tumbler quilt - there is one corner where I'll need to patch the batting, but it's ready now for me to quilt.  I ripped the fabric for the backing so there wouldn't be as much hanging over - only about 2 inches all around now.  Those long strips will be used as part of the binding.  I saw someone's tumbler online where they just did vertical lines along each side of the seams so that is what I want try for this quilt.  I'm going to use black or blue thread so it stands out - and the thread will perhaps blend more in the back.  Went to Sizzler for lunch by myself as DH is at workshop today.  Packed up some loose stuff in the sewing room and brought it upstairs to my side of the bed - next weekend we have friend who will be staying with us so want to have the sewing room cleared out more.

Sunday - May 6 - I'm delighted that my husband helped me go thru some stuff in the garage - we ended up with 5 boxes to be taken to The Bookman, and a van full of things to go to Goodwill.  Of course there is more to do but our goal right now is to get the extra new hospital bed that I got from a bed in the garage.  We were going to donate it, but the people at mom's assisted living place said I should keep for when it's needed.  We had workers come to give us prices for having different things done.  Decided to to with a lot of things outside, then will start the inside after our friend leaves.  I then went to a meeting for my organization - I chair a conference in the fall so it's time already to get started on that again.

Monday - May 7 - More cleaning and getting ready for our friend's visit and conference emails.


Monday, March 5, 2018

Starry Bright Sky QAL: Pattern 3b Fabric Folding, Origami


This month we are challenged to fold fabric to make the origami star!

https://alidatweloqdesigns.blogspot.com/2018/03/starry-bright-sky-qal-pattern-3.html

I picked the second block to make first this month. The resulting star is lighter so it will work in a bed quilt as that is how I think these blocks will be used in the end.

I used a walking foot to first tack down the inner seams, then the J foot for the blanket stitch.  After I finished then I went back and added the blanket stitching on the center section. I think having different stitches accents the 3-d-ness of the piece.

I first did the star with paper, then used a lot of starch so the fabric was as stiff as paper when I did the folding.  I removed the fold lines from making the pentagon before doing the star folding.

I felt more confident doing the blanket stitch for this block, but still need to figure out exactly when the needle should be turned!

I tied off each end by knotted the thread, then hiding it using Leah Day's method of doing this.

Memory: This procedure reminded me of the wax paper window stars we made when our son was in preschool and first grade at Waldorf School.. It was so much fun to see the design thru the window, and fun to make with and for him.  What a hoot now to see so many sites with images of them and tips on how to make them... Guess the sites are for the parents as the kids were not supposed to use computers or watch TV as it impacted their development of imagination.  It made it nice for us to not have TV as part of his early childhood.

Sharing with Alida and the other folks doing the challenges:
Click to see what others are doing!


Tuesday, April 17, 2012

Sew 15 Minutes a Day

I'm linking to: 
http://kate-life-in-pieces.blogspot.com/2012/04/15-minute-challenge-april-17th.html


Wednesday  - April 11 - Feeling very good today - those allergy meds are really working out fine.  I even walked part way to our local cafe for breakfast (DH picked me up and we ate together).  Then I got to work adding more stitching to the margins of my Leah Day whole cloth, and I did two blocks for Laura's FMQAYGQAL.  I have more to do to get caught up - with my sewing projects and with tax preparation, but feels great to be able to work and sew again!

Thursday - April 12 - Feeling better.  Took my mom out and in the evening watched the videos for the FMQing projects.  The Sew and Vac store was closed so I couldn't check to see if they have more of the green thread.

Friday - April 13 - Feeling good.  Went to cooking class with son and did block 19 for the FMAAYGQAL - started block 20 and ran out of bobbin...

Saturday - April 14 - Feeling good.  Called to different stores for thread - success!  Went to quilting workshop - worked on stippling on the big star practice piece for Leah Day.  After lunch with DH went to the fire sale with hopes of getting more thread in same color as I already had but the selection was very small...  Picked up some thread and fabric.

Sunday - April 15 - Only needing to take meds in the morning (for allergies to pollen).  Worked on taxes and then in the afternoon moved things in the sewing room to surround the sewing machine table with another table to support the quilt I'm working on.  I finished 1/4 of the stippling on the big star quilt!

Monday - April 16 - 45 minutes in the late afternoon - finished about 1/8 of the big star quilt.  Later I did the flame flower design for the FMQAYGQAL, and after dinner I did more work on the big star quilt - I'm now on bobbin three for this project.

Tuesday - April 17 - No sewing.  Felt fine though.  Spent the day with my mom and son.

Tuesday, March 27, 2018

Leah Day's Explore Walking Foot Quilting: My "Rainbow Log Cabin"

Part One of the Quilting Adventure:

In Leah Day's Explore Walking Foot Quilting, she has folks begin with making a very pretty rainbow log cabin.  I have so many unquilted tops that I just couldn't make another one.  So I decided to use my quadruple Irish Chain for the first project in her class.  I think this was the second or third quilt top I finished.  I know it was the first I made without a pattern.  I had liked the Irish chains I had seen, but wanted more colors.  So I figured out how to make this one:

I can't really remember how I made it, but know it involved make strip sets and subcutting, then putting things together.  (I forgot to take a photo of the flip side of the full quilt, but even looking at the back it is difficult for both a quilting friend and for me to to figure out how I sewed the pieces together. We couldn't find the block lines.)  I remember when I was sewing it how I was shocked at how large the dark blue parts became, and how much more of the beige and rust were becoming the face of the quilt.  I didn't draw and color things out to scale, I just figured where the pieces would go to make the design.  In my mind this was going to be a blue quilt with rust, beige and lighter beige accents.  When I saw what it had become, I started adding more of the little light blue/dark blue center bits, instead of making more of the large dark blue areas.  I extended the ends into the first border because it made the design float and was, I thought, rather cool looking.  I added the extra blues in the corners to also try to have more blue.  Immediately on finishing the last border I remember thinking how I should have made that border wider as it would become very small once I put on the rust binding.  Fun problems.

In those days machine quilting was new.  No one around here was showing how to machine quilt things.  I didn't want to hand the project off to someone else to finish up.  So this project sat in a box for around 26 years.  Was that the right decision?  I'm not sure. Well, probably not.  It would have been nice for my son and husband - and for me -  to be in a house with quilts...  But I really wanted to do the entire quilt myself.  So now with Leah Day's help, I will be able to do that.  I have been practicing on charity quilts, and gift quilts. I will continue to do that, but now I'm starting to work on a quilt that will be used in this house!

I pulled it out now to repair a piece that had wax on it, and to use as my first practice quilt for Leah Day's Explore Walking Foot Quilting project.  I was planning to do the quilting she prescribed on that quilt on this quilt...  But now I may change things up.  I'm still thinking.

Her quilt is made so the log cabin blocks are arranged so the final quilt appears from a distance to be one large block.  Here is her quilt with the quilting.  She has just two quilting designs on this 80 x 80 inch quilt.  In the center there is what she calls a giant bright star, surrounded by several concentric squares, and then in the corners she has a variation of the bright star (each corner has a quarter of the bright star that begins in the corner and goes back to the concentric square).  It's completely doable with the book and the videos on her site.


I'm thinking that I perhaps should have a bright star in each of the four larger blue parts, surround each with a concentric square and then put a few concentric squares around all those and then continue as Leah has shown. Instead of changing thread colors, I'm planning to use my grey for the top and bobbin of the entire 60 inch square quilt.

So right now I have just sewn the initial X in the center. I used painters tape to do the marking.


And ta dah - here are the first two lines of quilting on the quilt!


(I spray basted this project, so that is why there are not many pins.)

I created this backing made of left over bits and fabric when it was not 'a thing' to do - also then it seemed solids were not a thing.  But I sure like them. When I was sewing the quilt I liked the back of the quilt more than the front.  Now I can appreciate both sides.

Sharing via Em's Scrapbag: Moving it Forward

Sunday, February 4, 2018

Leah Day's Explore Walking Foot Quilting: Bright Star

Another great Leah Day lesson on Walking Foot Quilting.  Today I worked on quilting a Bright Star!

In the post Leah also included a review for how to deal with broken threads and hiding thread starts and stops.  Every time I watch the videos I pick up new information. First time I missed that we were to tie a knot but did get to bring the threads inside the quilt at least an inch. Then somehow I thought I was supposed to take the two ends and tie two knots! This time I've got it, just loop both threads, insert the end, and put the needle it to control where the knot ends up. And in this video I could see that the two threads do not come out the same hole. I was using a needle to get the threads out of the same hole figuring I had done something wrong. Anyway, I think I have it now!

But to be real in making my bright star I didn't watch the tying and hiding thread video again until I had done a few rays. 

I'm pretty pleased with how mine turned out. For a few of the in-between rays I went from one side to the other carefully checking that the tape was placed in the correct center point. I was slowing down when sewing to be extra careful at that point and now rewatching the bright star video I realize I was also doing what I was supposed to do to cut down on the thread build up. 

Since I started outside the marked square and ended also outside the marked square I missed out on some of the tying off practice, but know there will be other opportunities for that!


Here is the front:


Here is the back:


Thanks so much Leah for these lessons.


http://freemotionquilting.blogspot.com/2018/01/walking-foot-quilting-how-to-quilt.html
This post includes a link to how to do the design with a walking foot, with a quilting foot, how to mark, and how to hide broken threads!

This is all part of her 2018 project on using the walking foot.  She has a book to supplement the videos. So far this has been very fun to follow along!

Wednesday, October 3, 2018

Starry Bright Sky QAL: Embroidery Pattern 10b

Hmm.  Alida hasn't updated the website yet, but she did send out the patterns for the month.  This time the technique is embroidery. The pattern has directions for different ways to mark the design and how to do different hand stitches.  But as always it's open to interpretation...

I cut my star shapes out of freezer paper, then pressed them where I wanted them to appear on the block...


Then I referred to my sewing machine manual and found a stitch I thought would work to make the stars stand out.  (I had gone to a quilting shop, but they did not have any 12 weight thread in grey! So I decided to make use of what I already had).

Sewing Machine Manual download link:
http://download.brother.com/welcome/doch000470/bc21es20cs60ce50ex66xr6677ug10en.pdf
I used stretch stitch 03 with the default settings.  When I was looking at the manual I didn't notice the name.  It was a nice sharp repeating design that made the stars stand out using regular thread so it fit my needs of making the regular thread stand out and appear thicker.

I completed the stitching in a short period of time.  Was originally just going to do one star, but it went so quickly I continued until I was done.


 I used my clover 'cheater' needle to bring the threads so they were all on the back.  Tied the pairs up with two knots and then left the thread long as I am not sure how short I should cut them.  I guess it's good the background fabric is so dark...  For the thread I used the Isacord Polyester Thread that Leah Day recommends for quilting. I'm not sure if that is what I'm supposed to be using for this kind of stitching.  I use cotton thread when piecing though.

Update:  Alida has updated her blog now!  The link to see how others are interpreting the block is:
http://alidatweloqdesigns.blogspot.com/2018/10/starry-bright-sky-qal-linky-month-10.html

I'm not sure how this will be quilted in the final quilt.  Sometimes wish I was doing these all Quilt as You Go so the stitching would already be in the batting.  Oh well.

I have found at least two other pieced star blocks that I'm going to make to add to the Starry Bright Sky QAL quilt - they will be posted soon!  I have done most of the blocks Alida has prepared, so may go back and do more of them.... Or maybe will go ahead and try to create the final block, it's sort of a New York Beauty block but looks to have blunt ends instead of a lot of points.

I started with a selection of blues and yellows for this project and have just been grabbing what was handy really when preparing the blocks. Handy meaning piecing that were already cut in strips or sizes that would still leave me with larger pieces of fabric.


Saturday, October 23, 2010

BlockLotto - October 2010 - Variable Stars

My five October stars!
Directions are here:
http://blocklotto.blogspot.com/2010/10/octobers-block-is-variable-star.html

Examples are here:
http://blocklotto.blogspot.com/search/label/oct%202010%20photos

Wonderful that I don't need to buy new fabric this month! I have plenty of solid white, solid creme, and solid light grey so I can vary my backgrounds too!

10-4 Monday - I made a block but it's smaller than 9.5 square. I added two borders so it's right now. I guess I was in too much of a rush as I was trying to get done before I left for my mom's... I'll do the next one in s-l-o-w mode. I'm going to use 3.75 squares perhaps for my next block, then I can cut down to be 9.5 inches square. Sophie said I couldn't use this block for the Lotto. Oh well.

Oct 20th - Made two more stars.  At first I liked the open center, but now I really like the pieces in the center!
The top block has some purple with orange swirl fabric that used to make A shorts for kindergarten.

Oct 24th -Finished two more stars.  I've discovered a little trick that I want to remember for next time I make these kinds of stars.  Pick the fabrics.  Cut different strips.  Then cut different sized rectangles and cut in half.  Then just place on the full sized background.  Arrange so it will cover the background when flipped.  Makes it easier for me than working with the same sized triangle to get variety in points.
The top star has a little bit of rocket material from a pair of pants I made for A!
Later Oct 24th - I made this star - it may be my last for this month's BlockLotto. This time I experimented with having very skinny points that do not touch when in the same square.

Tuesday, May 1, 2012

Sew 15 Minutes a Day


I'm linking up to:
http://kate-life-in-pieces.blogspot.com/2012/05/15-minute-challenge-may-1st.html


Tuesday April 24 - AM - Sewed the three blocks so now I have five blocks ready for FMQAYGQAL project.  PM - Finished sewing the entry for SewCalGal - April.  Sewed the flower echo block and the shark block for FMQAYGQAL.  Did small practice of sharp stippling.

Wednesday April 25 - PM - cut strips for binding of the big star quilt.

Thursday April 26 - Spent day with son and mother!  I struggled with putting strips together for binding of the big star.

Friday April 27 - Finally got the strips together for the binding.  Fabric is now folded in half and ironed, ready to be applied. Revised the Liberated Round Robin site as the new step is now posted!

Saturday April 28 - Busy with event with my husband, then very lazy the rest of the day (as in napping and eating).  I did not attend my quilting 'class', reset the machine and unpacked the backpack that I had packed for that.

Sunday April 29 - Nothing with fabric - working on conference I chair in the fall for Computers in Education and also getting files in order for taxes.  It's all sucking the creative flair out of me.

Monday April 30 - re-trimmed the big star quilt so I can put the binding on the back and flip over to the front and really made good progress on my non-fabric projects.

Keeping track of what sewing I do with Kate's blog has really been a good thing for me to do.  I'm sometimes adding more things than sewing - but it's helping me so it's good to do!


Monday, August 7, 2017

WIP: Cultural Fusion Inspired Sunflower/Star

The project in my class this time is to make a center star design then to surround it with different sized blocks - most of them have been hand or machine appliqued - depicting our 'favorite things'. The other people all jumped in on this.  The design walls are full of cats, fish, flowers, dragon flies, pigs, food, iconic buildings, camping trips and more.  I, however, was drawing a blank.  What were my favorite things?  So for several weeks all I did was observe and learn.

But then I remembered my intent to make all the blocks in the Cultural Fusion book by Sujata Shah! They qualify to me as favorite things. I will probably not be able to put them in the one quilt, but I am making progress finally these week. It has been fun for me to pull out her book and remember the terrific time I had meeting Sujata while a student in two of her workshops.  But I'm also trying to stay focused to have a project to show the teacher and class.  

I warmed up by first grabbing some blue fabrics and cutting squares.  I admired them for a while, then finally made some half square triangles.


My original idea was to have the same sized blocks throughout the project, but I really wanted my yellow star/sunflower to stand out so I moved to larger squares of fabric.  After debating my choices of fabrics, I finally decided on darker oranges and golds for the center, and then mostly brighter yellows for the petals of the flower.


I decided to use Sujata's method for adding some 'leaves' in the corners:

Now I need to pick the size of the blocks...  Hmm, I'm sort of liking having the extra space between the blocks... Well, I'll think about that, but in the mean time will be squaring the blocks up sized by the smallest block.


Friday, February 17, 2012

Tips: Getting Ready: HST

Half Square Triangles (HST)

Missouri Star Way
Missouri Star Video
Easy to do even with smaller sized squares....

  1. Put two squares good side facing each other.
  2. Sew around all four sides with a 1/4 inch seam.
  3. Cut the square at the diagonal.
Creates 4 HST - the outside edges are on bias.
5 inch square give 3 inch unfinished HST. (Probably will need to trim to exact size.)

"Whip Up" Blog Post with different measurements.

HST by other attendee
Pinwheels by other attendee
The other attendee used the Missouri star method and made a lot of pinwheels - she started with 9 in squares.  Told me she is going to try to make some more starting with 6 inch squares.  I'm not sure what method she used for her excellent HST!  Aren't her colors beautiful? She has all the pieces trimmed up so nicely too.


Lucy in the Sky - Quilting Board Way
Lucy in the Sky - Quilting Board Directions
This way requires marking - still just have four seams - but there are 8 cutting lines....
  1. Put two squares good side facing each other.
  2. Draw both diagonals on the lighter fabric.  (I also drew the 4 sewing lines.)
  3. Sew 1/4 inch on either side of each diagonal.
  4. Carefully cut the block into four so you see four squares (in the diagram it's the lines that extend out of the square.
  5. Then cut the original diagonal in each of the resulting squares.
Creates 8 HST - the outside edges are on the straight edge of the fabric.
5 inch square gives 2 inch unfinished HST.  (For sure will need to trim to exact size.)


Left Over from Geese Way

Left over made squares and cut apart goose
When making geese the traditional way you can stitch the left over triangles to get HST - they are a little too small but by using a smaller seam I think it would work to get sizes that would fit with other pieces.

I also experimented with just cutting geese in half and then sizing up the results to get HST - seems like a lot of work though - but if the geese weren't going to be used or if they didn't turn out the expected size this would be a good thing to do....


Added 3-15-12:

QuiltingBoard - Rhonda's Really Easy Half Square Triangle Blocks
http://www.quiltingboard.com/tutorials-f10/really-easy-half-square-triangle-blocks-t37915.html

Basically, cut your strips.  Sew together.  Then use template placed on the sew and cut.  She shows two different ways to do it on the  web.  For one way she sews the strips into a tube and alternates where she cuts cut (fewer cuts but she now prefers pressing the seam open, cutting, then going back and sewing long sides together and cutting again.) There is very little wasted fabric as she uses the four large bits to sew together and make an hour glass block. For five 2.5" inch blocks she sews two 2.5" x 11" strips together.

Formula for HST - from QuiltingBoard
http://www.quiltingboard.com/main-f1/formula-half-square-triangles-help-t42546.html


Wednesday, May 30, 2012

My Days - Fabric and Other Things

I'm linking up to:
http://kate-life-in-pieces.blogspot.com/2012/05/15-minute-challenge-may-29th.html


My Fabric Week


Tuesday - May 22 - Nothing with fabric
Wednesday - May 23 - Nothing with fabric
Thursday - May 24 - In the evening I finished FMQing Leah Day's Sew Cal Gal pattern one on one of my FMQAYGQAL blocks.
Friday - May 25 - Nothing with fabric
Saturday - May 26 - Attended quilt workshop - incorrectly cut a slash star and only finished one FMQAYGQAL block.
Sunday - May 27 - Nothing with fabric
Monday - May 28 - Nothing with fabric


The Longer Combined Version - Too Much Information


Tuesday - May 22 - No workers today.  I met a friend for lunch and then went shopping to get a few things we needed.  Was so nice to not have to hang around the house today!  Having workers at the house gives me sort of the same feeling I have when my mom is in the hospital.  There are consultations, then I think I can do some work that I want to do, but then there is something else that needs attention.  Mom would hurt and need something turned or adjusted ot the workers knock to ask me opinion or to show-up something they finished.  I'd rather it be the workers of course - and am so appreciative that they are available to work for us - such high quality work - but it is a little stressful.


Wednesday - May 23 - The workers dug a trench for drain that will be going to the street.  Then there was more work on the sprinkler controller box getting the cords mounted to the wall and covered.  We found a linking valve in another area so a new valve was installed - but in the midst of that the water shut off failed so there was a gusher for awhile until the water department came with emergency truck to shut it off properly.  There was much discussion on this, the worker called another guy to come do some welding.


Thursday - May 24 - The workers came with special drill to put a hole in the sidewalk so we have a cool drain hole for water that comes in the openings in the side yard.  (Of course I learned in the water conservation reading that the cool thing to do was to set things up so the water went in the ground rather than in the street.  But we already had paid for this to happen so it happened.) It looks very neat.  Some houses in our neighborhood simply have above ground pipes to direct the water to the street, the way our guys did it looks much more finished.  In the evening I finished FMQing Leah Day's Sew Cal Gal pattern one on one of my FMQAYGQAL blocks.


Friday - May 25 - Went to cooking class where I met my son - we take it together.  The dishes today were all wonderful.  We made the Udon Cold Noodle salad.  Came home to watch the final episode of the Korean soap opera we have been watching together - Pasta in Love.  Then he left.  Bernie and I went to mattress store  - I guess I'll finally be getting rid of the awful box springs we have had since forever - but instead of going lighter will be getting some heavy Swedish foam mattress.  I dislike beds that are difficult to move, think back fondly to the simple bed I had in my dorm room in Uppsala so many years ago.  We went out to eat at a fabulou little Thai restaurant - I never knew how delicious Salmon curry would be!  It's my new favorite!


Incorrectly cut slashed star -
see extra triangles at
the ends of the points.
Saturday - May 26 - I was late, but did go to the quilting workshop.  Had a hard time settling down.  We have a new drunkard path die for the Accuquilter that I want to use - but I want to go ahead an cut my fabric to size (decided 13 inch square would be good size to cut).  The only other time I used it (for small tumblers) it was really time comsuming as I didn't precut - instead I was ironing and folding with each new set of fabrics that I cut.  This time I want to be more efficient with my time.  Also, it's the last class before the summer break so it could be that a lot of other folks also will have the same idea of using the Accuquilter to get things cut!  There will be another four weeks of classes but at the same time as the cooking class so I won't be able to quilting until next fall.  I cut out a practice slash star for the blocklotto, but didn't do the cutting correctly so scrapped that try - intend to try again tomorrow! When I got home had meeting with the treasurer - she didn't record much.  Only put Deposit - didn't put the name of the company or person who wrote the check.  So much extra time will be needed to be spent because she was trying to just get by rather than doing a decent job.  It's a shame.  I'm burned out just thinking about all the lost information and time that will be needed to fix things.  Oh well.


Long Sealed Door
Double click to see
the awful detail!
Sunday - May 27 - We tried to sleep in and rest, went to breakfast - I'm not going to have pancakes for a couple of months.  I enjoyed them so much the first time last week - and then again today - but it's just too much to start the day so often!  Then off to Home Depot to look at doors - we need a new one installed off the garage.  Years ago it was leaking right before we were leaving on an extended RV trip so I just sealed it up with goop - I think it's caulking? I put it on the outside and the inside so the door has been sealed since then.  So now that we have the nice cement and are clearing things out of the inside it's time for a new door.  We found a nice one - I think it's the most expensive one of course - that has a window and blinds in between two sheets of glass.  That will solve the problem of the sun cooking what's inside that area!  Bernie wanted a screen too but that option wasn't available with the blind, it's the light that we decided was most important.  So then back home to veg out before going to a meetup where we joined a new group to play a trivia game at Shakespeare's.  They have it every month apparently.  The categories were: geography, history, sports, entertainment, and potluck.  There were 40 questions - my team only got 22 correct.  The winning team got a coupon for $100 with their 31 correct answers!  It was loud, but we were able to talk with a few people - nice.

Monday - May 28 - Even though I do not work fulltime to bring in income, it's absolutely wonderful to have a three day weekend!  I slept in today - feel so rested!  Last night B and I had made lists for what we were going to do today.  He has been sanding and wire brushing our fences and new gate to get it ready to prime.  (I guess that's the real difference, that he is working on the house too! Makes it so much nicer to have company.)  I've been moving things (and going thru some boxes) so there is nothing to the right of the exterior side door that will be replaced.  I was sort of surprised at how many of these boxes were empty or almost empty.  Wish the entire garage would be like that!  After going thru the boxes I moved them again so I could get the shelf over to the side of the room out of the way - then re-stacked the boxes on the shelves - putting the heaver ones on the bottom.  My mom and dad were always buying me things - that's a lot of what is in the garage.  My dad is gone now, and my mom wouldn't remember anything now so it's time to go thru and take inventory and get rid of things.  Our son can look thru to see if he wants anything of course.  

Sunday, January 10, 2016

2016 Finish-A-Long Q1 - The Dream List

A finish-a-long!  What a great concept! 

I've been noticing the Posts and Links for the Quarterly Finish-A-Long on other blogs, this is the first time I'm creating a list of projects to finish. 

Like several of the others who have already posted their lists, I've done a terrific job of starting different projects, but haven't been good with following thru and finishing quilts.  For a long time I didn't know how to do more than piece fabric.  But I have been learning finally how to finish a quilt. It takes me time, but I can baste and quilt and put on a binding now!

So this year my focus is on following thru and finishing quilts for my family and friends.

Once I decided to join in the Finish-A-Long, I went thru boxes in my new sewing room. I found 24 mostly old, old projects that I hope to finish this year. There are more, but I couldn't find them tonight so they will be pushed to the next quarter/year!


1.  Sharon Craig Half Log Cabin (around 1992).  A local quilt shop (Rosie's Quilt Shop on El Cajon in San Diego) organized around 50 people to each cut strips from a dark fabric and a light fabric.  We brought it to the store and they then organized packets so we all got one of everyone's contribution.  Then we used Sharon Craig's method for making half log cabins (that reminds me I have a regular log cabin too to finish up too - where is that?). Making the half log cabins was so much fun, I went to the store and bought tons of fabric so I could keep making them!  So instead of a twin, this is a king top.  It can't be the first thing I work on this quarter as I have so far only done lap or block quilting, but I found it tonight so it's on the list.  I realize I've been telling people I have fabric from my Godmother and mother, but really it's this quilt that was responsible for me buying and so having a ton of fabric that I'm not crazy about...  I only needed a strip from each, but had to buy what ever the minimum was...

2.  Quilt in a Day Tulips (around 1991).  This was my second quilt top.  I made this for my Godmother, but she only got to see the blocks.  She loved tulips and this sort of grey green.  I made the blocks from Eleanor Burns' book, but thought the setting wasn't interesting so I modified the sashing so the tulips were more random.  It was supposed to look like the seeds for the flowers had been flung on the field.  To get just the right shade of the green for the border I flipped the fabric over.  People looking at it though thought the I had goofed in my flower placement.  Oh well. I pieced a back from left over fabric.

3.  My First* Pieced Quilt Top - Stars and Planets (1990) I took a class when our son was three, so I remember the year! I have star blocks in all the colors of the rainbow, but my DH thought I should limit the number of colors so I picked these. I had wanted to make the quilt with solids, the teacher insisted I get fabric with a little design in it. It was boring to make all the blocks the same size so I made some that were smaller and added the HST border and some plain blocks on the top. I finished the extra long twin top and our little son admired it. Then he asked where the planets were! So I took a class to learn how to make circles (see quilt #6 on this list) and searched for just the perfect fabric to represent each of them. This time I only needed a few inches, but again had to buy what ever the minimum was. I either sewed quarter circles together or appliqued circles on the fabric with stars. (Pluto was too small for me to manage with fabric so I painted it on). The planets are sized to be correct relative to a one inch earth. This was going to be the back of the quilt. When I was working on this, our son asked where the sun was. I should have said he was the sun, but that didn't occur to me. I was overwhelmed so I put the quilt away... I could add the other color blocks to make the quilt fit the top of a king bed...  * This is my first completely pieced quilt top, after taking a class.  In the early 1960's with my mom's help, I started cutting pieces for a quilt with 1/2 inch seams, it was finally put together, quilted and bound in May 2012. The finish is blogged here: huge star quilt. My numbering system is off!  : )

4.  Husband Quilt - (2013) I cut fabric while we were in Cambridge.  I had one idea for the top, my DH had another.  Since it's for him it will be made the way he wanted.  Hopefully this quarter!  This post shows the various versions of the quilt.

5.  Irish Chain (around 1991) My third quilt.  I liked the idea of an Irish chain, but thought it was too simple so made it a triple!  I was surprised that the dark blue ended up being so large in the design. I put it on a table to show off, but a candle dripped on a piece of fabric so I'll have to figure out how to replace that piece in the middle of everything before quilting it.  But because of Leah Day' videos, I do believe I have the skills now to finish this one!

6.  Farm Scene Sampler (1991) I took a class to learn how to do curves so I could make the planets for my son's quilt.  The project was very good as we also did y-seams, applique hearts, miter corners and I also learned that if it doesn't fit to add more fabric or change the pattern!

7.  Cultural Fusion - Windmills (2015)  I was so fortunate last summer to take a day long class with Shajata Shah!  Had so much fun making the windmill blocks from her wonderful book, Cultural Fusion.  I hope to make all of the quilts in her book, in a timely manner.  These purple windmills will be flying off to a friend in Sweden when the quilt is completed.

8.  Tumbler (2011)  I sewed these in leader and ender fashion but then it took over as it was so much fun to sew these pieces (cut with a Studio GO from an adult education class) and arrange them so the colors were sort of clumped together.  This quilt is being made for our friend in Colorado.  This post shows the basted (since 2014) tumbler project. Now I know how to quilt the project, and since it's basted, it will be first on this list to be completed!

9.  Large Blocks (2013) When I was in Cambridge, an online Liberated Quilting friend, Audrey, gave me a great Freecycle sewing machine so I was able to sew.  I bought fabric and made these large blocks.  They were going to be a quilt for my DH but he wanted more black in it.  So it will be a quilt for me I think! This post has the image of the blocks on bed top.

10. Chinese Coins or Made Fabric (2011-ish) I found a stack of fabric in my mom's things that was mostly around 6 inches square.  I cut strips while in a class, with the intent to make a Chinese Coin quilt.  But I might make a Liberated Wedding ring quilt instead.

11. Leah Day Building Blocks (2014)  I got started, then things happened and I didn't continue working on this.  I found the blocks tonight so they are on the list to finish!  These posts show the blocks I've finished.  The rest are organized in baggies according to Leah's directions.

12. Marston/Moran Workshop (2012) - I was very lucky to attend a multiple day workshop held by Gwen Marston and Freddy Moran.  Before the workshop we were given preparation assignments to make parts for a quilt.  In theory I was supposed to have enough I guess that I just put the parts together to create a quilt.  That didn't happen for anyone I think in the class.  It was so exciting to see the quilts they have in their books in person and to meet them and other quilters.  As I recall I have just a few inches to fill in then can put the top together.

13. FMQAYGQAL (2012) - This was an online group organized by Laura/QuokkaQuilts that practiced FMQing, the blocks are all made and quilted.  I just have to find them and put them together and finish it up. This quilt is going to be a wedding present for one of my husband's students. Click here to see the posts about this project. This was the first time I used precuts for a quilt!

14. Wonky Shoo Fly (2010) - I won these blocks from the Block Lotto. I had been putting them together with solid blocks and practicing FMQing in sections.  Here is a post with a photo of some of the sections that are completed.  I have to find the blocks, but they will probably be one of the first projects I work on this quarter after the tumbler is quilted.  Each block is a different Leah Day Free Motion Design.  I even have a category on my blog to use to show all the progress on this project!

15. Liberated Round Robin LibRR1 (2011) - This was the year I was really getting going with my quilting.  I organized an online group - The Liberated Round Robin - and we worked on creating a liberated quilt.  I started mine with pieces of blocks that I got in an online liberated quilter fabric swap.  Here are my posts about this project.  I have two more rounds to add, but I'll have to find the project and pieces first!

16. Paper Pieced Deer Pillow (2015) - My son and his new wife had several pillows with deers on them on their wedding registry. After searching the web, I found a really nice paper piecing pattern from Julianna who lives in Poland that I'm going to use for one of the pillows. I have the orange/grey version finished, but I made a mistake in my piecing so will either correct that one or will make a new one with green/black/brown fabric.

17. Fused or Pieced Deer Pillow (2016) - For the other deer pillow, I may fuse the silhouette of a deer on fabric that will go with the paper pieced version.

18. Small Blocks (2010) - I made these with left overs after making the larger sized wonky shoo fly versions for the block lotto. These will make a nice little quilt for someone!


19.  Fused Circles (2014) -  I used a Studio GO to convert some beautiful Kansas City Troubles strips to fused circles.  I was going to do my interpretation of ChristaQuilts Abacus - but thought I would used the stitching from the Leah Day Butterfly project to practice FMQing.  I have many pieces ready, this might be the time I actually do it!

20. Friday Block Party (2011) -  For my contribution, I found free block designs that were in the shape of animals.  I made a lot of these blocks, and also some traditional blocks all with the grey background.  When I find the blocks, and the time, they would go together pretty easily in to a nice child's quilt. Posted progress here.

21. Quarter Circles (2011) - I had access to a Studio GO so cut a range of solids in blues and yellows with the quarter circle die, so I'm committed to these colors.  Perhaps this quarter I will be inspired to finish sewing these together and actually making a quilt!

22.  Cow Pillow (1991) - This was FMQed as part of a workshop, the back is perfect but it's done on not very nice looking muslim so would be better as a pillow.

23.  Lone Star Pieces (around 1991) - Eleanor Burns is from around here so if you take any adult education classes or quilting classes we are exposed to her sister's great demos and her books all the time.  In class I bought a ton of her books as we were given 30% discounts.  The lone star seems so complicated but with her directions was really doable even for a beginner like me.  Except I got too confident and impatient and didn't double check my angles for the last cuttings, so the angles are off.  Maybe this year I can improvise and make a quilt of the pieces.

24.  Whole Cloth Pillow (2012) - I followed along for Leah Day's instruction for a lot of the 2012 project.  This whole cloth piece doesn't look nice enough on the back to be part of a quilt, but would make a very nice pillow.  Blogged here.


Like the rest of you, I have new projects that I'm working on, and like some of you, I have even more WIP lurking in boxes waiting to be found again!

It's been fun for me to go thru boxes with these projects and remember them.  I've been so focused on new projects that I sort of just pushed them aside.  It's nice to have this finish a long to help me on my way to having finishes.

I'll be happy with any progress on finishing these this quarter!

Thank you all for for organizing the FAL!

Here are the 2016 Finish-A-Long Q1 guidelines:

For those of you who are new to the FAL, it is a place to find motivation and encouragement to complete those unfinished projects that are hanging about becoming UFOs. Every quarter you post a list of projects you hope to finish in the next three months, and then at the end of the quarter, you post a link from your blog, flickr or instagram of each successful finish from your original list.

Each finish is an entry for wonderful prizes from our sponsors. There is no penalty for not finishing a listed project, so feel free to make your list  long or short, as you wish.  The 2016 Schedule and the Rules for the FAL are on my permanent FAL page, let me know if you have any questions.