Pages

Showing posts with label Cultural Fusion. Show all posts

Friday, March 22, 2019

A Finish: Two Pillows to Go with the Purple and Black Cultural Fusion Windmill Quilt


My pillow tops are 19 inches, the pillow form is 20 inches - the result is a firm pillow!

I sandwiched and quilt the top as normal.

For the back I used a method where I did not have to be exact with the zippers - there is a large flap that covers the zipper up.

I had to piece the second pillow, that is what I took photos of.

Thanks to Heather Kojan @ Moda Bake Shop for the directions on how to put zipper with flap on a pillow back.

First the backing is cut to either the same size as the front or just pick one direction make the same.  Cut at least the top section of the backing to size.

Make a flap that is about 4 inches wide and the same length as the width of the backing.  Press it in half with the good side showing.

Place the top section of the backing facing up, then put the flap so the cut edges are even with the top of the backing.  At this point I used pins to make sure these pieces would not move.

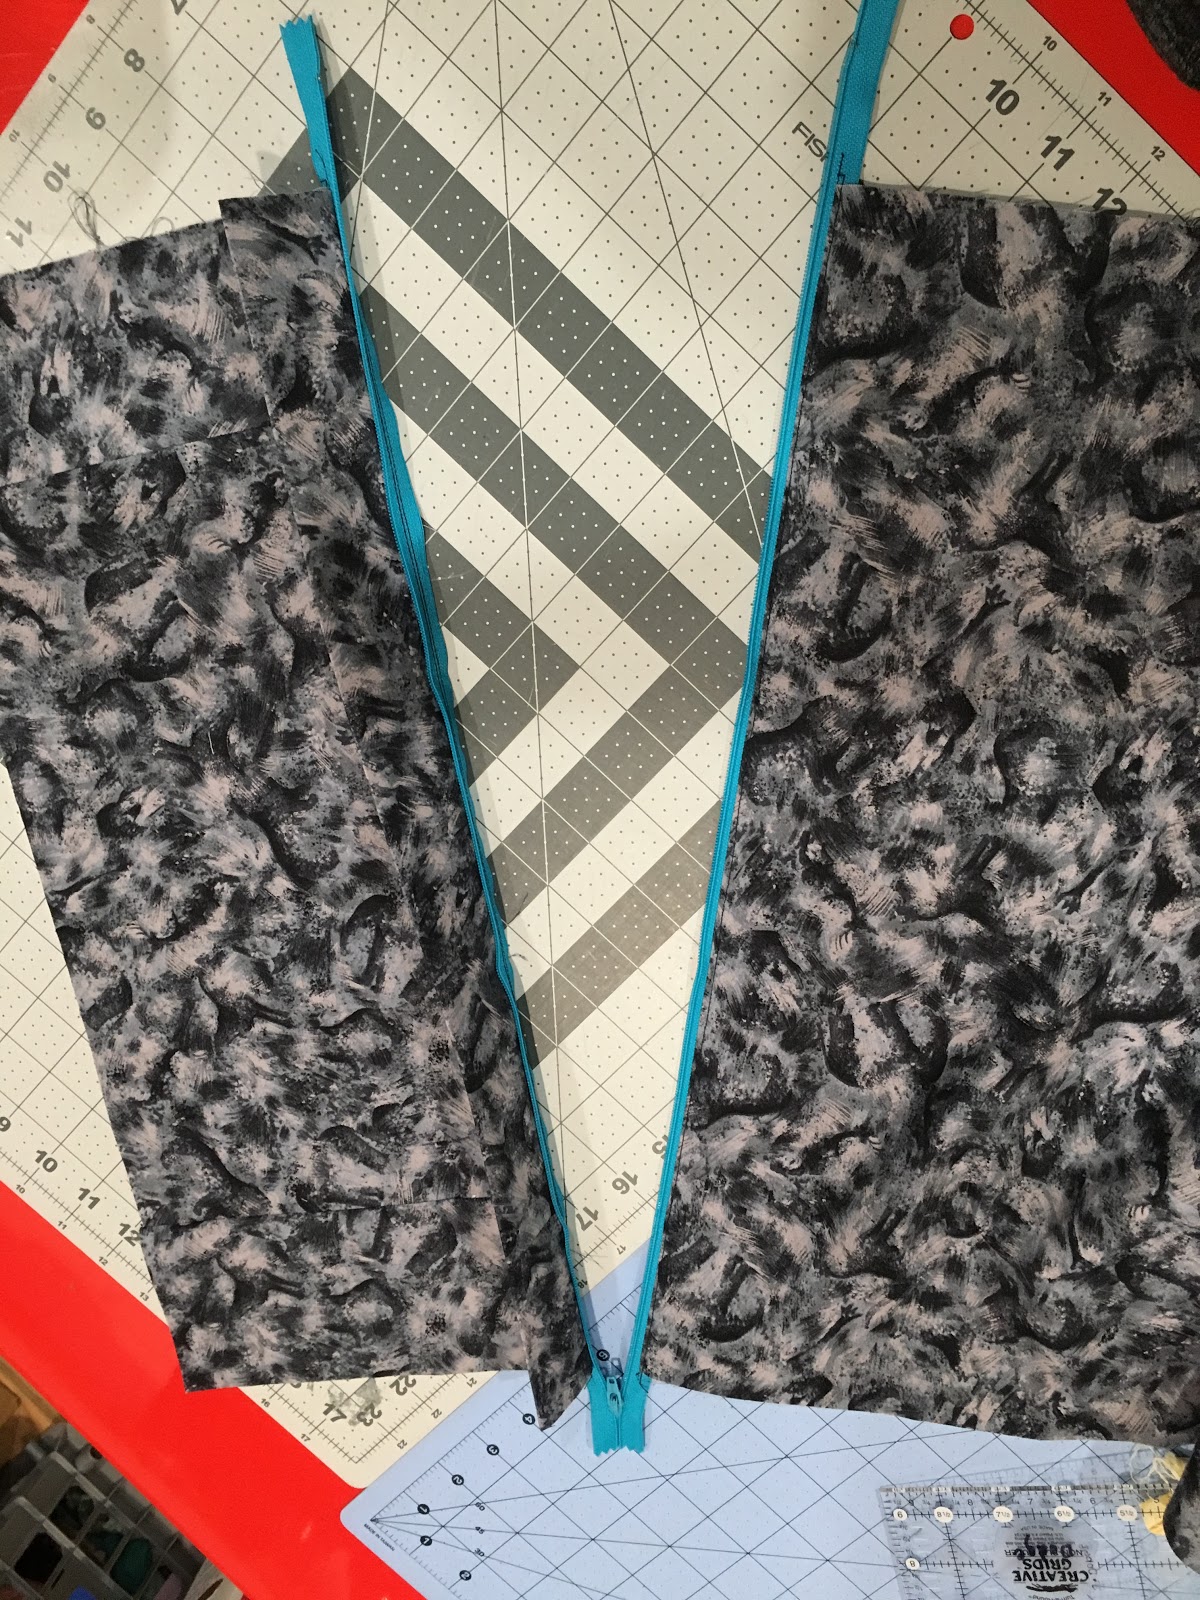
Then place the zipper upside down with the opening part on the left.  Then sew the three pieces together.  I did not have a zipper foot, but as I wanted some of the zipper to show this is not an issue to worry about.  I use a zipper that is longer than the pillow backing - this makes it easy to sew it down as I didn't have to fiddle with anything.

After it was sewn, I smoothed the fabric away from the zipper.
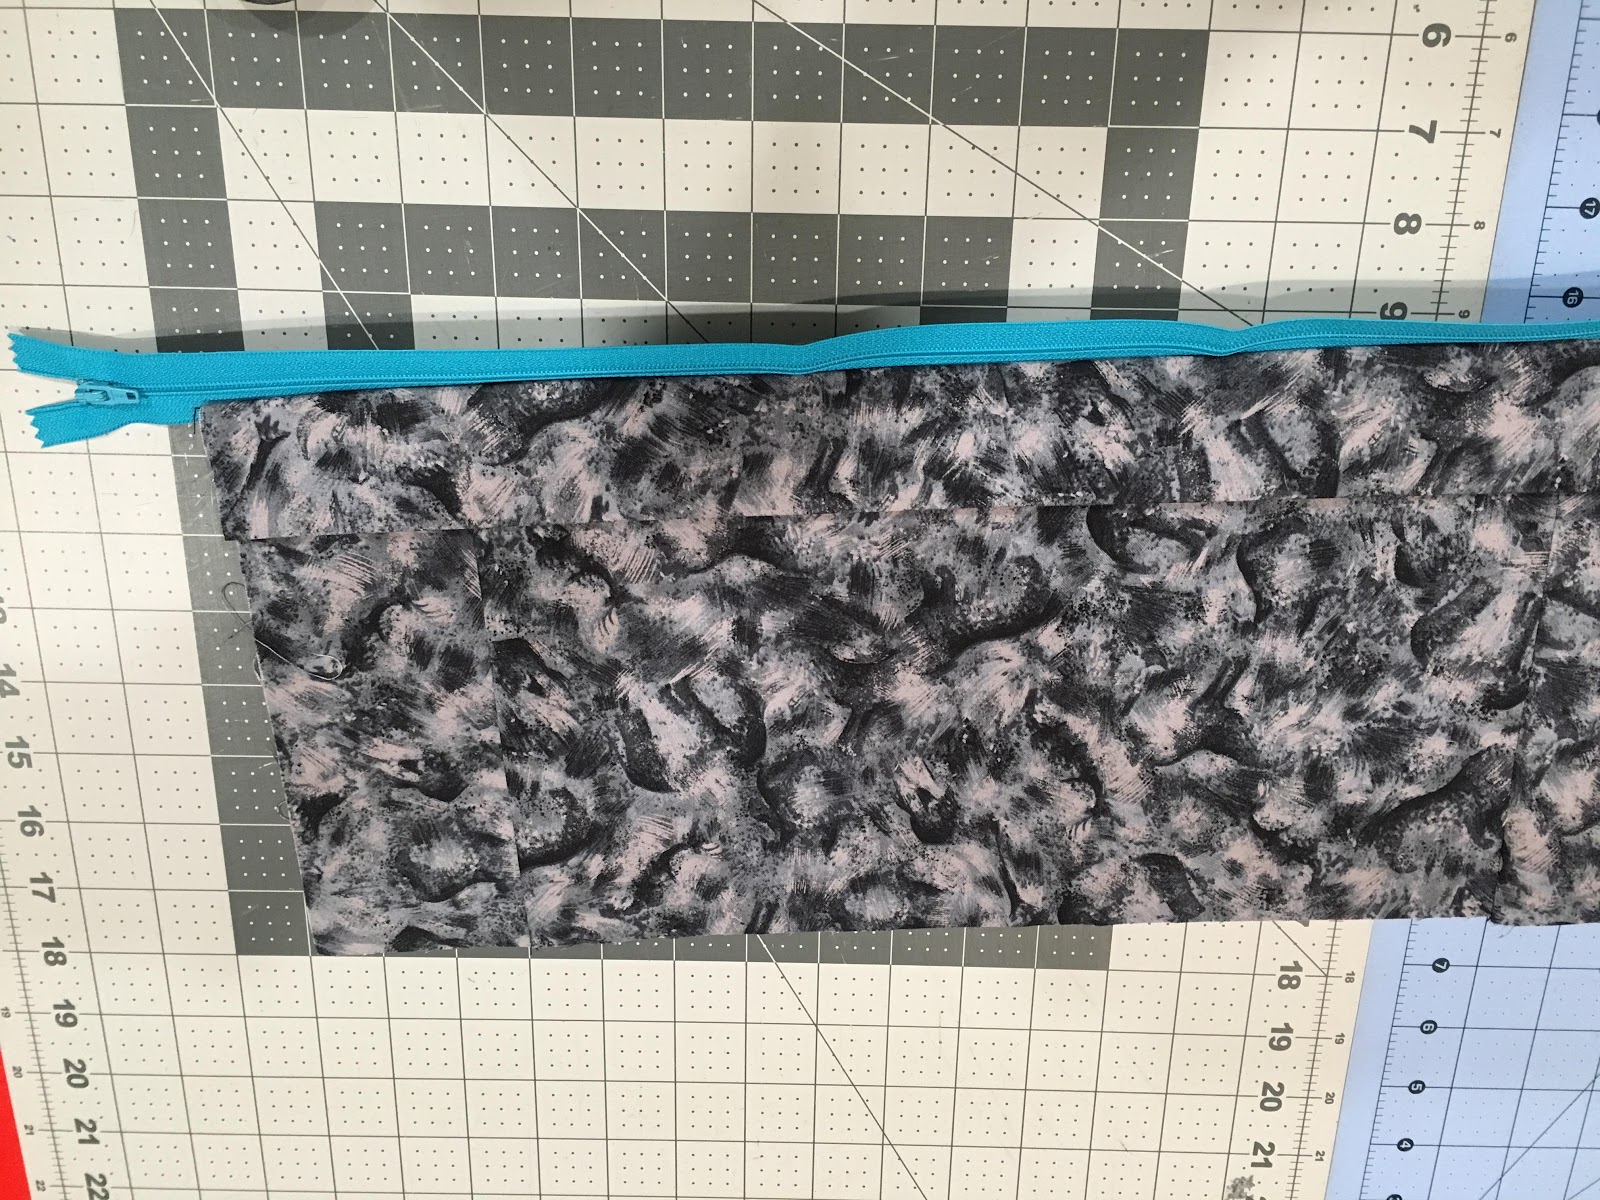
I added the bottom piece of the back so it was lined up with the other side of the zipper and the sides of the top of the backing.  I used pins to be sure things stayed lined up.

Then I smoothed the fabric again to see the zipper.  I checked to be sure the zipper still worked.
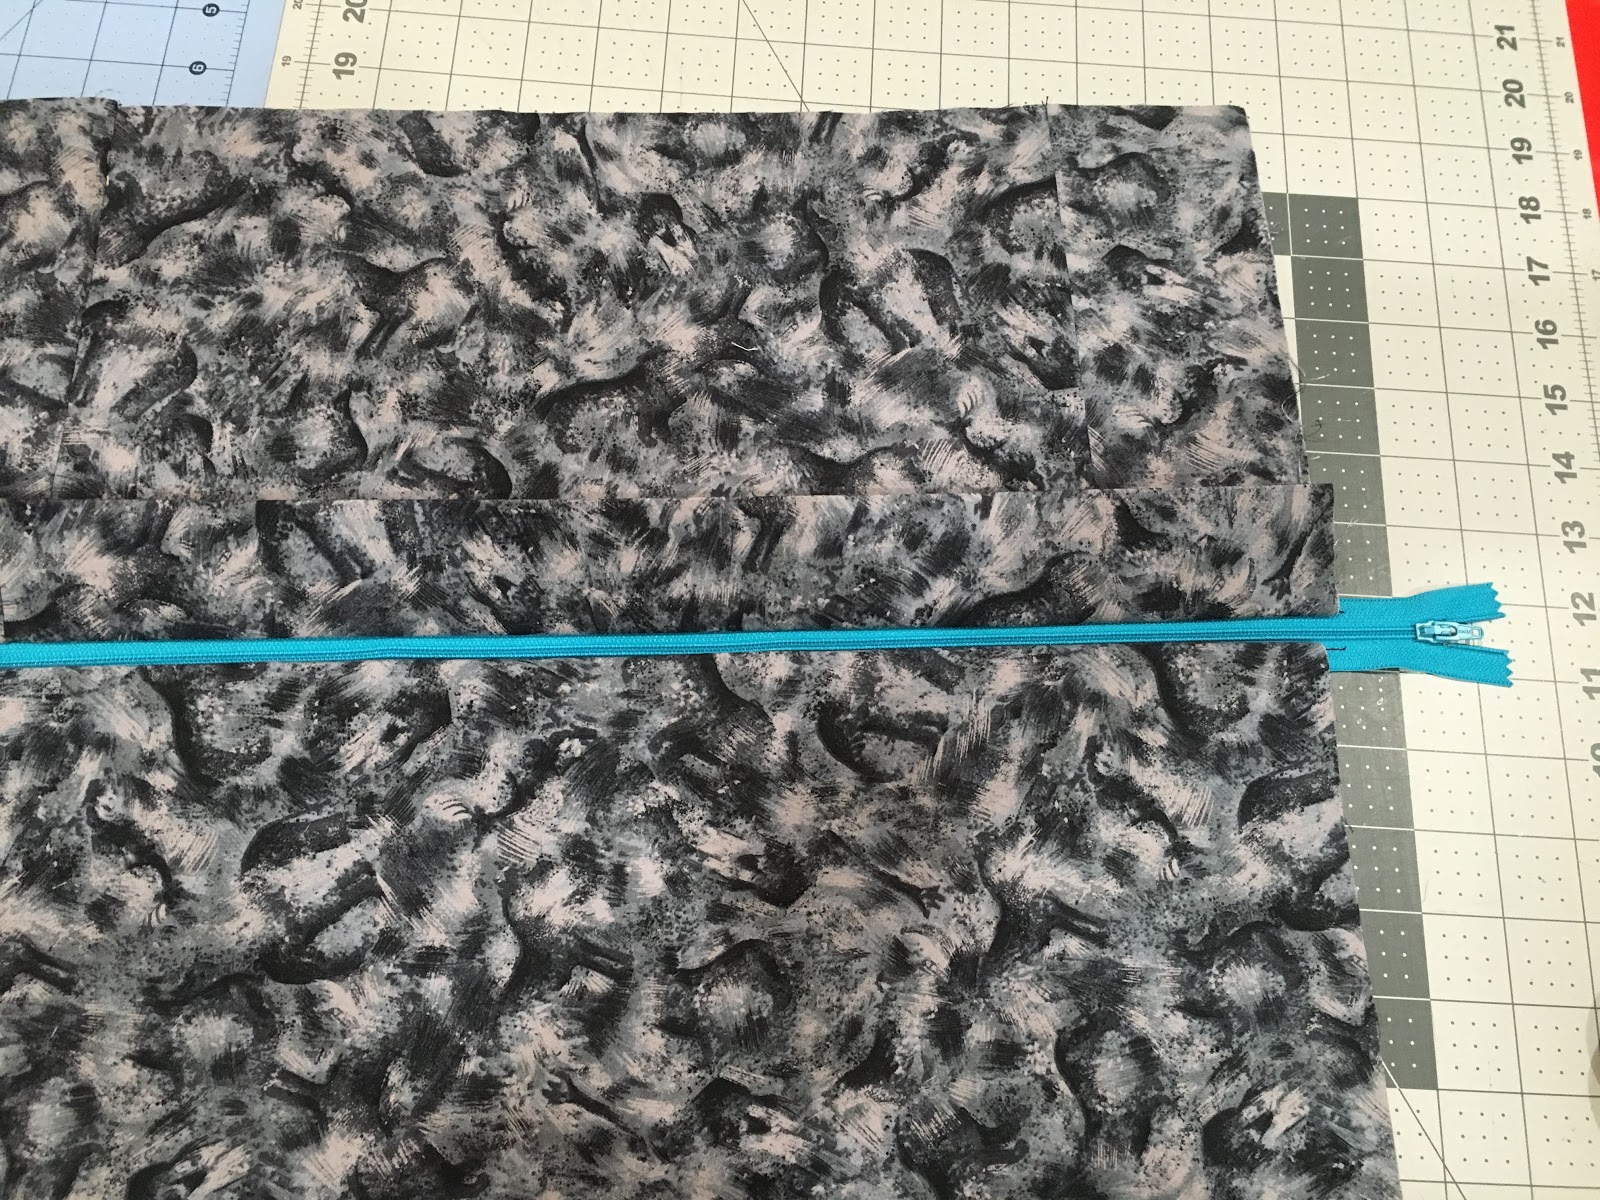
Then I sewed along the top of the fabric next to the bottom side of the zipper.

Then I pressed the flap down and sewed right next to the seam on top of the flap.
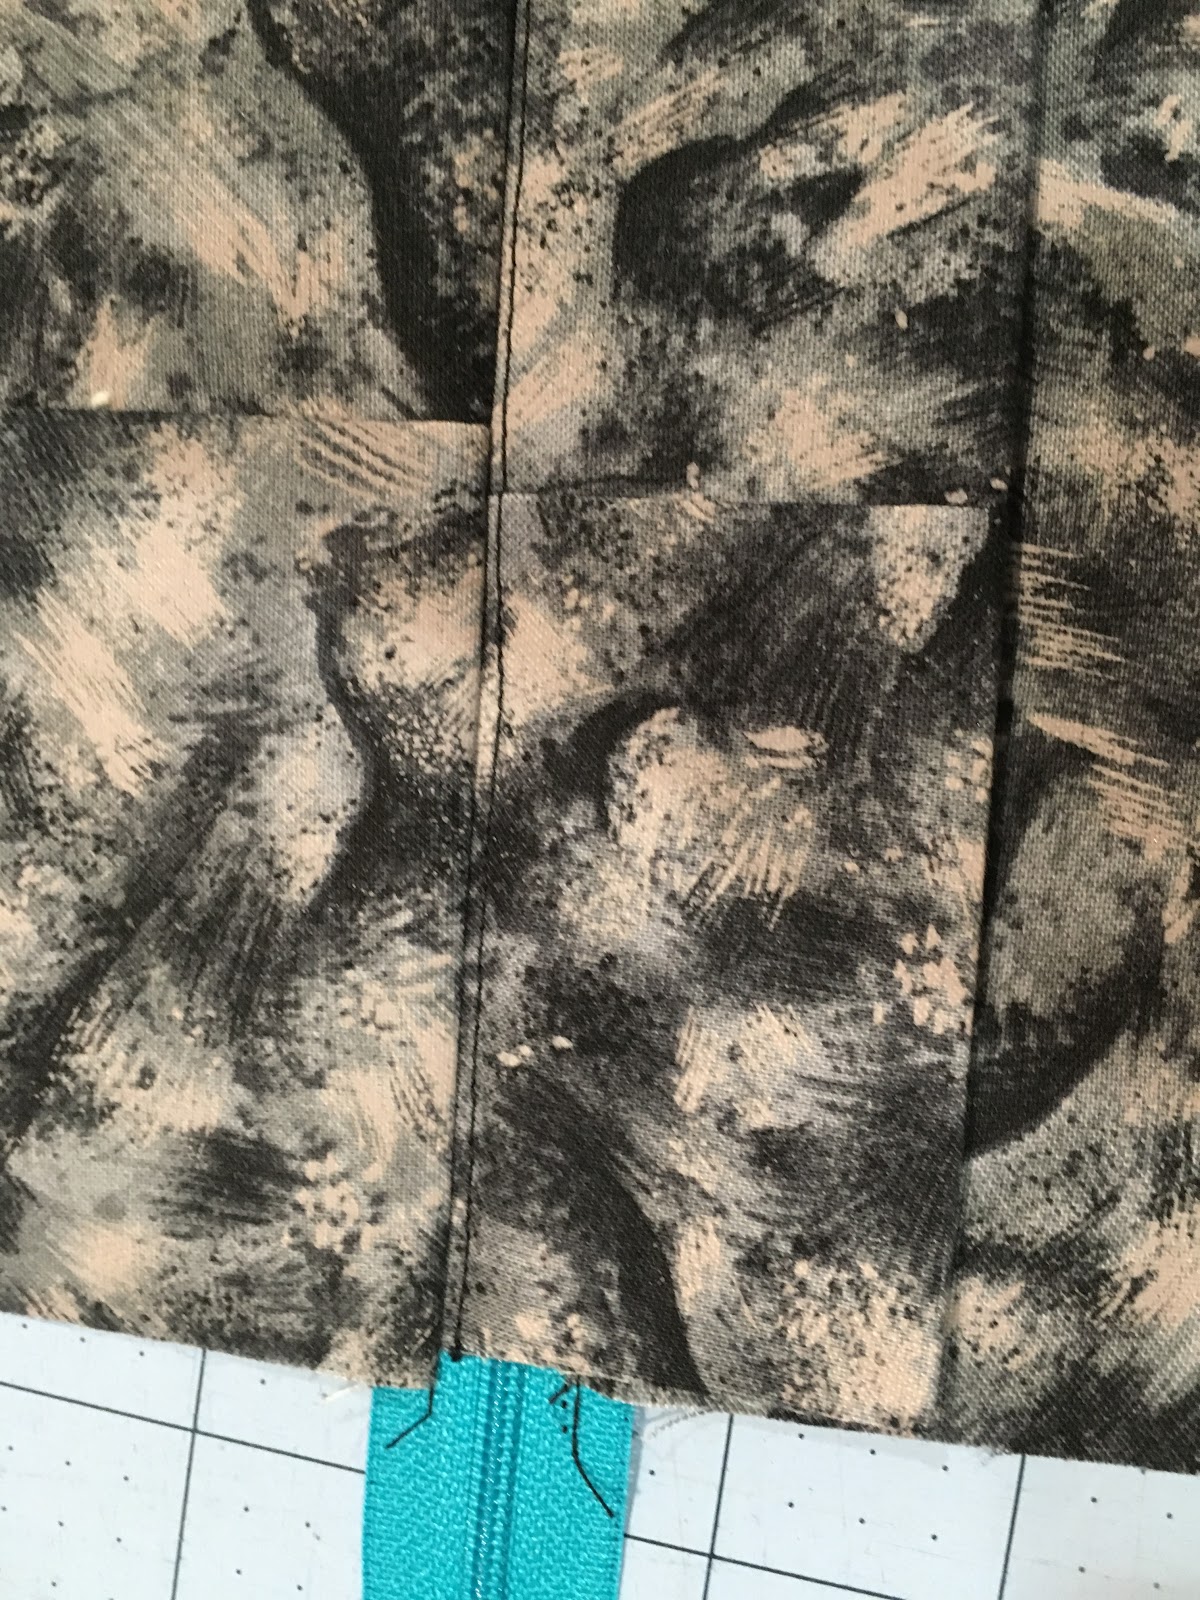
Tested to be sure the zipper worked.
Then I sewed by hand to be sure the zipper edge would be in the correct place.

Sewed just that end of the zipper with the machine.  I unzipped part way.

Then it was a simple matter of pinning the top to the zippered back.  I had left my piece of fabric a bit longer.  This was trimmed after the back and front were joined together.

Thanks to Chrissie D for the directions on how to get rid of the bunny ears on the corners of the quilt.

Then I marked each corner to show 1/2 inch from the seam and five inches from the seam.

Then I drew lines

And used the lines as my cutting guides.

Turn the pillow covers so the right side is out - done!

A Finish: Cultural Fusion Black and Purple Windmills

I finally put the binding on the black and purple windmill quilt that I started in the Sujata Shaw workshop in 2014 in Maryland.

Timeline:
2015-07 Take Sujata's Workshop and Start Piecing:  Mid-Appalachian Quilters July 2015 event 
2016-02 Sew Blocks Together: https://quiltquest.blogspot.com/2016/02/one-monthly-goal-feb-2016-sew-blocks.html
2016-02 Making it Larger and then Spray Basting: https://quiltquest.blogspot.com/2016/02/one-monthly-goal-feb-2016-sew-blocks_28.html
2016-03 FMQing: https://quiltquest.blogspot.com/2016/03/omg-march-2016-quilting-cultural-fusion.html
2019-03 Squaring up and applying binding


My quilting friend, K,  reminded me how to square up the quilt and get the binding on...

For squaring up we used a large square and a long ruler.  Put the square on the corner and use the longer one to then see the where the side is to be cut.  Using the larger square was new to me and really helped get the job done.

My binding is cut on bias at 2.5 inches.  I put on using an approx 3/8 inch seam - binding is full and nice.

The back is just black and the quilting does not really show up.


Monday, August 7, 2017

WIP: Cultural Fusion Inspired Sunflower/Star

The project in my class this time is to make a center star design then to surround it with different sized blocks - most of them have been hand or machine appliqued - depicting our 'favorite things'. The other people all jumped in on this.  The design walls are full of cats, fish, flowers, dragon flies, pigs, food, iconic buildings, camping trips and more.  I, however, was drawing a blank.  What were my favorite things?  So for several weeks all I did was observe and learn.

But then I remembered my intent to make all the blocks in the Cultural Fusion book by Sujata Shah! They qualify to me as favorite things. I will probably not be able to put them in the one quilt, but I am making progress finally these week. It has been fun for me to pull out her book and remember the terrific time I had meeting Sujata while a student in two of her workshops.  But I'm also trying to stay focused to have a project to show the teacher and class.  

I warmed up by first grabbing some blue fabrics and cutting squares.  I admired them for a while, then finally made some half square triangles.


My original idea was to have the same sized blocks throughout the project, but I really wanted my yellow star/sunflower to stand out so I moved to larger squares of fabric.  After debating my choices of fabrics, I finally decided on darker oranges and golds for the center, and then mostly brighter yellows for the petals of the flower.


I decided to use Sujata's method for adding some 'leaves' in the corners:

Now I need to pick the size of the blocks...  Hmm, I'm sort of liking having the extra space between the blocks... Well, I'll think about that, but in the mean time will be squaring the blocks up sized by the smallest block.


Monday, March 28, 2016

OMG: March 2016 Quilting Cultural Fusion Windmill - DONE!

http://redletterquilts.blogspot.com/2016/03/
omg-its-finished-prizes-added-to-march.html
I have just finished quilting on my purple and black Cultural Fusion Windmill quilt.  This was my March One Month Goal.  I'm sure if I had not written this down as something to finish I would have put it off and not got it done.  But I did.  : )

It turned out to be done in two steps.  Initially, I outlined each of the windmills, changing the method for the middle and the ends of the windmill blades.  I blogged about that initial quilting here:  http://quiltquest.blogspot.com/2016/03/windmill-initial-quilting.html

Here is the design quilted at all the places
between the windmills where four fabrics meet.
It didn't seem finished though so I had to think of what additional quilting I could add.  At first I was going to do one of Leah Day's designs.  I was thinking shadow waves or etch n sketch would make the blades stand out more and they are very much like Sujata did in her windmill quilt (at least in my memory).  The more I thought though I couldn't figure out how to start and stop each line of the design. The borders for the area I intended to quilt were so irregular I couldn't figure out how to put the outline for the area in that I thought I would need.

Anyway, today or maybe yesterday I decided to draw a little four leaf clover - or four hearts that meet in the middle in the junction of the four blocks.  It's really difficult to see with the fabric being so near the black of the thread that I'm using, but it's done now - so my March OMG is done and I will be linking up now.

Front - I think click to see the design - only shows on the lighter plain fabric
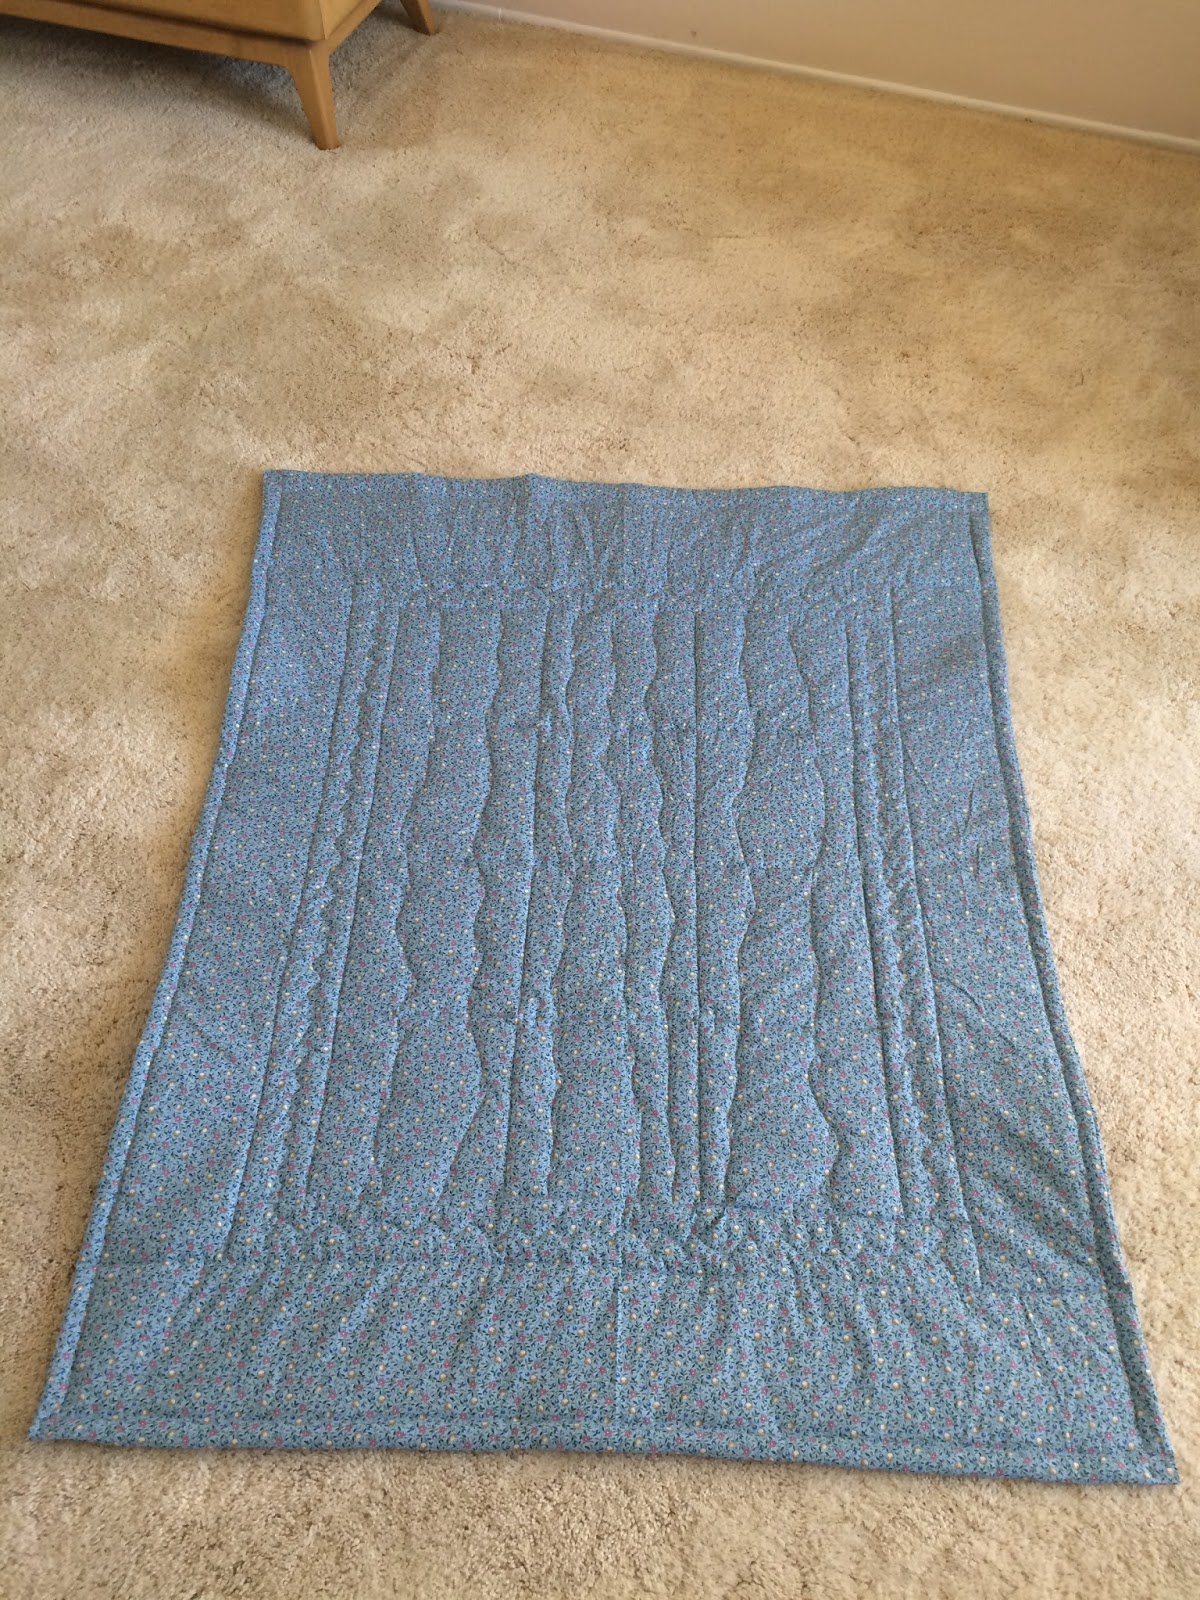
Back - stitching doesn't show


 I mentioned when I wrote my goal that I was saving the binding until I had at least three quilts ready for binding.  This is my second quilt now ready for the binding step!

I'm pretty happy to have this part of the quilt done.

So time for me to link up and go see what some of the other folks have finished!
http://redletterquilts.blogspot.com/2016/03/
omg-its-finished-prizes-added-to-march.html


Wednesday, March 16, 2016

Windmill: Initial Quilting

I have finished the initial quilting of the purple and black Cultural Fusion windmill quilt.

This is the quilt I spray basted last month.

It was extremely easy to quilt this project, so right now I'm thinking it might be worth it to set up a table so I can spray baste future projects myself. I will decide after washing the project.

My friend who helped me had suggested just quilting by sewing a line thru the fans, and then to call it done.  That would finish the quilt, but I want to do more quilting.  I think more in this case would be better!

I decided to start by stitching to outline the blades of each fan.  The outsides follow the fabric seams, the inside of each fan has stitching that usually waves over to meet the blade that is below it in the fan.  I will be adding more designs either in the blades or the part of each block that is not a blade, or maybe in both areas I'm not sure of how I will continue this quilting.  I'm mostly pleased with how this initial stitching looks.

11:42 - 1:00 Tues - sewed 8 lines and filled a bobbin
3:52 - 5:00 Tues - sewed 14 lines and ripped one part of a blade that wasn't done correctly. only had three lines left to do!
12:00 - 12:55 Wed/Today- filled bobbin, sewed the last three lines and redid the blade that hadn't been sewn correctly.
======
3 hours and 21 minutes

Here is the initial quilting:


Detail of the center of a fan.  Curved the line
so it lined up with the bottom fan blade.
At the outer edges of each fan blade I followed the shape of the blade.

And here is another outer sides of the blades.

Here is another center of a fan.


Here a view of the back - it's easier to see the quilting without the different fabrics. The lint from the carpet makes the black fabric look grey!


The center of a fan.


Showing the outer blades. You can see how each time I
 turned to create the X to jump from one fan to another.


Another example of outer blades.

Here was my problem though.  The outline of the blade is part of the design.  When I put the binding on, that design will be lost as it is right where the edge of the binding will be.  I should have done this stitching so it was half inch from the outside, so the design would show when the binding is applied. I am going to add an additional line of stitching on the outer blades so the design will show when I apply the binding. I can do that when I add the additional design to the piece.  I'm not going to pick the existing stitching out as I made the size of the stitches as small as possible on my machine at each ending and beginning of quilting, but will learn from this experience so I don't repeat this in another project!  I wondered about it when I was quilting, but didn't think it thru until I was done.  Oh well.  A lesson learned.  Writing it up here to help someone else!  : )


Tuesday, February 2, 2016

One Monthly Goal: Feb 2016 Sew Blocks Together, and Baste the Cultural Fusion Windmills Quilt

Last summer I was very lucky to take two classes under the direction of Sujata Shah.  I have finished
http://redletterquilts.blogspot.com/2016/02/
omg-one-monthly-goal-linkup-time-for.html
the first project from that time, but this month my goal is to sew the blocks together that I made in the class to finish my Cultural Fusion Windmill quilt.  And this month, I want to pick the backing fabric, and baste the top so it is all ready for quilting too!

I'll save the actual quilting and binding of the quilt for another month.


This was really a fun block to piece. 

I picked purples and black and white that I had cut in preparation for the Marston/Moran workshop a few years earlier, but the variety of looks is limited as they say, only by your imagination.

Picture the quilt being done in solids (as is in her book), in a range of patriotic prints, in civil war reproductions, or in Kaffe Fassett fabric. It was amazing to see the way the workshop participants interpreted the free-form directions.  And their progress during the workshop proved the blocks would look fabulous in a quilt!

If you don't have the book, I do recommend buying it.  And if you can ever take a workshop with Sujata, leap at the chance!


Definitely, part of the fun is clicking on the different goals people write about in the post they link to on the link page for the month.  OMG One Monthly Goal Linky for February 2016  There are so many though that this time I'm just picking the ones that are in the first column.  At least for now!  The projects are all beautiful and the range of sewers is from professional to beginner.  It's always inspirational to click and see what people have shared.


Wednesday, November 18, 2015

Cultural Fusion: Charity Blue and Green Hour Glass


So finally, I have finished the blue and green charity quilt.  I started the blocks in a workshop taught by Sujata Shah using her Cultural Fusions book.   It took about two hours to get the sides trimmed and binding done.

I did it all by machine and had wide binding so it was pretty easy to do.  I wanted to add some inches by keeping the batting, but the backing wasn't large enough for me to do on the sides.  I goofed when measuring the bottom but just kept going.  So the binding at the top is wider than the bottom and the sides.  The last border was left unquilted as I think it will be pretty puffy when washed.

So next time:
Write down the measurements when trimming.
Add more hour glass blocks instead of just borders.
Find the pressure feet for this machine, so I don't have to use the darning foot when putting on the binding!
Pay more attention to the colors and placement of blocks.

Now a break and then bookkeeping!


Friday, October 23, 2015

Cultural Fusion: Hour Glass - and basting in a pinch!

* New (to me) way to baste!
Last summer I was able to attend two workshops taught by Sujata Shah (The Root Connection Blog).  What a wonderful way to spend two days!  Sujata was a delight, I have made a new friend.

I've finally pulled out my machine and sewed the Cultural Fusion Hour Glass blocks together, added some borders and basted the result. The block was fun to make.  I thought I had picked a good number of blue and green fabrics, but while cutting I starting doubting myself and added some more yellowish material and mixed myself up on how I was doing it too.  So some of my blocks are not following the guidelines but the results are still striking.

I'm making this quilt for a local charity.  They organized a sewing session last weekend that I attended. The ladies there picked the fabric for the borders and gave me the batting, a thick polyester something I've not used before.  If I had thought ahead I would have made more hour glass blocks for the frame, but I just have borders now.  The other ladies were also using that batting, so I could see how lovely the stitching shows on the quilts.

We meet once a month to sew from 9 to 4 - all day.  The location (a church) has a person who sets up the sewing tables including (higher) cutting tables and ironing boards.  We just have to contribute one quilt a year and spend one day each year only working on their projects.  Oh and we each bring a salad to share for lunch with the others.  Last weekend I made a grape salad, more like a dessert - it was well received.

Grape Dessert Salad - (Because it's near Halloween my husband named it eye ball salad topped with crumbled bones.)
1.  Clean and put in a dish - about 4 lbs of assorted grapes (mine were frozen as they were over bought for a party we held a few weeks ago)
2.  Cream together: 8 oz sour cream, 8 oz cream cheese, and about 1/4 c sugar.  Add to the grapes and mix
3.  Right before serving top with some brown sugar and nuts.

The ladies are very nice, I feel very lucky to be included in the group.

I still haven't quilted my tumbler quilt, it has all my pinmoors as it's basted and waiting for me to finish - but I wanted to get this hour glass charity quilt at least started during the day long session.  * I taped the backing down so it was taut on the table and then just put the batting and top of that on the table.  I used regular straight pins to baste! When I finished I took the tape that had been used on the backing and put little pieces on the sharp tips of the pins.  It worked!  I was able to stitch the seams and then remove the pins without sticking myself once!  So now I just need to decide on how to add a FMQing design and finish the binding!

I'm looking forward to making more quilts from Sujata's book, Cultural Fusion.  Several folks are making rail fences following her guidelines, I'll be joining in!  The results are posted on this website - http://culturalfusionquilts.blogspot.com/