Monday, April 1, 2019

A Finish: Red Charity Quilt

I finished this quilt up today.  It took around 4ish hours to change the top into a quilt.

The group gave me fleece to use for batting and backing, so it was pretty easy to finish up.  I put the right sides together, then sewed around the outside leaving a space for me to turn the quilt right side out.

At first I was going to keep the right angle corners, but then I decided to curve them out.

I used a saucer to determine the curve, first marked with a pencil, sewed, then cut.


After turning it right side out again I pressed with my fingers to get all the edges oriented so the seam was at the side, rather than with the backing or front showing on the other side.  I put extra pins where the opening was to help keep that in place.

I did a variation of an orange peel design.  This is how I started in the center.


Then it was just a matter of going out one square and finishing the design and stitching around the outside of the piece.

I didn't intend to have the center be off to the side, but I kept going hoping it would look okay in the end.  There was one spot where I deviated from the plan and put an extra loop.  The last two lines I could feel something wasn't right with the thread or tension but when I looked it was okay.  It was only after I pulled it completely off that I saw the two spots with the thread build up.

Added April 18 2019:  Took about 30 minutes to remove the thread buildup, hide the threads and resew the quilting. Looks a lot better now!


It was quick to finish, but I think I prefer working with a binding, then it is easier to go off onto the batting when quilting.  But I'm not sure.  So looking at my notes from the first post on this I guess it took around 8 hours of hands on time with this quilt.  Is that what it would have taken you?

Added April 18, 2019 30 minutes to correct the thread build up issue on the back.

First post on this project here:
https://quiltquest.blogspot.com/2019/03/wip-red-charity-quilt-top-done.html

I used the Singer that Audrey got me from Freecycle and a walking foot for the quilting.

If I do this pattern again I will put two rows around the outside so the points are not lost...

Finishes: Play Mat, Hooded Towel and Washcloths

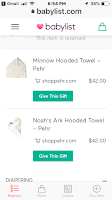
My friend's daughter is having her second baby.  I made gifts for her baby shower.

I got very nervous about doing this once I had started everything - she had a gift registry for the baby but I wanted to make something instead of just clicking away to pay.


So I made a 42 inch play mat, very similar to what was on her list:


My son helped me make a quarter circle template with freezer paper that I used to cut the circles.  (I cut the front and back, but if anyone else does this just cut one of them, then pin the batting and backing on that and use that fabric circle as the template.)  I used hi loft polyester batting.  Using curved stitching made it very fluffy!  The 2.5 inch binding was applied with a walking foot on my Brother.  It was about 3/8 inch on the back and also when it was brought around to the front.  I folded it at the beginning and then just tucked in the final piece when I came back around.  This made it very simple to finish.


For the hooded towel, I got a quick dry towel and cut it so it was square - ended up being 30 inches.  Used a saucer to shape the corners.  I cut a triangle from the remainder of the towel.  Also cut a triangle of different fabric.  (I had planned on using the bird fabric from the play mat but my left over pieces weren't oriented the correct way.) Used the same saucer to shape the top triangle.  Used 2.5 inch binding to connect the triangle fabric to the triangle bit of the towel.  Then pinned the triangle down and put binding around the whole thing.  (I saved the link to my inspiration for this but can't find it now - here is one that is similar: https://sew4home.com/projects/bath-linens/hooded-baby-bath-towel-and-matching-bound-washcloth


I had some left over towel, so used my 12.5 inch template to cut two squares.  Used that saucer to shape the corners and added the binding!

Two days before the event I got so upset thinking I should have just clicked to buy something, I had myself in tears.  But got myself together so I got some new clothes, had my nails done, and found these clear bags (supposed to be to put gift baskets in) to put the gifts in.  


 These were the first sewn gifts I have given to people who know me (other than the little quilts for my husband and son).  I put directions for washing and some of those Shout Color Catchers in an envelope with the purple and black quilt.

Baby Shower was March 23, didn't realize I hadn't posted here until I was working on the red charity quilt post...