Pages

Showing posts with label Finished Quilt. Show all posts

Tuesday, June 8, 2021

Round Up Week 22: Log Cabins and Power Bars Quilt Finished!

In the second session of the In the Studio with Lauren class "Appliqué", she covered freezer paper appliqué.  I again used a heart for my practice piece...  I'm pretty sure I finished this while still in bed. So I didn't notice until I was done that the shape of the heart had bent while I was working on it.  My concave and convex points need more practice, but this experience was sort of fun.


-------------

Lauren's class gave me confidence to try my hand at stitching binding.  I'm glad I finally did this..

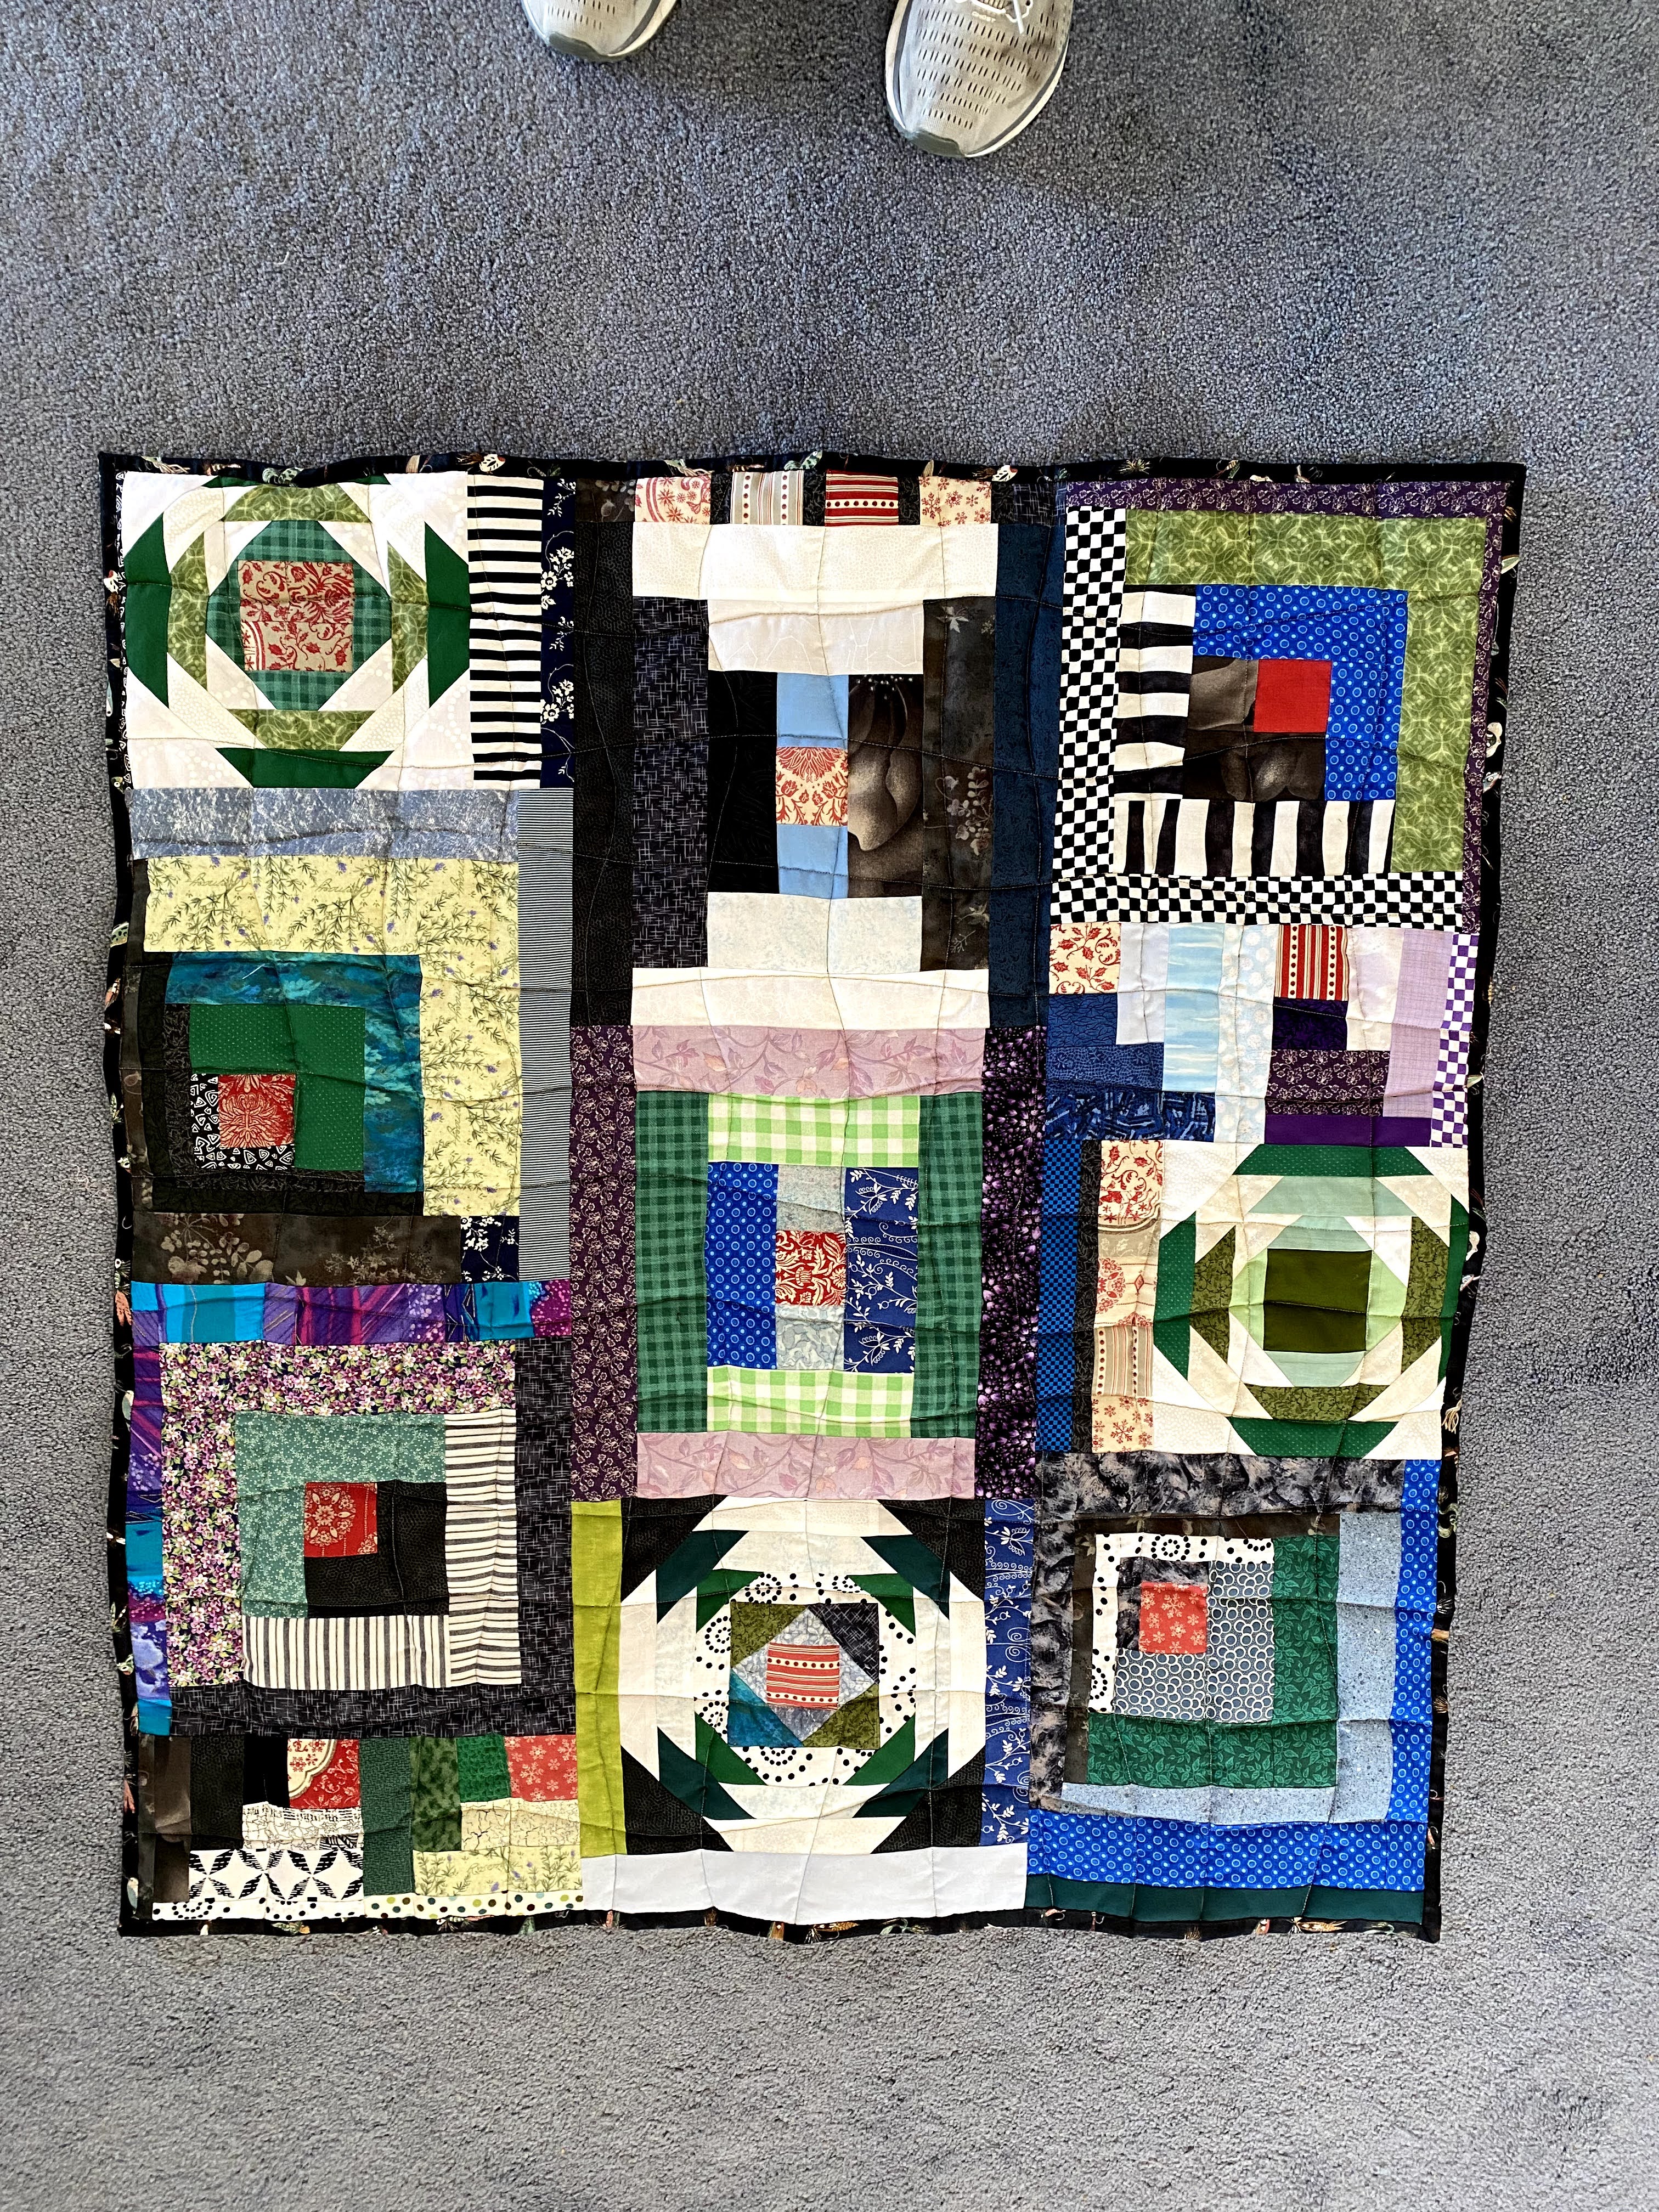
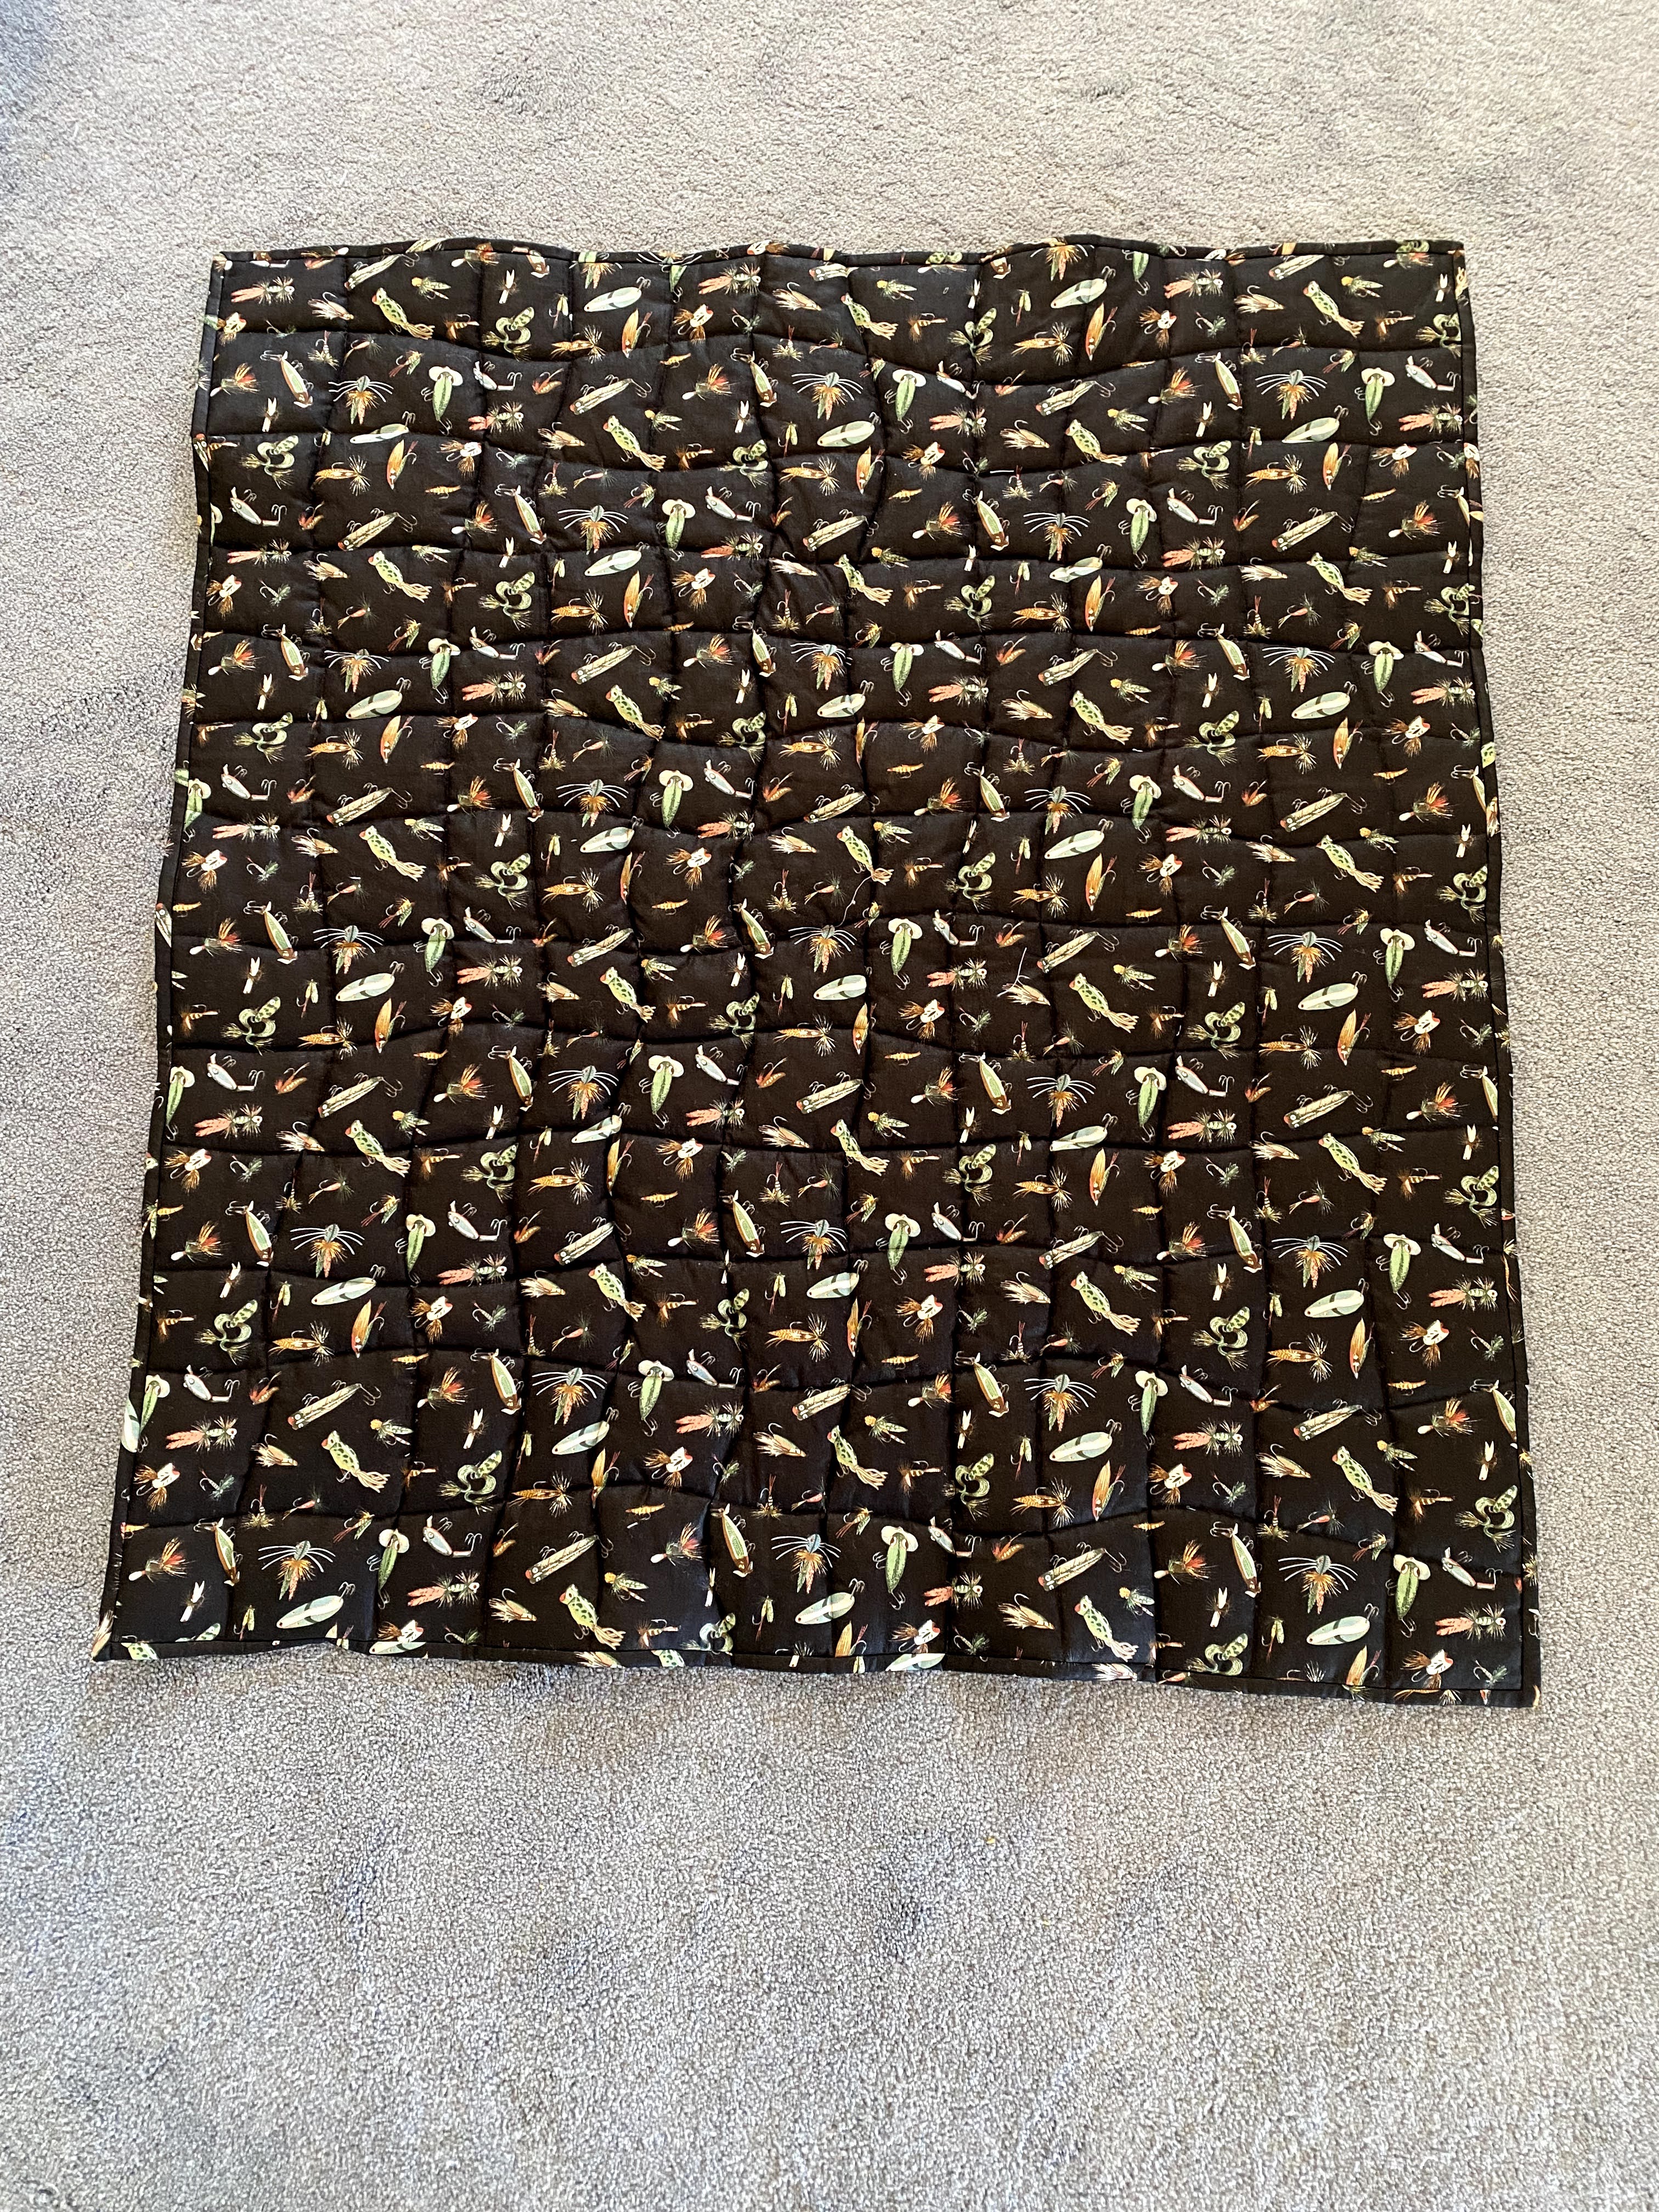
I started and finished my first ever hand stitched binding!  The quilt is about 36 by 40 inches, and was done as part of the second session of the online classes: In the Studio with Lauren "Log Cabins and Power Bars'.  Without her classes I never would have had the nerve to try this, and I am sold!  It perhaps took a few hours for two days - I had the TV on in the background while I worked for part and listened to The Wedding Quilt on Audible for some of the time too.  Although I need to work on getting better corners, I'm very pleased with how the binding looks.  I tried to sew the 2.5 inch binding 3/8 of an inch from the raw edge, but once I hit the corner could see that I needed to be closer to 1/4 inch.  Next quilt I am going to try surrounding the quilt with a zig zag stitch instead of several victory rounds of straight stitching.  Perhaps that will be easier to place the stitches for the binding.  I sewed the binding to the back then stitched it down on the front by hand.


This quilt was made for our little dog, Buffy.  She has already liked being under it - and for a while sat on in when it was in the sun.  I haven't washed it yet, nor put a label on the project...

I realized after sewing a bit that being thrifty and using the needles left to me by my Mom was not going to work out.  With each stitch it felt like there was a little tug - as if the needle had a rough spot on the side.  So I actually went to a quilt shop to get new needles!  While I was there I brought the Add a Quarter Ruler that I had purchased online and some gizmos that were supposed to make it easier to thread a sewing machine needle to the store.  To exchange the Add a Quarter with the newer beveled edge version, and to get direction on how to get the needle threader to work.  It turns out the online purchases have to be returned to the online store for online store credit.  This was not clear to me at all when I made the purchase.  But at least I have online credit.  The threader took two people at least 20 minutes to get it to work. It did but not consistently.  (I had gotten three of them since the shop owner said they worked so well.  I was going to give two away as gifts.)  But it took so long to get it to work - and the one we used got bent up too.  So I returned everything (sans the bent one) to the store - so I have about $21 of credit now in the online catalog only. I am thinking of getting the Hex n More ruler recommended by the teacher of my next EBHQ class...

------------

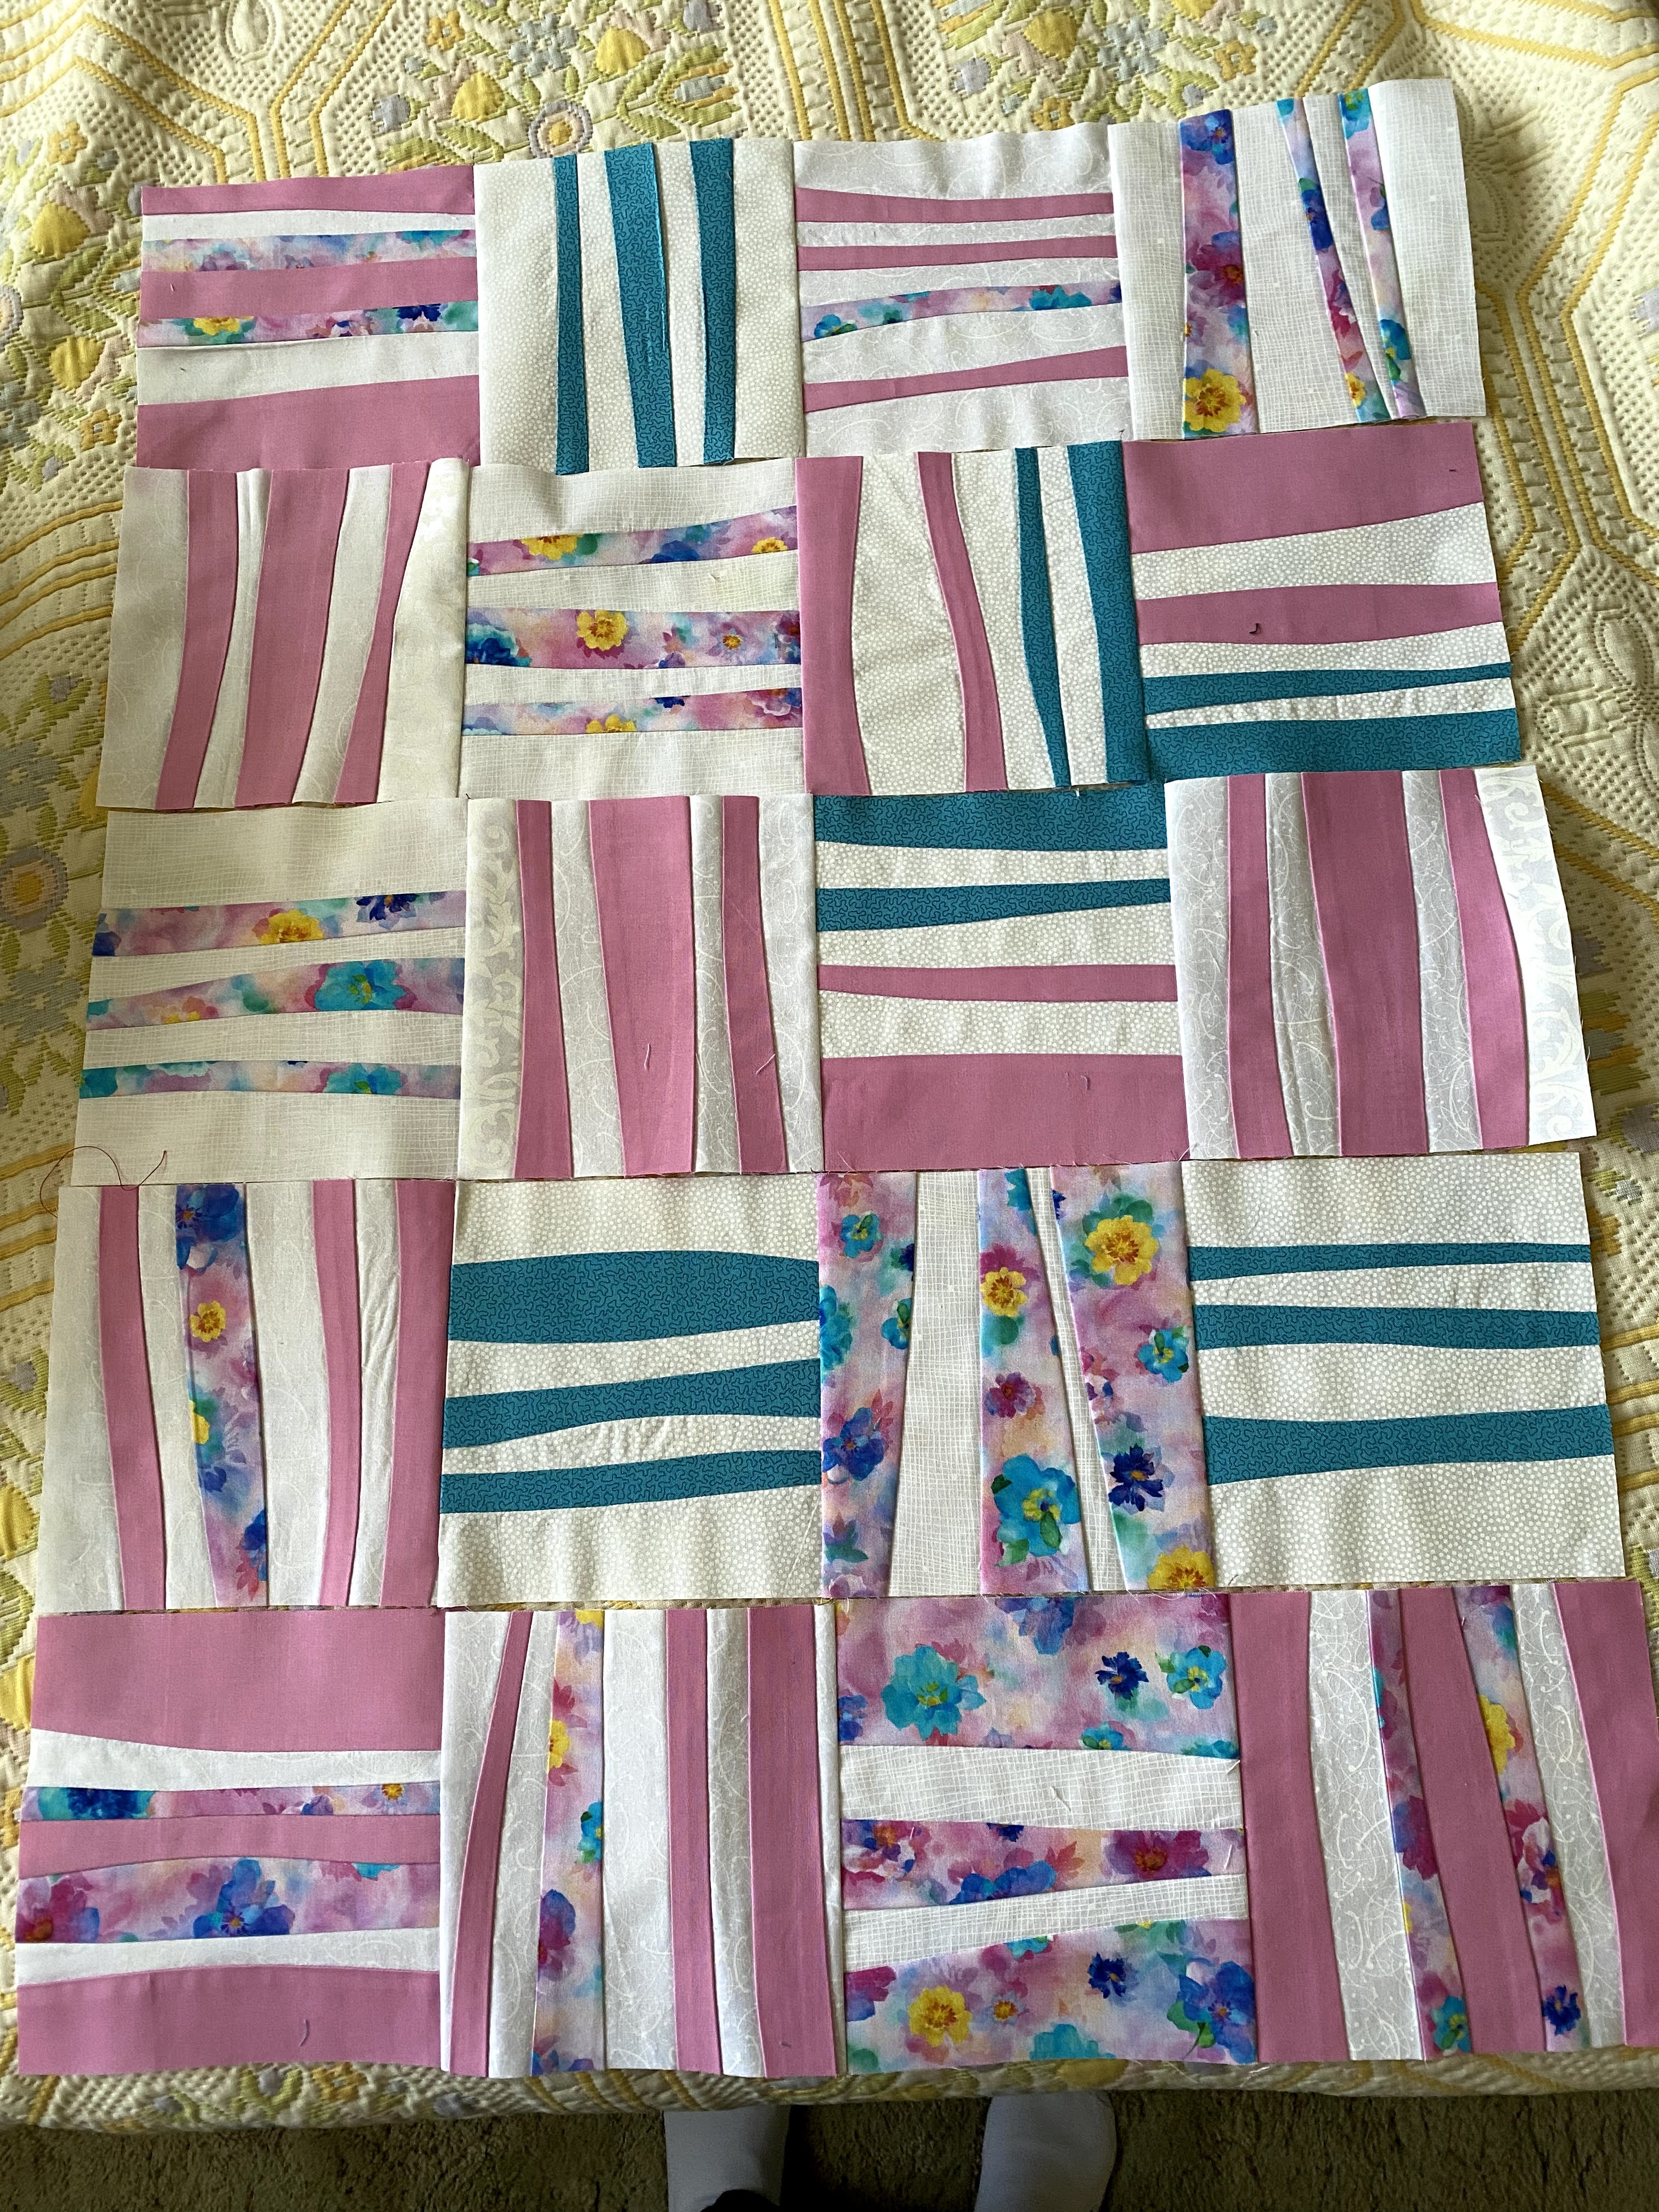
Wavy blocks (from May 2021 EBHQ class by Marge Tucker) in white and pink WIP.  I made a total of 21 6.75-inch blocks and decided to sew them together in rows of 4 x 5 (so I have one left over block) as I had really run out of the fabric I had in the right colors.  It now measures 26 by 32 inches.  I'm thinking of how to do the next part of the project - still trying to make it look like it was planned fabric, rather than being scrappy looking...


---------

Not Quilting

I had my hair cut and a pedicure!

The hair had been about five or six inches longer than it is now.  When I made masks for neighbors, I found out one of them owned a salon - it was a very nice looking place - in a terrific location in downtown San Diego.  Everyone wore masks - felt normal and nice to be out again.  The neighbor wrote to thank me for my support of her business.  Times are tough for businesses...

I did well with walking the first day of June.  Passed some nice looking houses....


And passed a junior high, school in session. 
The music class had moved to practice outside.  It was a beautiful day.


Tuesday, June 25, 2019

Finish: BlockLotto Baby Quilt Grows Up!

My friend and I put together nine of the Block Lotto blocks I won back in 2010 to make a baby quilt for her new granddaughter in 2015. This year the daughter returned the quilt and requested that it be made larger since the baby was larger now. She didn't want a new quilt, she wanted this one enlarged.
My friend's first quilt - 2015

So how was this going to get done?  I sent my friend some fabric and more of the blocks to help her get started.

She decided to start by making another quilt the same size!  She even put binding on the quilt!

My friend's second log cabin - 2019
So when I came for my visit we had two quilts the same size that needed to be combined.  She did not want to remove the binding.  The idea of sewing strips to the sides to join the pieces was unappealing to her.  So I suggested trying to zig zag them together.  Last Road to California, I had watched a demo by Pauline on how she joined quilt pieces to finish the projects up...  Since our pieces had binding we had to adapt the method.

My friend zig zagged the two quilts before I came for my visit.  It actually looked pretty good.  But we decided to finish it off nicely with strips to cover the zig zagging.

We made strips of fabric.  Wider for the front.  They were folded in half, then the ends were brought up to meet at the center.    So the resulting strips had folded edges, and were all two layers deep.  These were starched and then sewn to cover the joining of the two pieces.  We sewed the back side first.  Then the wider strip was sewn to the front.  Each strip was sewn down on both sides.

     
If you do this I suggest sewing the left side first - it would be easier then to pull the fabric flat while sewing.  I seem to only have taken a photo of the first seam when it was done with the initial sewing on the right side - don't do what is shown in the photo above! Look below for a better sequence.

After the two quilts were joined we made borders and added them using the same method.

     
In the photos above, you can see we sewed initially the left side and then the right side - this was the best way to do add the strips, then it was easy to pull the pieces flat.  My friend used a walking foot to make the design on the borders.

  
We pinned the pieces together before we sewed, but did not measure until we were trimming things up.  Each time we could see more and more ripples appearing in the project.


But we liked the way the stitches were showing up and how easy it was to join the larger quilted pieces together....

Her little dog liked the larger quilt too!

When we added the shorter top and bottom borders we could see that we needed to be sure the pieces were pinned on so things were centered, then the waves did not appear.  So that is a step to be sure to add if you try this method!

We were not consistent with the size of the strips, started out with half inch on back and 2 inches on front. We used Clover bias tape makers at first, then decided we wanted different widths.  It was pretty easy to just press and get things set up without the Clover tools.

We sewed the binding on and took some close ups of the corners...

For the binding we trimmed so the batting extended about 1/8 or maybe it was 1/4 inch from the quilt.  The strips were cut 3 inches.  We adjusted the seam width so it was sewn on around 3/8 inch so the front and back were pretty even.


You can see the fold in the one strip, that was the one sewn right side, then left side mentioned above.  In the end that fold washed out, but it bothered me once I noticed it.

Here is how it looked before it was washed...

And here is how it looks after being washed!  The ripples pretty much disappeared!  (Usually I give my quilts unwashed to charities so it was nice to see how it looked after being washed.)


It is easy to the original quilt size on the back of the quilt.  Enlarged now so it covers the top of a twin mattress!

Here I tried to get an artistic shot of the quilt on a chair...

I'm sure her daughter and granddaughter are enjoying the enlarged quilt, and it will be used for many more years now!

This was a fun challenge.  So lucky I got to share in the adventure with my friend.  This method of joining quilted pieces is very easy, the results were very nice. I recommend giving it a try!

Amazingly, I still have more BlockLotto blocks to play with!

Monday, April 1, 2019

A Finish: Red Charity Quilt

I finished this quilt up today.  It took around 4ish hours to change the top into a quilt.

The group gave me fleece to use for batting and backing, so it was pretty easy to finish up.  I put the right sides together, then sewed around the outside leaving a space for me to turn the quilt right side out.

At first I was going to keep the right angle corners, but then I decided to curve them out.

I used a saucer to determine the curve, first marked with a pencil, sewed, then cut.


After turning it right side out again I pressed with my fingers to get all the edges oriented so the seam was at the side, rather than with the backing or front showing on the other side.  I put extra pins where the opening was to help keep that in place.

I did a variation of an orange peel design.  This is how I started in the center.


Then it was just a matter of going out one square and finishing the design and stitching around the outside of the piece.

I didn't intend to have the center be off to the side, but I kept going hoping it would look okay in the end.  There was one spot where I deviated from the plan and put an extra loop.  The last two lines I could feel something wasn't right with the thread or tension but when I looked it was okay.  It was only after I pulled it completely off that I saw the two spots with the thread build up.

Added April 18 2019:  Took about 30 minutes to remove the thread buildup, hide the threads and resew the quilting. Looks a lot better now!


It was quick to finish, but I think I prefer working with a binding, then it is easier to go off onto the batting when quilting.  But I'm not sure.  So looking at my notes from the first post on this I guess it took around 8 hours of hands on time with this quilt.  Is that what it would have taken you?

Added April 18, 2019 30 minutes to correct the thread build up issue on the back.

First post on this project here:
https://quiltquest.blogspot.com/2019/03/wip-red-charity-quilt-top-done.html

I used the Singer that Audrey got me from Freecycle and a walking foot for the quilting.

If I do this pattern again I will put two rows around the outside so the points are not lost...

Friday, March 22, 2019

A Finish: Cultural Fusion Black and Purple Windmills

I finally put the binding on the black and purple windmill quilt that I started in the Sujata Shaw workshop in 2014 in Maryland.

Timeline:
2015-07 Take Sujata's Workshop and Start Piecing:  Mid-Appalachian Quilters July 2015 event 
2016-02 Sew Blocks Together: https://quiltquest.blogspot.com/2016/02/one-monthly-goal-feb-2016-sew-blocks.html
2016-02 Making it Larger and then Spray Basting: https://quiltquest.blogspot.com/2016/02/one-monthly-goal-feb-2016-sew-blocks_28.html
2016-03 FMQing: https://quiltquest.blogspot.com/2016/03/omg-march-2016-quilting-cultural-fusion.html
2019-03 Squaring up and applying binding


My quilting friend, K,  reminded me how to square up the quilt and get the binding on...

For squaring up we used a large square and a long ruler.  Put the square on the corner and use the longer one to then see the where the side is to be cut.  Using the larger square was new to me and really helped get the job done.

My binding is cut on bias at 2.5 inches.  I put on using an approx 3/8 inch seam - binding is full and nice.

The back is just black and the quilting does not really show up.


Thursday, February 8, 2018

Just Checking: Was it the fleece, batting or fmqing design?

After finishing the Put a Little Love in Your Heart Project, I was curious to check if the quilting puffiness dimension was a product of the FMQing or the fleece or the batting.  

I pulled out a charity top made with a different quilt pattern and finished it with the same walking foot quilting design and batting.  Not as puffy, but still a great design...


So it was the fleece that make the Put a Little Love in Your Heart Quilt puffy (and I liked the puffiness for that quilt). But with or with out the puffiness I like this variation of the orange peel quilting design!

This quilt had the binding sewn on the front as I thought I was going to try hand stitching it on the back.  But instead I found some thread that almost matches the rust border and sewed the binding on.  These were 2 inch bias cut strips.  Sewn on the front and then the back with 1/4 inch seam.


Wednesday, February 7, 2018

Blog Hop: Put a Little Love in Your Quilt

Welcome to my blog!

Last Christmas I found a fun blog hop where folks shared a Christmas project and a cookie recipe.  Yum!  We ended up making 8 different kinds of cookies for the holidays and I enjoyed the projects everyone shared.  

Carol announced the Put a Little Love in Your Quilt Blog Hop and I signed up to share.  Her requirements were just that we include a heart somewhere in the project...  This is absolutely the fastest I have ever finished a quilt!  I started January 8 and finished February 6. Click on the images to see the details!

My adult ed class teacher challenged us to make a double 4-patch quilt using different fabric for most of the design.  (If we had done this it would have been 30 different fabrics.  She has a huge stash of neat, new fabric so it's easy for her.)  Anyway, I decided to use any heart fabrics I had in my (older, mostly inherited) stash and to make the pattern with that.

Here is my quilt, semi-artfully displayed on a chair in our backyard.....!  

There are some memories sewn into this quilt.  


The white fabric with the large black polka dots (starts at the center and goes up to the right) were from a selection of fabrics I got when our (now almost 30 year old) son was an infant.  Like all new mothers, I had read how exposing the kiddos to high contrast helped developed their abilities.  Our baby ended up with a white paper plate with a black felt pen happy face in the side of his crib (as I got real since I really didn't have any idea how to sew a quilt and it was more fun to hold him anyway!)


The fabric with hearts and words (larger pieces start at the second row and goes down ending with the white heart, this fabric was also used in the smaller 4-patches) is a piece of fabric I got from my Aunt June - probably more than 15 years ago.  It was a design printed on the fabric to cut and make a sort of collar deal.  

In the bottom row is my first paper pieced attempt at a heart.  I was going to make my mom a jacket, but I could only share the sewn together pieces with her.  She felt the seams and appreciated the effort.  She was impressed even though she couldn't see very well.  That red in that heart was in the first set of fabric I ever bought to make a quilt.


Here is how I went about making the quilt:

First I went thru my fabric to pick the colors and patterns...


At first I was going to only use reds and pinks....


I started cutting to get a better idea of how things would look.  I was thinking of adding more colors.  Green and lilac were considered, but black and white became more appealing...

I started with the larger pieces and arranged them on the design wall. I decided to not use all the flower prints and instead went for more graphic fabrics.

I folded and pinned together the narrower stripes to audition how things could look...

Then I made the smaller 4-patches and added them to the design wall...

The piecing of the double 4-patch was challenging.  There were going to be many seams to match so I measured and trimmed if needed each time I got to a square!

The measuring helped.  I think all but one of the intersections is pretty perfect.  I was consistent with how I placed the fabrics when piecing and pressing the 4-patches, but when I put them next to the other blocks they got twisted so the ironing on the back is not consistent....


Ready now for the back.  I have not used fleece before so this seemed a good time to try it out!  My friend found 50" * 60" throws at CVS (3 for $10) and gave me one to use for my backing. 

I took a photo of the front, printed it and doodled to decide how to quilt the project...  (It turned out later that everyone in class did stitch in the ditch in a grid around the larger squares and called it done. But that quilting was right for their beautiful modern fabric and colored projects.)  I added a half row of blocks to the top to not waste the fleece, and added an additional line of quilting going from top to the right intersecting between the two smaller loops when I found that the batting required closer quilting... 

I thought this was going to be really difficult to quilt, but I just spray basted it to some polyester batting and used the walking foot (learning about using the walking foot this year with Leah Day).  The fleece turned out to be easy to quilt. I started and ended the quilting in the batting before I got to the top so didn't have many thread tie offs at all!  I really like the way the design makes the quilt a little puffy!  Click any of the photos to see the quilting!

The binding is my weak spot in the project.  I had hoped to finally be grown up and to hand stitch to the back.  But I decided I really wanted to finish the project in time for the blog hop...  So I cut 2.5 inch fabric on the bias, and joined the pieces together.  Sewed on the back side of the quilt with a .25 inch seam and to the front with a 3/8 inch seam.  This added an extra line of stitching that goes around the back near the edge of the binding.  Looks fine.  

I used these tips from Laura Ann Coila @SewVeryEasy https://www.youtube.com/watch?v=r8qzeOczXEo to help me apply the binding:
  • Minute 0:56 see how she preps the start of the joining part of the binding 
  • Start sewing it on on the bottom middle to distract the eye
  • Minute 4 Mark end of corner, learn foot measurement to help, 
  • Minute 5:23 stop then pinch the fabric at the end of the corner and bring up to the side just stitched.
  • Minute 6:10 use padded nail file or folded fabric to help placement of presser foot
  • Minute 8:08 how to end with her folded method of ending the binding
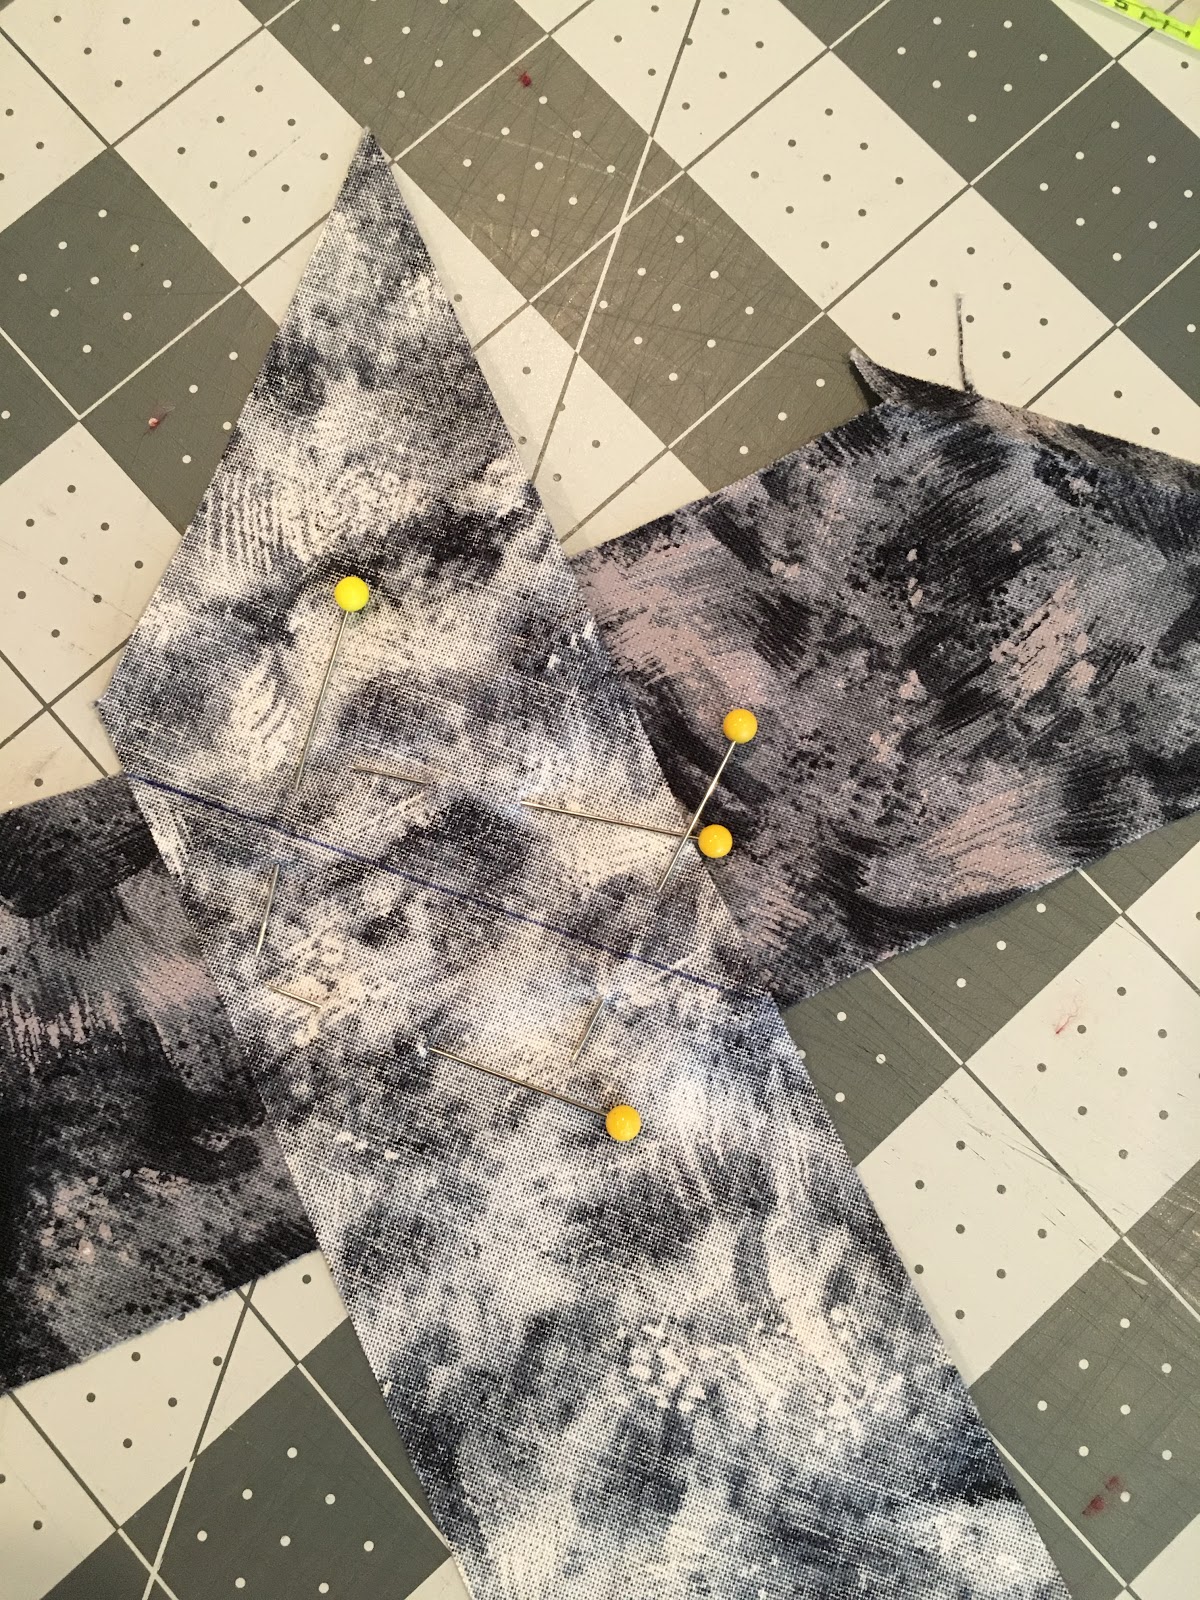
It ended up, I sort of did my cutting the way she describes here: https://www.youtube.com/watch?v=jXvLAHWbyXo except I did more work and cut my fabric into fat quarters first as I didn't notice the video until typing this! I tried making continuous bias strips but lost a portion of the fabric as the way I marked the lines was difficult to see and my cutting went wonky. In my next tries, I did not depend on the angles in the cut fabric to make the seams.  Instead I used a ruler to verify that the intersection was at 90 degrees, put a pin in, drew a line and added more pins. I chain pieced. With this extra effort all the binding fabric strips were usable and straight.

Our son helped me by taking the photos of the finished quilt, and tested the size by sitting with it on a chair.  Little Buffy and he approve, but we decided the quilt will be saved to give as a gift later on. You can really see the quilting in this photo...

I really enjoyed quilting this project and it has been so nice to see everyone else's interpretation of how to Put a Little Love in Your Quilt!

Thank you for coming by and visiting my blog.  Thank you to Carol for organizing the Put a Little Love in Your Quilt Blog Hop.

Please click on the names of the blogs below to visit the other lovely heart projects shared for the event and leave a happy comment!


February 7
QuiltQuest <-- You are here!
And if you missed the first two days.  

February 5

February 6


💕