Pages

Showing posts with label Log Cabin. Show all posts

Monday, April 12, 2021

Round Up Week 13: Another Log Cabin Variation (Pineapple Blocks) and Log Cabin Sampler Quilt from Elizabeth DeCroos at Epida Studios

 Time is passing so quickly.  It seems like it was just yesterday that I wrote the last update!

Sewing:

I made a second courthouse step block:


This time I really tried to be aware of the value instead of looking at the color - but the light blue in the center, compared to the other light strips in that direction is very dark. Ah well, back to the drawing board...

So at the beginning of last week I had these blocks in my log cabin exploration stack - from the free online eventbrite class "More Quilts - Log Cabins and Power Strips". 

This week we were on to pineapple blocks. I made a few variations of this block for the Block Lotto in 2011 - Sophie always had a great way of describing the colors to use to make the blocks look so lovely together.  I wish she were continuing with her block ideas.  

By making the logs so they are one inch after three rounds the block for my online class was supposed to be 10.5 inches. (Center block is 2.5 inches.) My block was 10 inches.


I added another round, and not trimming the outer addition, now it is 12 inches square.  According to the tutorial I found (Bella SKILLBuilder) I should add one more one inch log to finish at 10.5.

Again, I started with a light blue that is much darker than the rest of the fabrics in that location...  I have one more block to make.  Hopefully the block will look okay in the group of blocks I have already made. 


I found an online tutorial for making a 10.5 inch pineapple block with the same 2.5 inch center and 1 inch logs at:  https://youtu.be/jhDurpvOn9o
The entire quilt along info here:  https://blog.fatquartershop.com/bella-skill-builder/
This method makes use of the speciality ruler for making pineapple blocks.  Pretty neat, but I don't think I'll be making many pineapples...  The directions are very nice as they include what the measurements should be after a round is added.  Also, the cutting instructions make it easy to figure out what to do! 
Here sort of is the cutting information:
Center 2.5 inch
First round make with 4-2 x 4.5 and trim to 3.25
Second round make with 4-2 x 4.5 and trim to 4.5
Third round make with 2-2 x 4.5 and 2-2 x 6.5 and trim to 5.25
Fourth round make with 4-2 x 6.5 and trim to 6.5
Fifth round make with 4-2 x 6.5 and trim to 7.5
Sixth round make with 4- 2 x 4.5 and trim to 8.5
Seventh round make with 4-2 x 6.5 and trim to 9.25
Eighth round make with 4- 2 x 4.5 and trim to 10.5
Oops I forgot for each round also have to add the corners or maybe the information I typed includes the corners.  I'm not sure. 
So also at the end add 4-2 x 4.5 to the corners and trim to 10.5
Need to watch the video again to count things up correctly.

This site does a good job of explaining the dark and light corners using paper piecing patterns - https://www.generations-quilt-patterns.com/pineapple-quilt-patterns.html

This pineapple has the same color for the center and the outer corners and stresses the need for contrasting values:
She also shows a different way for the first round than I have seen before. 

Added 4-13-2021: I'm thinking perhaps of making a pineapple instead of the wreath block for the block exchange I mistakenly signed up for.  I need to make 20 blocks that measure at least 9 1/2 inches - unfinished.  They must include some of the focus fabric.  (I have a half yard of the focus fabric.)  I thought the math for the Bella SKILLBuilder would save me, but it ends with a round at 9.25.  Perhaps if I started with a larger center block I would be okay?  Doing this block I could just use the fabric I have for different greens and whites and just have the red for the center and corner...  Perhaps I will know for the next Round Up post here....  : )


New-to-me Blog to Follow:

I did find a beautiful Log Cabin Sampler Quilt (doesn't look like a sampler!) from Elizabeth DeCroos at Epida Studio:


This sampler quilt has these Log Cabin block variations (click to go to her site):
  1. Getting Ready for the Log Cabin Sampler.  The blocks are 9″ square,  49 blocks total square.  Quilt will be 63" square.
  2. Corner Block  Make 11 blocks (five with a light square and six with a dark square)
  3. Bento Block Make 3 blocks
  4. Court House Steps Make 3 blocks
  5. Traditional Log Cabin Make 9 blocks
  6. Greek Keys Make 3 blocks
  7. Off Set Cabin Make 7 blocks
  8. Star Cabin Make 6 blocks
  9. Cornerstone Log Cabin Make 7 blocks
  10. Finishing it up
  11. Sampler Quilting Options
The directions for each block and information for the quilt are all generously available for free on the Epida Studios website.  

Elizabeth DeCroos's directions are very clear - so nicely arranged, I really like the way this quilt shows off the different styles of log cabin in a non-symmetrical way.  She also made the quilt with red and white and red, white and green.


So that's it for the sewing part of this entry.

=======

As I mentioned at the start, this week went by very quickly.  I did my three times a week phone chat walk with my friend, and I did five hours of exercise with my personal trainer.  Beyond that I think it was spent taking care of our little dog, planning and preparing meals.  Some reading.  I found a book I had purchased years ago - a novel about life in Taiwan "An Orphan of Asia".  

Hopefully, next week I will have more to write about.

And have the energy required to write!

My son and I made cookies and brownies this week!


Ah, I'm reminded of an article, I think in the Washington Post, about behaviors that we should continue with even after everyone is vaccinated and the threat from Covid is over.  I can't find the article again now...  But one of the behaviors was Cooking WITH YOUR FAMILY.  That sounded wonderful.  I guess my family does cook with me, but not on a consistent basis...

Too tired to write more now.

=======

4-13-21  I add the links to the sites with information on how to make the log cabin sampler quilt, another photo of the log cabin sampler, and more information about the Bella SKILLBuilder pineapple quilt.  And a note added about the Christmas block exchange....


Tuesday, June 25, 2019

Finish: BlockLotto Baby Quilt Grows Up!

My friend and I put together nine of the Block Lotto blocks I won back in 2010 to make a baby quilt for her new granddaughter in 2015. This year the daughter returned the quilt and requested that it be made larger since the baby was larger now. She didn't want a new quilt, she wanted this one enlarged.
My friend's first quilt - 2015

So how was this going to get done?  I sent my friend some fabric and more of the blocks to help her get started.

She decided to start by making another quilt the same size!  She even put binding on the quilt!

My friend's second log cabin - 2019
So when I came for my visit we had two quilts the same size that needed to be combined.  She did not want to remove the binding.  The idea of sewing strips to the sides to join the pieces was unappealing to her.  So I suggested trying to zig zag them together.  Last Road to California, I had watched a demo by Pauline on how she joined quilt pieces to finish the projects up...  Since our pieces had binding we had to adapt the method.

My friend zig zagged the two quilts before I came for my visit.  It actually looked pretty good.  But we decided to finish it off nicely with strips to cover the zig zagging.

We made strips of fabric.  Wider for the front.  They were folded in half, then the ends were brought up to meet at the center.    So the resulting strips had folded edges, and were all two layers deep.  These were starched and then sewn to cover the joining of the two pieces.  We sewed the back side first.  Then the wider strip was sewn to the front.  Each strip was sewn down on both sides.

     
If you do this I suggest sewing the left side first - it would be easier then to pull the fabric flat while sewing.  I seem to only have taken a photo of the first seam when it was done with the initial sewing on the right side - don't do what is shown in the photo above! Look below for a better sequence.

After the two quilts were joined we made borders and added them using the same method.

     
In the photos above, you can see we sewed initially the left side and then the right side - this was the best way to do add the strips, then it was easy to pull the pieces flat.  My friend used a walking foot to make the design on the borders.

  
We pinned the pieces together before we sewed, but did not measure until we were trimming things up.  Each time we could see more and more ripples appearing in the project.


But we liked the way the stitches were showing up and how easy it was to join the larger quilted pieces together....

Her little dog liked the larger quilt too!

When we added the shorter top and bottom borders we could see that we needed to be sure the pieces were pinned on so things were centered, then the waves did not appear.  So that is a step to be sure to add if you try this method!

We were not consistent with the size of the strips, started out with half inch on back and 2 inches on front. We used Clover bias tape makers at first, then decided we wanted different widths.  It was pretty easy to just press and get things set up without the Clover tools.

We sewed the binding on and took some close ups of the corners...

For the binding we trimmed so the batting extended about 1/8 or maybe it was 1/4 inch from the quilt.  The strips were cut 3 inches.  We adjusted the seam width so it was sewn on around 3/8 inch so the front and back were pretty even.


You can see the fold in the one strip, that was the one sewn right side, then left side mentioned above.  In the end that fold washed out, but it bothered me once I noticed it.

Here is how it looked before it was washed...

And here is how it looks after being washed!  The ripples pretty much disappeared!  (Usually I give my quilts unwashed to charities so it was nice to see how it looked after being washed.)


It is easy to the original quilt size on the back of the quilt.  Enlarged now so it covers the top of a twin mattress!

Here I tried to get an artistic shot of the quilt on a chair...

I'm sure her daughter and granddaughter are enjoying the enlarged quilt, and it will be used for many more years now!

This was a fun challenge.  So lucky I got to share in the adventure with my friend.  This method of joining quilted pieces is very easy, the results were very nice. I recommend giving it a try!

Amazingly, I still have more BlockLotto blocks to play with!

Thursday, March 14, 2019

WIPs in Progress: String Log Cabins, Red Charity, and Baby Gifts and Just Get It Done Winner!

Well, I have been busy.  But nothing is complete, yet...

I made more of the strings that will surround the UANDUQAL wonky log cabin with strings quilt.  Was all set to finalize the placement of the blocks, and then received an invitation to a baby shower of a friend's daughter second baby.  I wasn't able to attend the first shower a few years ago when I came down with the shingles (diagnosed when I went to the doctor to receive the shingles shot!).  I never finished that quilt and instead gave her a little gift meant to be a place saver until I finished the quilt.  I reread my notes and see that I used the wrong colors in the blocks I was putting together (but having trouble cutting the final square correctly so the seams would line up).

Here are the blocks I have completed for the wonky log cabin with strings. The log cabins  are placed on top of each  other since my design wall wouldn't hold them all.  Project UANDUQAL.

Here is the link to the post about the original baby quilt.  Notice in the words I say she requested (black, grey and if I had to use another color maybe some purple).   I'm not sure how I converted that to black white, and navy blue.  https://quiltquest.blogspot.com/2017/03/wip-baby-quilt-based-on-allpeoplequilts.html  But since I couldn't get the seams to line up I will save these strips and partially completed blocks for another project, another time.  The Wonky Log Cabin with Strings would almost be the correct colors, but the green and the blue knock it off in the running for the now three year old...

I want to have a quilt for both children for the baby shower on March 23rd.

I'm now thinking of finishing the purple, and black Cultural Fusion Windmill for the first child.
https://quiltquest.blogspot.com/2016/03/omg-march-2016-quilting-cultural-fusion.html
To finish it I just need to square it up and apply the binding.  Would be nice to make a pillow cover too.  I was going to send this to my Swedish friend, but since she doesn't know that was my plan I can make another one for her...  I see in my blog notes I saw a problem with the way I did the quilting as the outer lines will be covered by the binding.  Oh dear.

Then for the new baby (a girl) I may either combine my Liberated Floating Yellow Triangle Quilt:
https://quiltquest.blogspot.com/2016/07/a-variety-of-liberated-floating-yellow.html  This would be pretty easy to put together, but I'm unsure if the mom would like all the yellow and white...  Easy but since I'd have to continue inventing the directions it would be time consuming...

Perhaps better yet, use my newly won fabric from Karen at Just Get It Done Quilts (Blog) that I forgot to write about) and make either a square on point quilt or the Moda So Simple pattern.


The beautiful fabric that I won in a random drawing from Karen Brown is amazing!  30 fat quarters!  In her note she said she hoped I would use it in my next project...


I only need 12 fat quarters for the So Simple pattern though so I'm unsure which to use....  I didn't ask The new mother this time what colors she would like as there is a baby registry where I can see what colors she is liking now...  The fabric Karen sent me match all the colors I think!
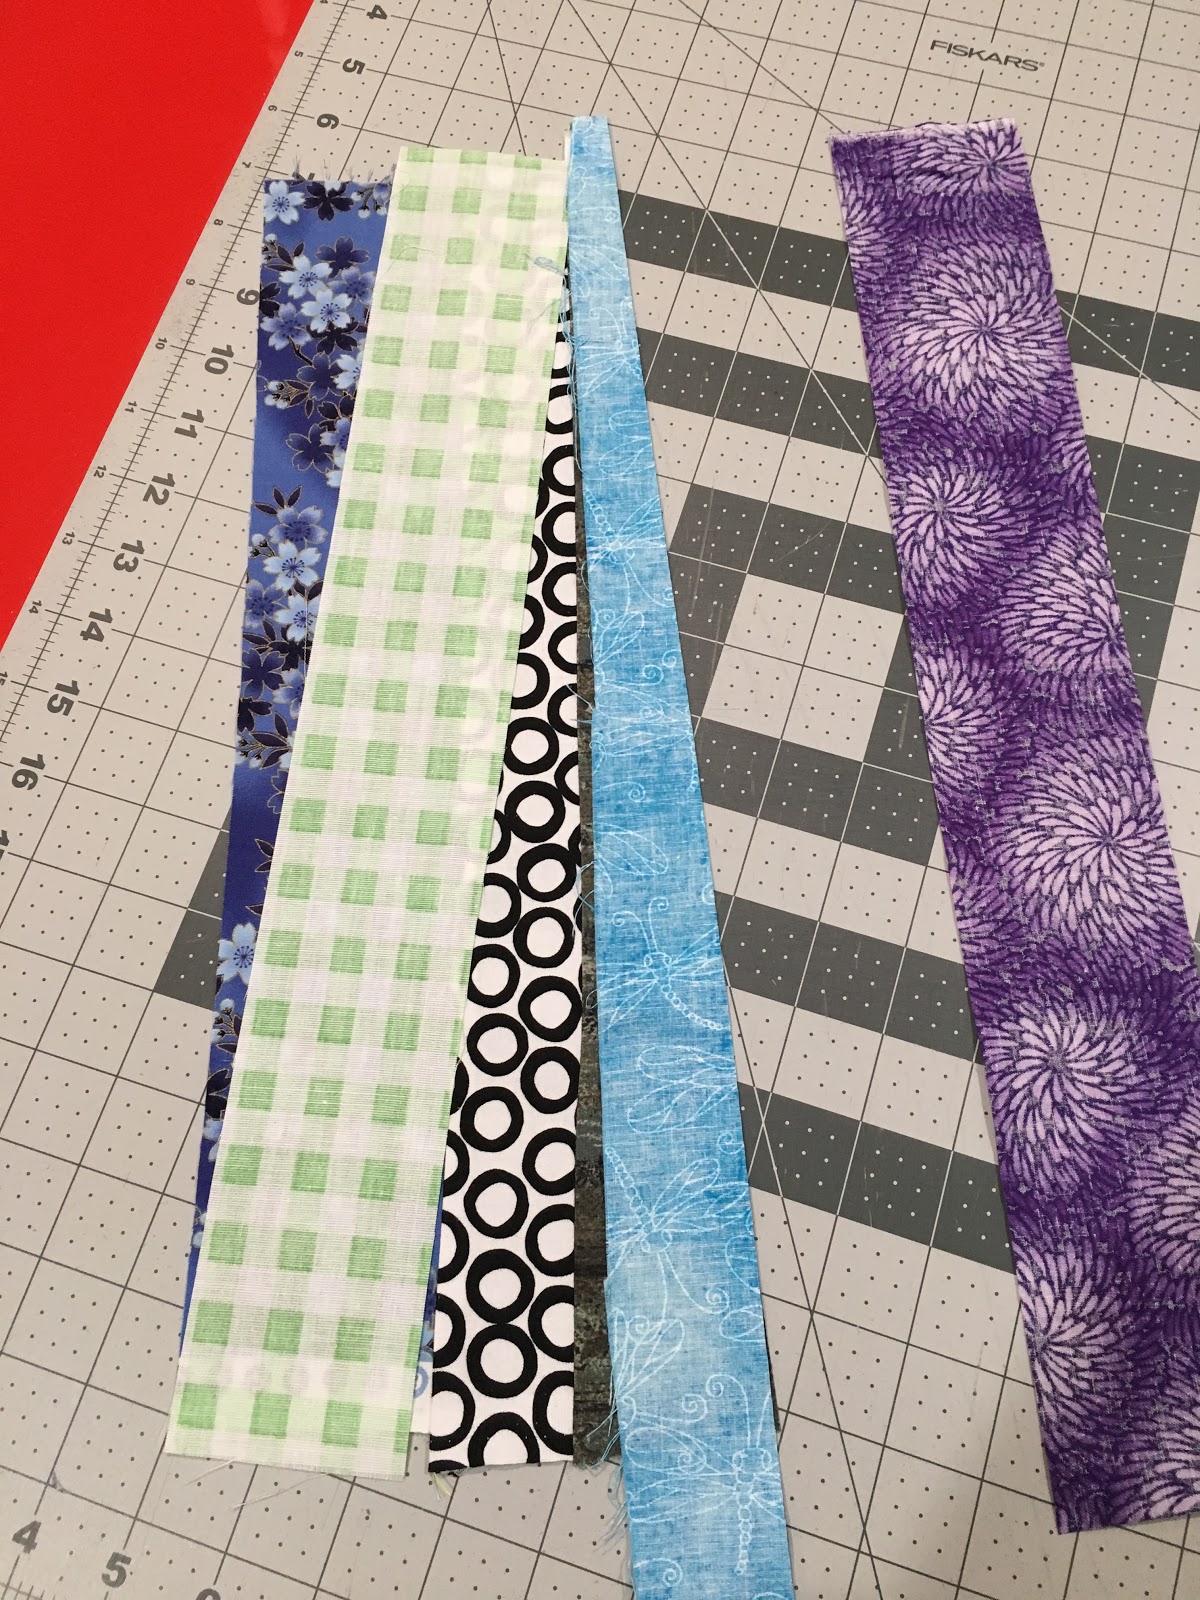
Not able to come to any decisions on anything,  I have distracted myself with starting a square on point charity quilt...  Testing this will let me know whether it would be a good pattern to make for the baby girl.

Here are the directions I am doing for this quilt.

Cut squares (my long ruler is 6 x 24 so I cut 6 inch squares).  In doing some rough math since I wanted the quilt to finish at around 42 inches square with out any additional border fabric, I needed 72 squares.

I decided to arrange my squares so when finished there would be an outer border of all the same fabric.  So I needed 12 squares of one fabric, and then 60 squares of a combination of fabric.


Originally I was going to divide my fabrics into darks and lights, but then I added some middle shades and ones that were different as they had large designs.  I just added them in but by by coding them as light or dark the six inch seams never joined with the same fabric.  Once the two squares are together then I will cut each on the diagonal and sew together to get my top.

To work on where the squares would end up I put the pieces of fabric on my bed top:
I decided to try not to stress about it and just be happy if it ended up that two of the same fabric would not have a long seam next to another...

Here is what I have after my first sewing session...


So I have been busy, but nothing is completed.

Do make sure to check out Just Get it Done Quilts! 

Sunday, February 17, 2019

New Project: UANDUQAL

UANDUQAL

Last December Sujata shared an idea for a non-structured quilt along. Using the quilts in the book: Unconventional and Unexpected Quilts by Roderick Kiracofe we will pick a quilt to interpret a project.


From Sujata's Blog: The Root Connection: RED

Here are some  "No Rules" of this U&U Quilt-Along


  • They do not need to be wonky if  you like to stitch in the straight line. 
  • There are no deadlines.
  • I will be sharing some loose directions but you Do Not need to follow my guidelines. You are more than encouraged to go your own way. 
  • Remember that possibilities are endless and you Do Not need to repeat the colors or pattern exactly like it is in the book.  
  • When you post the progress pictures as well as finished quilts on Instagram, use #U&UQA  

Sujata has written about the quilt she is starting with:
https://therootconnection.blogspot.com/2019/01/u-and-u-qal-january-2019.html

It is beautiful.  Such fun to see how she decided to make the pieces and how they are going to fit together.  If you go to her site you will see she made some changes in her initial  plan, and has by using mainly repurposed shirts had a terrific start (of course) to getting her project together.

I was drawn to try this quilt too, but then after reading the first few chapters of the book realized I could get a jump start if I picked a different quilt.  So I am going to use the Block Lotto wonky log cabin blocks that I won for the center and make the log cabin quilt that is on page 54 of Unconventional and Unexpected Quilts


My blocks were made using blue, green, purple, black and white - the directions are still posted at:
http://blocklotto.blogspot.com/2010/03/scrap-strips-for-log-cabin-quilt-with.html
(Anyone making the blocks should remember that the edges of the blocks should have space without a seam so the colors are not lost when they are joined.  I'm going to try to just leave the pieces the way I received them, but will add fabric if any is needed to bring the block to a full 9.5 inches.)

I pulled out most of my fabric in these colors so they are handy to make the surrounding blocks.  (Aside: I shared some of the blocks with a friend. She and I made a baby quilt for her granddaughter.  Now her daughter would like her to make the quilt larger so she needed more blocks and fabric to add on!)  I cut a lot of mostly 2.5 inch strips as they would be a good starting size to deal with don't you think?


I also cut some 12.5 squares of fabric so she would have more flexibility when making her blocks.

As I was cutting I took the odd widths for myself and when there were several cut of the same fabric I split those so I have a large stack in these colors for myself.

So here you can start to see the blocks.  I can only get three across on my counter top, but the final quilt will be made I think so the inner log cabin section will have 20 blocks (4 x 5).  The original quilt on page 54 has 24 log cabin blocks (4 x 6).

At the beginning and ending of each row and column there will be wonky string blocks made of fabrics in the same colors as the log cabins.  These blocks will be the same size as the log cabin blocks (9.5 inches).  Making the first border blocks I started with width of fabric pieces, but now I am using strips that are around 11 inches long.  The four corners will have the strings oriented so they radiate out from the corner so those strings will be around 17 inches and then trimmed down to 9.5 inch square too.

I will need 4 corner border string blocks and 18 or 20* edge border string blocks. (* depending on the number of columns and rows of log cabin blocks in the quilt)


When I was first making the border blocks I laid the new fabric so it was on an angle on the already joined fabric and just arranged where the fabric went as I sewed the seam.  (Then I had to fiddle with the fabric and go back and trim the seams down to .25 inch.)  Now I'm trimming the fabric at an angle so I have a straight edge to sew the new fabric on.


Here is my first set of 17 inch long strips.


Blue/green: At first I would lay the new fabric on the fabric, sew and trim.  (It was tricky to do the trimming when I sewed in this order, so I do not recommend doing this!)
Moss/purple: Now I'm trimming the larger fabric and then just place the new strip down and sew.  Only trimming after the new pieces are joined/pressed and ready to add another strip.  If I am careful I will end up being able to use the trimmed fabric in another block.


Moss/turquoise: I will also test trimming both pieces before joining them.


In the book the strips for the border blocks are made up of strips of different widths.  Some are sewn straight, while others are at an angle.  The corner pieces were set so all the pieces radiated out so I will experiment with that too.

Tips:

I cut most of my strips with a regular straight edge ruler, but at my Saturday group used a
June Tailor Shape Cut 12''x12'' Slotted Ruler. Wow! This made the strip cutting go so much quicker. I just needed to be sure to smooth the fabric and place the fold on the zero line.  Full price this is around $30.  

The Saturday group has pieces of PVC pipe cut to raise the height of the cutting table - what a back saver!  My table doesn't have curved legs though so I'm going to get some furniture lifters.  Home Depot has some that will work and raise the table 8 inches for around $15.  Ideally I think the cutting table should be even taller, but 8 inches is the tallest I could find when I searched online.

All my fabric has been washed.  I was using spray starch to make the fabric easier to cut, but am now experimenting with simply putting some corn starch in a spray bottle with water.  I need to work on the measurements, but this so far is working well. (Sorry, can't remember where I got the idea to do this.)  I put around 1 tablespoon corn starch to 1 cup of water in a spray bottle - just shake to combine.