Pages

Showing posts with label BlockLotto. Show all posts

Tuesday, June 25, 2019

Finish: BlockLotto Baby Quilt Grows Up!

My friend and I put together nine of the Block Lotto blocks I won back in 2010 to make a baby quilt for her new granddaughter in 2015. This year the daughter returned the quilt and requested that it be made larger since the baby was larger now. She didn't want a new quilt, she wanted this one enlarged.
My friend's first quilt - 2015

So how was this going to get done?  I sent my friend some fabric and more of the blocks to help her get started.

She decided to start by making another quilt the same size!  She even put binding on the quilt!

My friend's second log cabin - 2019
So when I came for my visit we had two quilts the same size that needed to be combined.  She did not want to remove the binding.  The idea of sewing strips to the sides to join the pieces was unappealing to her.  So I suggested trying to zig zag them together.  Last Road to California, I had watched a demo by Pauline on how she joined quilt pieces to finish the projects up...  Since our pieces had binding we had to adapt the method.

My friend zig zagged the two quilts before I came for my visit.  It actually looked pretty good.  But we decided to finish it off nicely with strips to cover the zig zagging.

We made strips of fabric.  Wider for the front.  They were folded in half, then the ends were brought up to meet at the center.    So the resulting strips had folded edges, and were all two layers deep.  These were starched and then sewn to cover the joining of the two pieces.  We sewed the back side first.  Then the wider strip was sewn to the front.  Each strip was sewn down on both sides.

     
If you do this I suggest sewing the left side first - it would be easier then to pull the fabric flat while sewing.  I seem to only have taken a photo of the first seam when it was done with the initial sewing on the right side - don't do what is shown in the photo above! Look below for a better sequence.

After the two quilts were joined we made borders and added them using the same method.

     
In the photos above, you can see we sewed initially the left side and then the right side - this was the best way to do add the strips, then it was easy to pull the pieces flat.  My friend used a walking foot to make the design on the borders.

  
We pinned the pieces together before we sewed, but did not measure until we were trimming things up.  Each time we could see more and more ripples appearing in the project.


But we liked the way the stitches were showing up and how easy it was to join the larger quilted pieces together....

Her little dog liked the larger quilt too!

When we added the shorter top and bottom borders we could see that we needed to be sure the pieces were pinned on so things were centered, then the waves did not appear.  So that is a step to be sure to add if you try this method!

We were not consistent with the size of the strips, started out with half inch on back and 2 inches on front. We used Clover bias tape makers at first, then decided we wanted different widths.  It was pretty easy to just press and get things set up without the Clover tools.

We sewed the binding on and took some close ups of the corners...

For the binding we trimmed so the batting extended about 1/8 or maybe it was 1/4 inch from the quilt.  The strips were cut 3 inches.  We adjusted the seam width so it was sewn on around 3/8 inch so the front and back were pretty even.


You can see the fold in the one strip, that was the one sewn right side, then left side mentioned above.  In the end that fold washed out, but it bothered me once I noticed it.

Here is how it looked before it was washed...

And here is how it looks after being washed!  The ripples pretty much disappeared!  (Usually I give my quilts unwashed to charities so it was nice to see how it looked after being washed.)


It is easy to the original quilt size on the back of the quilt.  Enlarged now so it covers the top of a twin mattress!

Here I tried to get an artistic shot of the quilt on a chair...

I'm sure her daughter and granddaughter are enjoying the enlarged quilt, and it will be used for many more years now!

This was a fun challenge.  So lucky I got to share in the adventure with my friend.  This method of joining quilted pieces is very easy, the results were very nice. I recommend giving it a try!

Amazingly, I still have more BlockLotto blocks to play with!

Sunday, February 17, 2019

New Project: UANDUQAL

UANDUQAL

Last December Sujata shared an idea for a non-structured quilt along. Using the quilts in the book: Unconventional and Unexpected Quilts by Roderick Kiracofe we will pick a quilt to interpret a project.


From Sujata's Blog: The Root Connection: RED

Here are some  "No Rules" of this U&U Quilt-Along


  • They do not need to be wonky if  you like to stitch in the straight line. 
  • There are no deadlines.
  • I will be sharing some loose directions but you Do Not need to follow my guidelines. You are more than encouraged to go your own way. 
  • Remember that possibilities are endless and you Do Not need to repeat the colors or pattern exactly like it is in the book.  
  • When you post the progress pictures as well as finished quilts on Instagram, use #U&UQA  

Sujata has written about the quilt she is starting with:
https://therootconnection.blogspot.com/2019/01/u-and-u-qal-january-2019.html

It is beautiful.  Such fun to see how she decided to make the pieces and how they are going to fit together.  If you go to her site you will see she made some changes in her initial  plan, and has by using mainly repurposed shirts had a terrific start (of course) to getting her project together.

I was drawn to try this quilt too, but then after reading the first few chapters of the book realized I could get a jump start if I picked a different quilt.  So I am going to use the Block Lotto wonky log cabin blocks that I won for the center and make the log cabin quilt that is on page 54 of Unconventional and Unexpected Quilts


My blocks were made using blue, green, purple, black and white - the directions are still posted at:
http://blocklotto.blogspot.com/2010/03/scrap-strips-for-log-cabin-quilt-with.html
(Anyone making the blocks should remember that the edges of the blocks should have space without a seam so the colors are not lost when they are joined.  I'm going to try to just leave the pieces the way I received them, but will add fabric if any is needed to bring the block to a full 9.5 inches.)

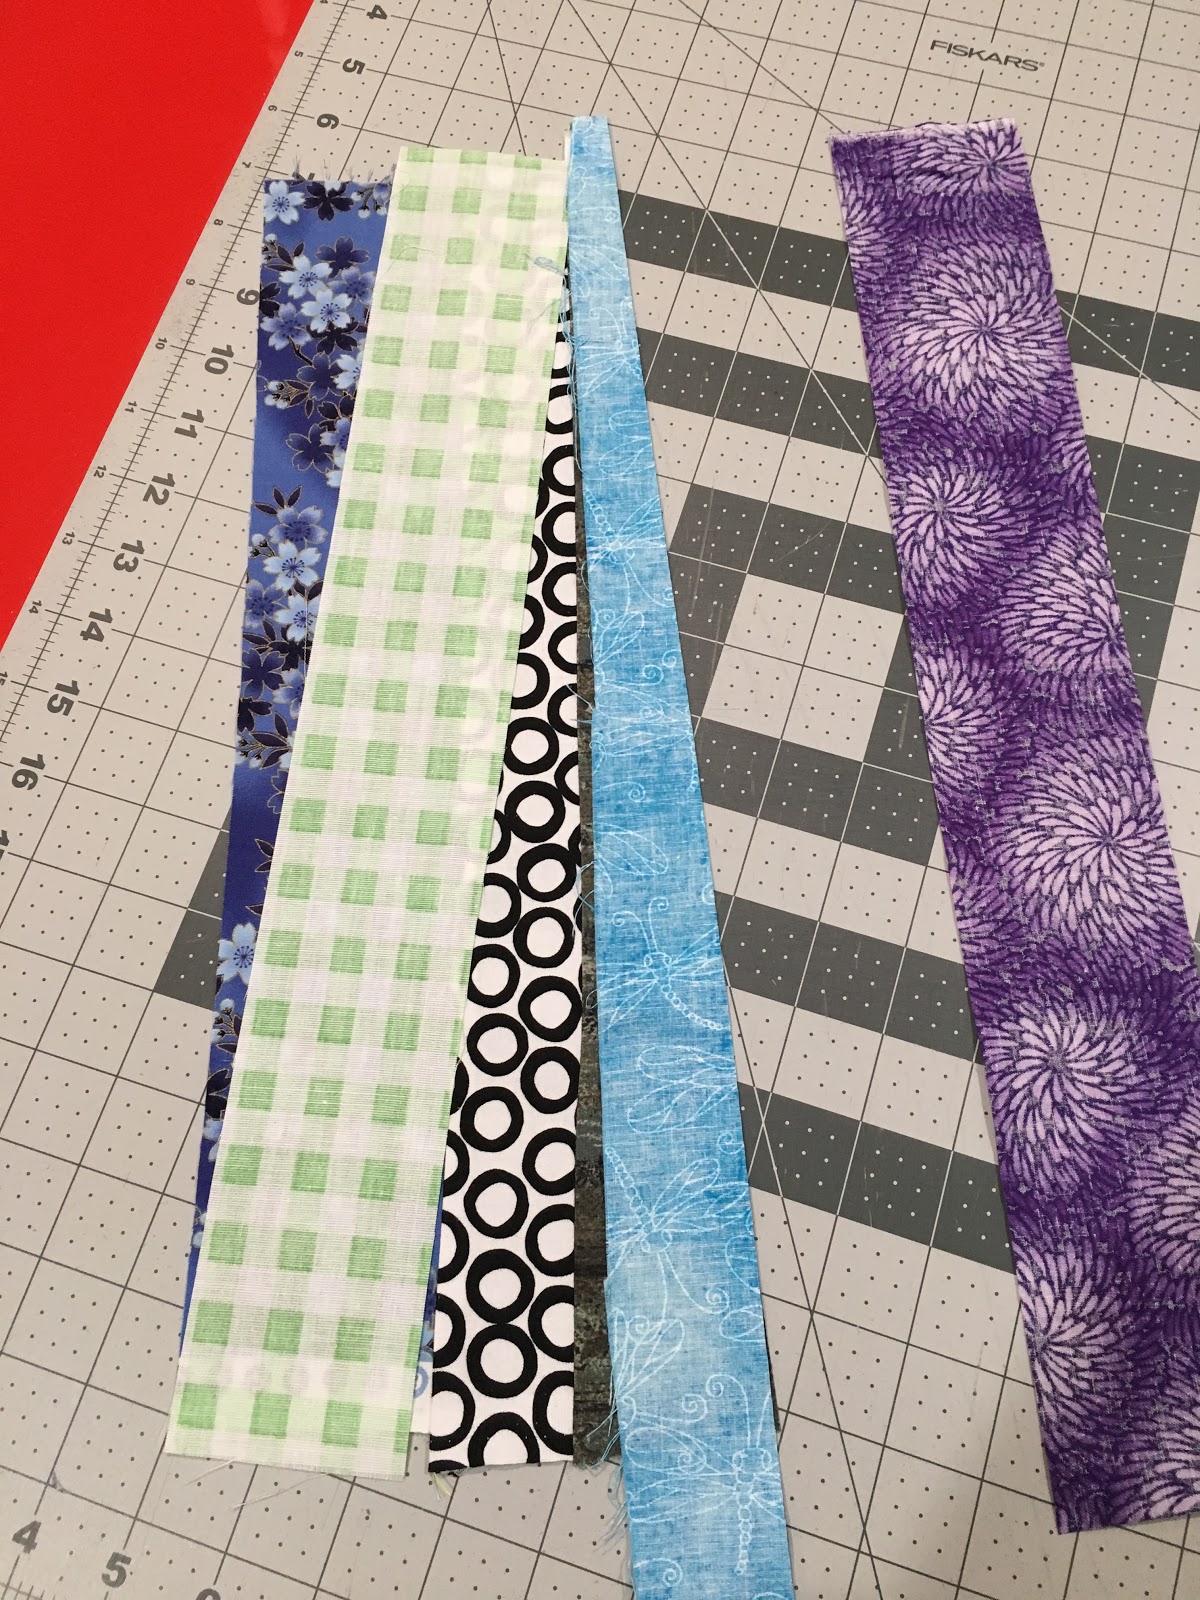
I pulled out most of my fabric in these colors so they are handy to make the surrounding blocks.  (Aside: I shared some of the blocks with a friend. She and I made a baby quilt for her granddaughter.  Now her daughter would like her to make the quilt larger so she needed more blocks and fabric to add on!)  I cut a lot of mostly 2.5 inch strips as they would be a good starting size to deal with don't you think?


I also cut some 12.5 squares of fabric so she would have more flexibility when making her blocks.

As I was cutting I took the odd widths for myself and when there were several cut of the same fabric I split those so I have a large stack in these colors for myself.

So here you can start to see the blocks.  I can only get three across on my counter top, but the final quilt will be made I think so the inner log cabin section will have 20 blocks (4 x 5).  The original quilt on page 54 has 24 log cabin blocks (4 x 6).

At the beginning and ending of each row and column there will be wonky string blocks made of fabrics in the same colors as the log cabins.  These blocks will be the same size as the log cabin blocks (9.5 inches).  Making the first border blocks I started with width of fabric pieces, but now I am using strips that are around 11 inches long.  The four corners will have the strings oriented so they radiate out from the corner so those strings will be around 17 inches and then trimmed down to 9.5 inch square too.

I will need 4 corner border string blocks and 18 or 20* edge border string blocks. (* depending on the number of columns and rows of log cabin blocks in the quilt)


When I was first making the border blocks I laid the new fabric so it was on an angle on the already joined fabric and just arranged where the fabric went as I sewed the seam.  (Then I had to fiddle with the fabric and go back and trim the seams down to .25 inch.)  Now I'm trimming the fabric at an angle so I have a straight edge to sew the new fabric on.


Here is my first set of 17 inch long strips.


Blue/green: At first I would lay the new fabric on the fabric, sew and trim.  (It was tricky to do the trimming when I sewed in this order, so I do not recommend doing this!)
Moss/purple: Now I'm trimming the larger fabric and then just place the new strip down and sew.  Only trimming after the new pieces are joined/pressed and ready to add another strip.  If I am careful I will end up being able to use the trimmed fabric in another block.


Moss/turquoise: I will also test trimming both pieces before joining them.


In the book the strips for the border blocks are made up of strips of different widths.  Some are sewn straight, while others are at an angle.  The corner pieces were set so all the pieces radiated out so I will experiment with that too.

Tips:

I cut most of my strips with a regular straight edge ruler, but at my Saturday group used a
June Tailor Shape Cut 12''x12'' Slotted Ruler. Wow! This made the strip cutting go so much quicker. I just needed to be sure to smooth the fabric and place the fold on the zero line.  Full price this is around $30.  

The Saturday group has pieces of PVC pipe cut to raise the height of the cutting table - what a back saver!  My table doesn't have curved legs though so I'm going to get some furniture lifters.  Home Depot has some that will work and raise the table 8 inches for around $15.  Ideally I think the cutting table should be even taller, but 8 inches is the tallest I could find when I searched online.

All my fabric has been washed.  I was using spray starch to make the fabric easier to cut, but am now experimenting with simply putting some corn starch in a spray bottle with water.  I need to work on the measurements, but this so far is working well. (Sorry, can't remember where I got the idea to do this.)  I put around 1 tablespoon corn starch to 1 cup of water in a spray bottle - just shake to combine. 


Saturday, January 19, 2019

Was Menu for Block Lotto Posts

This is the blog that really got me to get the sewing machine out of its resting area - and back in to use!

Sophie has been hosting this lotto since 2002.  Each month she posts clear directions to a different quilt block design.  We can accept the challenge to make up to nine blocks - or not.  For every block we earn one chance to win a selection of the blocks for that month.  This year the stars aligned and she is doing the blocks in Liberated Quilting style.  (Something I've become very interested in!)

So I have submitted blocks each month and have been very lucky as I have already won!  What fun to have blocks arriving here made by ladies around the world!

Here is a link to the posts where I post my entries for the monthly BlockLotto: (shows the most current post first) http://quiltquest.blogspot.com/search/label/BlockLotto

When there is a photo, double click to see the enlarged view.

Here is the link back to the blog that inspires me:    http://blocklotto.com 
Pre-Feb-2012Site: http://blocklotto.blogspot.com/

Sunday, November 1, 2015

QFK Green Quilt Finished and Baby Quilt with Block Lotto Winnings Finished too!

I finally finished the green Quilts For Kids (started Jan 2015) project last summer.  I brought it with me to the east coast and used it to help my friend make a quilt for her granddaughter.

We only had the regular walking foot for the machine so were only able to do straight stitching.  I was disappointed to not be able to introduce her to FMQing, but it was very freeing also to just do the stitch in the ditch and to get the projects done!

First went around each block.  Goofed in one place near the middle so just added another line so the quilting was symmetrical.  Then went around the borders.

When it was time to do the borders realized:
1.  I didn't have enough pins with me to pin the bindings the way I have done in the past, and also didn't have any glue or snapping pins to keep the border in place.
2.  There was extra batting and fabric all around the quilt.

So instead of trimming the batting even with the top and wasting the batting, we cut the batting so it was even on all sides (but sticking out about an inch) and trimmed the background so it was even and would cover the new batting plus about inch so the edge could be finished.

Then we just folded and sewed, pinning on side down at a time.  I did the top then the sides - but now I'm not sure that is the correct order.

The binding then added two inches to the size of the quilt and looked like another border instead of binding.

The wider binding made it very simple to finish this quilt and I think I will just do it for all my charity quilts. Then it will mean I can finish them so they can be donated and used!

As a lesson I showed her how to do a step with my green quilt, and she then did the sewing on her baby quilt.

We'd prefer more quilting, but sometimes it's better to just get something done...

If you look closely you can see the extra lines that do not follow the outline of the blocks.
Much easier to see the extra lines here, but they just look like a design pattern.  Not a mistake!
Wider binding added to the size of the project, followed the design in the borders, and was so easy to do!
A finish!
I brought blocks I had won in the Block Lotto and my friend
picked some to put in her daughter's baby quilt.

She sewed nine blocks together, then added two
borders.

We folded the backing over and extended the
size by trimming the batting so it was
about 1 inch wider on all four sides.
Machine sewed the binding and project was done!

A finish!  Here is where I wrote about the Block Lotto blocks... 

Created with the HTML Table Generator

Thursday, May 31, 2012

BlockLotto - May 2012 - Liberated Slash Star

Directions: http://www.blocklotto.com/2012/05/lets-get-liberated-in-may-with-5-pointed-stars/

Technique: http://www.equilters.com/library/techniques/slashstars1.html

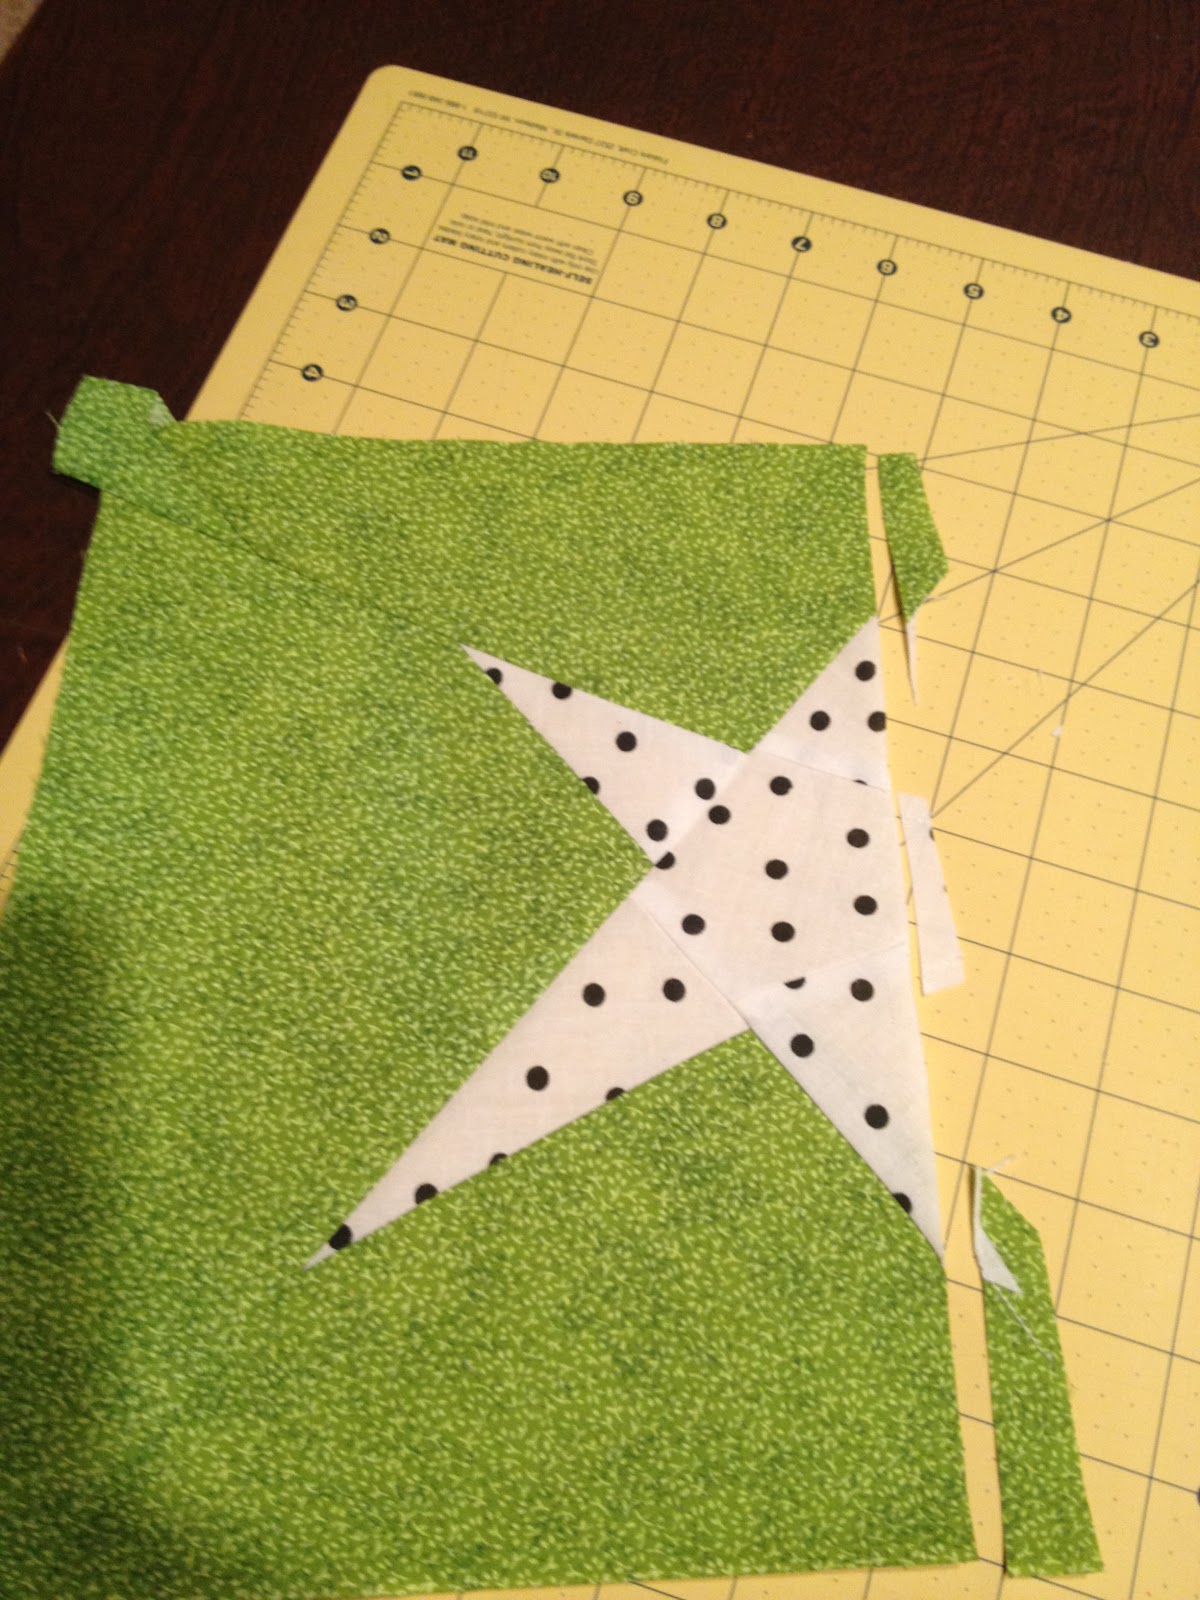
My first try at this I goofed with the cutting.  I remembered that the points needed to be away from the sides so they would not be lost, but cut it so all the lines went side to side (resulting in extra little triangle pieces).

After looking at the technique pages again and more closely I figured out how to proceed with making a few of the blocks...
Additional notes to help with the block.
Showing trimming seam


Here are my first two blocks!  I included the trimmed fabric just to show how much is trimmed away.  I started with 13 inch squares - ended with 9.5 inch squares.


I went ahead and finished the green stars - it looks great - and there is no extra seams in the corners.  These were cut with out lifting the fabric so there are little triangles at the end of each point.  At first I thought I had really made a mistake and would have to trash the fabric - but I'm glad I kept it as I was able to get two more 9.5 inch blocks!  Notice that the green blocks did not have as much trimmed away - but there were more seams to sew...  I might put the green stars in the project I'm still working on after the Marston/Moran workshop....  (I only need one green star I think, wrote to see if the other one could be in the drawing but didn't get a reply, so I'll use it myself somewhere!)

Four stars front
Four stars back - not green has more seams.


Posted on Block Lotto at: http://www.blocklotto.com/2012/05/may-2012-2-slash-hearts-by-june-d/

Sunday, January 8, 2012

BlockLotto - January 2012 - Eclipse

Here is my first January 2012 Blocklotto block.

Directions are here:
http://www.blocklotto.blogspot.com/2011/12/are-you-ready-for-little-challenge.html

Examples are here:
http://www.blocklotto.blogspot.com/search/label/eclipse

The templates are sized for a 9.5 unfinished block.  Template C is really what is cut out of the larger 9.5 inch square.  Luckily the way I had place the template on my fabric and cut things (starting with C and then cutting B and A) I saw that before officially messing up!

Sophie found and picked out the block, Kristin resized the templates so we really didn't have to think when cutting things out.

The angle in this photo is odd - but shows where the seams are.  The background in the strip is mainly pink and does a nice job of picking up the background and supporting colors in the bigger pieces of fabric.  I will try to sew at least a few more later in the month but wanted to post at least one so I get the sneak peek for the next month's block.

All the blocks this year are going to be 9.5 unfinished, so in theory someone could easily make themselves a sampler quilt..... nice idea.

I made another block just to be sure everything lined up correctly!  I used the same light pink for the rings.  The directions say we can repeat fabric up to three times (in up to nine blocks) but have to have different combinations of fabric.

Monday, October 31, 2011

BlockLotto - October

I was so busy with my organization's conference that I missed October's challenge.


October Directions:
http://blocklotto.blogspot.com/2011/10/you-chose-colorway-now-choose-block.html

Examples:
http://blocklotto.blogspot.com/search/label/Oct%202011%20photos

Thursday, September 29, 2011

BlockLotto -September 2011 - Curved Rails

These were incredibly quick to sew!  I think it took me longer to trim to 8.5 square than to sew.  Someday I'm going to find a 8.5 inch square ruler - that will help alot!

Directions are here:
http://blocklotto.blogspot.com/2011/09/curved-rails-in-batiks-for-september.html
Example photos are here:
http://blocklotto.blogspot.com/search/label/sep%202011%20photos

Sunday, July 17, 2011

BlockLotto - July 2011 - Liberated Checkerboard Pairs

Empty sewing room again - so I got two pieces of 10 inch fabric and made the BlockLotto challenge for July!

Directions:
http://blocklotto.blogspot.com/2011/07/liberated-checkerboard-pairs-in-july.html

Additional Tips:
http://blocklotto.blogspot.com/2011/07/tips-for-making-liberated-checkerboard.html

Examples:
http://blocklotto.blogspot.com/search/label/july%202011%20photos

I'm interested now in blocks that are made in pairs, and have suggested a few for Friday's Block Party recently. I think it would make a fun kids quilt to have one make of these kinds of blocks.  Sort of a pieced block I-Spy quilt.

Tuesday, May 3, 2011

BL-2011 May 2011 - Pineapple Blossom

 Here are my two blocks for May.

The guidelines are here:
http://blocklotto.blogspot.com/2011/05/mays-block-is-pineapple-blossom.html
The example blocks are here:
http://blocklotto.blogspot.com/search/label/May%202011%20photos

The directions said we needed to use white for the center part and the triangles - then we had to use 2 strips of yellow/gold and 2 strips of grey.  The remaining 4 strips could be any color.

But I think even looking at all the other blocks, when half the colors are random it didn't make any difference that we had grey and yellow in the other parts.  This will look like a scrappy quilt (except for the white in the center). 

Bet it will look great as part of a quilt - but when half the colors are random the look of the blocks will look like random colors are used.

Sunday, April 24, 2011

April 2011 BlockLotto: Modern Clover

If I were lucky enough to win the blocks I would use the on point setting idea from Lyn Brown.

Directions:   

Example Blocks:  
I had a lot of WOW collected for BlockLotto, but then Sophie threw me for a loop (or is it threw me a loop?)  and said cream was to be used for the background.  After going thru some boxes, I found the fabric I needed.  These were easy to put together.  I like the bolder (rather than light) colors for the flowers.  Would be nice to add a third fabric in the flower for a non-BlockLotto block.

The directions Sophie provided are so clear!  A long time ago I made some Eleanor Burns Tulips (so old she doesn't seem to carry the pattern now) where we folded pieces of fabric and sewed down each side to applique the stems on.  Sophie's way of cutting slightly smaller squares of background and then sewing them to the full size stem fabric is much slicker I think!


While I was sewing I started my small tumbler project as a leader and ender. I picked a color and matched it with some muslin - so I have 19 pairs of those sewn up too! It made it so nice to pick up a pair of those to sew when I was at the end of a doing a certain part of the modern clover blocks - it feels great to think I'm working toward a quilt instead of just using up scraps of material....


Tuesday, February 22, 2011

March BlockLotto: Disappearing Red and White Four-Patch

The directions are here:
http://blocklotto.blogspot.com/2011/03/red-white-disappearing-4-patch-for.html

Examples of blocks are here: http://blocklotto.blogspot.com/search/label/March%2011%20photos

Between today and yesterday I have seven blocks completed! I've done in three sets of cutting and sewing - taking less time to complete each block.  I think the secret is having the fabrics cut and ready.

Only five are for the BlockLotto - the remaining ones (with duplicate reds) are going to be sent to Clare for her charity project.

: )

(Photo and links added March 2, 2011)

Sunday, February 13, 2011

BlockLotto - February 2011 - String Hearts


The directions are here: 
http://blocksnswaps.blogspot.com/2011/02/string-heart-block-with-bonus.html

Examples of other blocks sewn are here:
http://blocklotto.blogspot.com/search/label/Feb%2011%20photos

The first block I made wasn't correctly done - see the frown?

It would be fun to make a pillow cover and have one frowning heart and one happy heart - could be a secret signal for the marriage bed!

The directions say to use any color for the strings, but if I make any more I'll only use medium and light fabric.  Since the background is dark, dark colors there needs to be more contrast.

Wednesday, January 12, 2011

BlockLotto - January 2011 - Bright Stacks

Directions:
http://blocklotto.blogspot.com/2011/01/bright-stacks-for-bright-quilts-in.html

Examples:
http://blocklotto.blogspot.com/search/label/jan%2011%20photos

1/4/11: Today I will press and cut the strips for these blocks.
1/5/11: Nope, didn't do anything on the quilt or fabric. Out of town friends visiting!
1/8/11: Got the nine colored strips and some white strips cut, went ahead and cut ten 8-inch sections and made one block..  Fun!  So pleased it measures 10.5 square!
1/9/11: Okay it turns out I didn't have nine complete strips last night.  I had some full strips and some shorter strips that I cut to 2.5 inches. Sophie's directions say we are not to just mix up the fabric and have the same fabrics in different order - she suggests starting with nine strips (each strips makes five subcuts).  I must have had too many pieces of candy today this just seems so difficult to figure out what strips to put in what block.  I guess I will see if I can just go ahead an put the white pieces on at least some of these subcuts. Urgh.
Update:  I wrote Sophie and she sent a chart to help me get the colors in the right places:
So now I see that if I had cut five strips from nine longer strips things would have been much easier, but really the trick is to just put the colors on the chart so they are arranged by fabric rather than by blocks....
1/10/11: I put my strips so they are in little stacks for each block - and sewed the ends for one block. 
1/11/11: Cut my white strips and started to sew blocks.
1/12/11: More sewing.  Five blocks done!
1/13/11: I finished up 8 blocks.  I would need to cut some more white to make the last block so will put that off to later, if I have time!