Pages

Showing posts with label Procedure. Show all posts

Sunday, February 17, 2019

New Project: UANDUQAL

UANDUQAL

Last December Sujata shared an idea for a non-structured quilt along. Using the quilts in the book: Unconventional and Unexpected Quilts by Roderick Kiracofe we will pick a quilt to interpret a project.


From Sujata's Blog: The Root Connection: RED

Here are some  "No Rules" of this U&U Quilt-Along


  • They do not need to be wonky if  you like to stitch in the straight line. 
  • There are no deadlines.
  • I will be sharing some loose directions but you Do Not need to follow my guidelines. You are more than encouraged to go your own way. 
  • Remember that possibilities are endless and you Do Not need to repeat the colors or pattern exactly like it is in the book.  
  • When you post the progress pictures as well as finished quilts on Instagram, use #U&UQA  

Sujata has written about the quilt she is starting with:
https://therootconnection.blogspot.com/2019/01/u-and-u-qal-january-2019.html

It is beautiful.  Such fun to see how she decided to make the pieces and how they are going to fit together.  If you go to her site you will see she made some changes in her initial  plan, and has by using mainly repurposed shirts had a terrific start (of course) to getting her project together.

I was drawn to try this quilt too, but then after reading the first few chapters of the book realized I could get a jump start if I picked a different quilt.  So I am going to use the Block Lotto wonky log cabin blocks that I won for the center and make the log cabin quilt that is on page 54 of Unconventional and Unexpected Quilts


My blocks were made using blue, green, purple, black and white - the directions are still posted at:
http://blocklotto.blogspot.com/2010/03/scrap-strips-for-log-cabin-quilt-with.html
(Anyone making the blocks should remember that the edges of the blocks should have space without a seam so the colors are not lost when they are joined.  I'm going to try to just leave the pieces the way I received them, but will add fabric if any is needed to bring the block to a full 9.5 inches.)

I pulled out most of my fabric in these colors so they are handy to make the surrounding blocks.  (Aside: I shared some of the blocks with a friend. She and I made a baby quilt for her granddaughter.  Now her daughter would like her to make the quilt larger so she needed more blocks and fabric to add on!)  I cut a lot of mostly 2.5 inch strips as they would be a good starting size to deal with don't you think?


I also cut some 12.5 squares of fabric so she would have more flexibility when making her blocks.

As I was cutting I took the odd widths for myself and when there were several cut of the same fabric I split those so I have a large stack in these colors for myself.

So here you can start to see the blocks.  I can only get three across on my counter top, but the final quilt will be made I think so the inner log cabin section will have 20 blocks (4 x 5).  The original quilt on page 54 has 24 log cabin blocks (4 x 6).

At the beginning and ending of each row and column there will be wonky string blocks made of fabrics in the same colors as the log cabins.  These blocks will be the same size as the log cabin blocks (9.5 inches).  Making the first border blocks I started with width of fabric pieces, but now I am using strips that are around 11 inches long.  The four corners will have the strings oriented so they radiate out from the corner so those strings will be around 17 inches and then trimmed down to 9.5 inch square too.

I will need 4 corner border string blocks and 18 or 20* edge border string blocks. (* depending on the number of columns and rows of log cabin blocks in the quilt)


When I was first making the border blocks I laid the new fabric so it was on an angle on the already joined fabric and just arranged where the fabric went as I sewed the seam.  (Then I had to fiddle with the fabric and go back and trim the seams down to .25 inch.)  Now I'm trimming the fabric at an angle so I have a straight edge to sew the new fabric on.


Here is my first set of 17 inch long strips.


Blue/green: At first I would lay the new fabric on the fabric, sew and trim.  (It was tricky to do the trimming when I sewed in this order, so I do not recommend doing this!)
Moss/purple: Now I'm trimming the larger fabric and then just place the new strip down and sew.  Only trimming after the new pieces are joined/pressed and ready to add another strip.  If I am careful I will end up being able to use the trimmed fabric in another block.
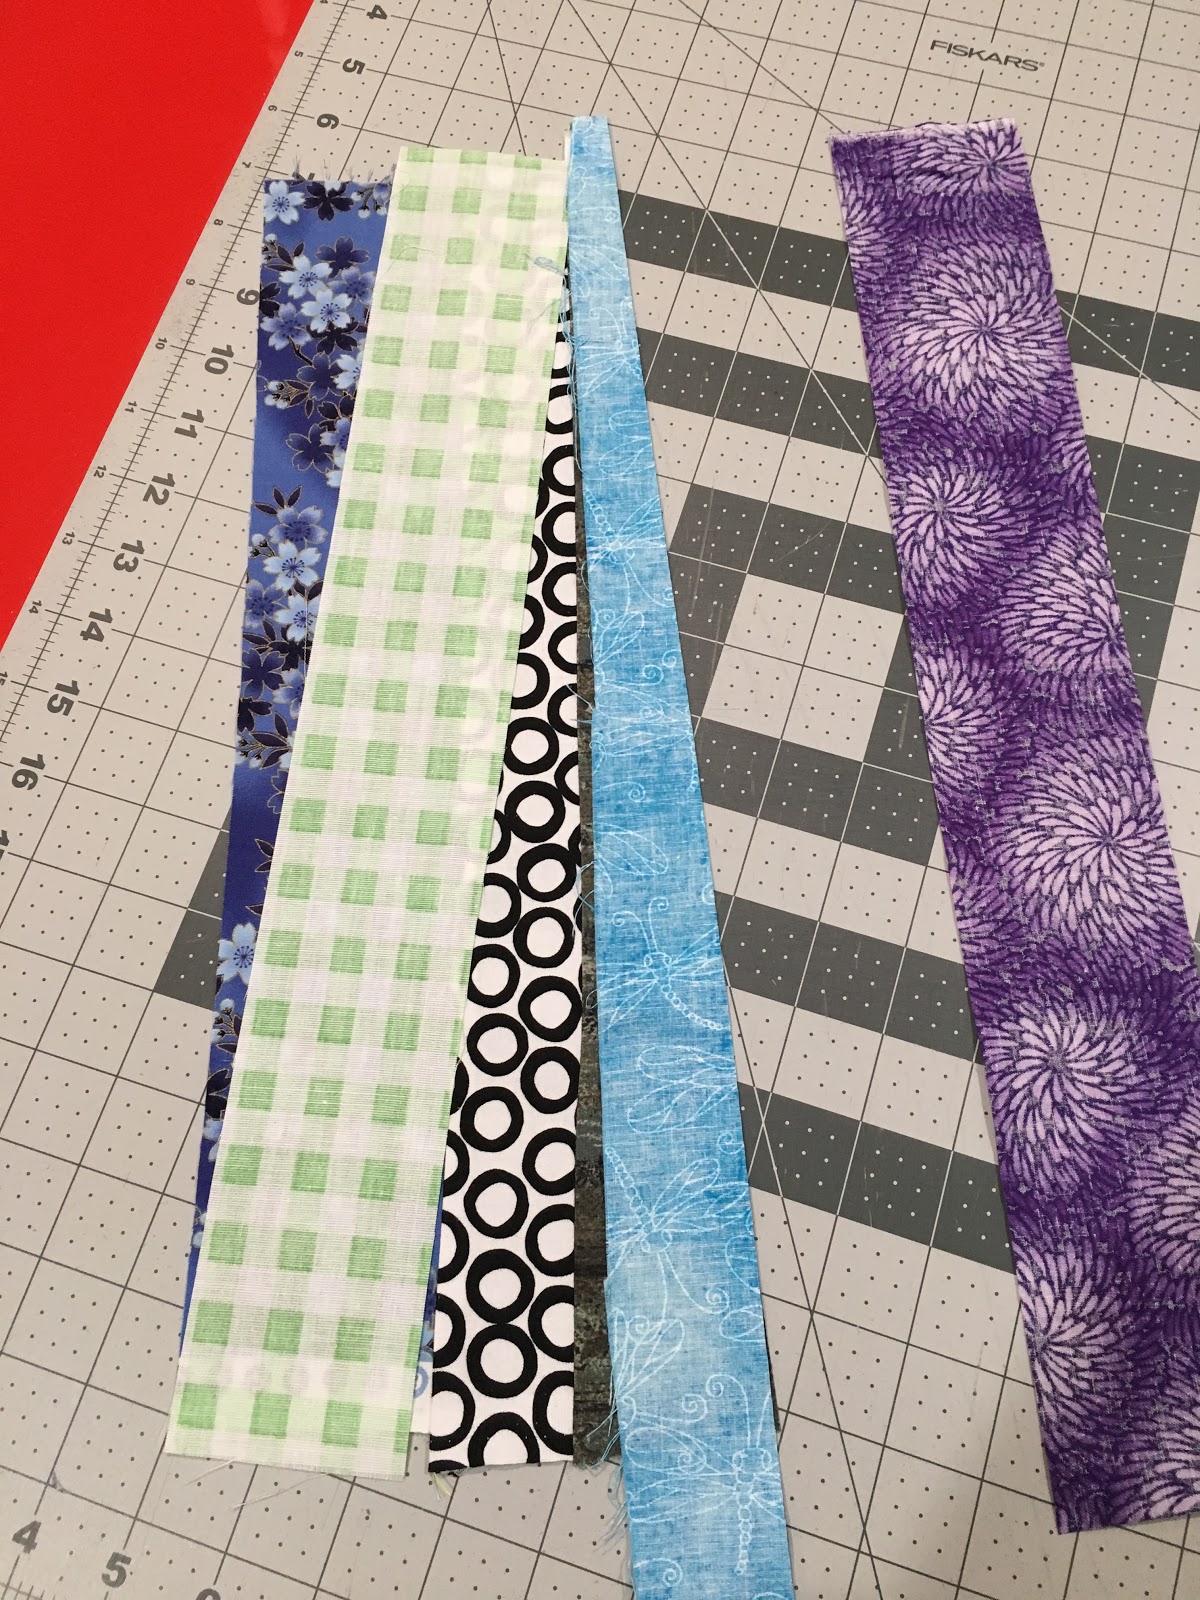

Moss/turquoise: I will also test trimming both pieces before joining them.


In the book the strips for the border blocks are made up of strips of different widths.  Some are sewn straight, while others are at an angle.  The corner pieces were set so all the pieces radiated out so I will experiment with that too.

Tips:

I cut most of my strips with a regular straight edge ruler, but at my Saturday group used a
June Tailor Shape Cut 12''x12'' Slotted Ruler. Wow! This made the strip cutting go so much quicker. I just needed to be sure to smooth the fabric and place the fold on the zero line.  Full price this is around $30.  

The Saturday group has pieces of PVC pipe cut to raise the height of the cutting table - what a back saver!  My table doesn't have curved legs though so I'm going to get some furniture lifters.  Home Depot has some that will work and raise the table 8 inches for around $15.  Ideally I think the cutting table should be even taller, but 8 inches is the tallest I could find when I searched online.

All my fabric has been washed.  I was using spray starch to make the fabric easier to cut, but am now experimenting with simply putting some corn starch in a spray bottle with water.  I need to work on the measurements, but this so far is working well. (Sorry, can't remember where I got the idea to do this.)  I put around 1 tablespoon corn starch to 1 cup of water in a spray bottle - just shake to combine. 


Saturday, May 6, 2017

Another Try at Binding: Inner Corners

Almost done with my interpretation of a class project quilt, and time to think about how I want the edge of the project to be bound.  Instead of regular 90-degree corners, this time I want to do a binding that has at least a few inner corners!

The sites I found to help are:

Added 5-12-17:  Shasta sent me link to a tutorial she prepared on binding too:
Added here as a resource to refer to:

https://hubpages.com/art/How-To-Bind-When-Quilting   Thanks!

http://thecraftyquilter.com/2013/06/how-to-bind-an-inverted-corner/

  • Make a small cut into the corner.
  • When you near the inverted corner, draw two lines on batting to show where the needle should be down when you pivot.
  • Stitch to the back then wrap to the front (she only machine finishes). Her inner corners do not have miter, but look nice.  She uses thread to match the fabric.


https://ankastreasures.wordpress.com/2009/06/01/how-to-bind-inside-corners-plus-a-give-away-to-practice-your-skills/


http://flyingparrotquilts.com/2015/01/16/binding-inside-corners-and-joining-curved-binding-tutorial/

  • Example shown is a scalloped finish.  I think once I do then the detailed photos will really help me with making the mitered inner corners - and finishing up the binding on a curve. Sews on front then flips to the back.


http://www.sisterscommonthread.com/how-to-bind-an-inside-corner.htm

  • Adds hint of stay stitching at the inner corner, then doing the cut and sewing binding on. Sew on the back, flip to the front.


https://m.youtube.com/watch?v=4VGNcDoI-R8 - From http://quiltwithmarcibaker.com

  • Sew on front, wrap to the back.  Stay stitch and cut. GREAT demo. Shows how to adjust the fabric at the inner corner. Using a sample piece and pins.  Her website has other helpful videos.  Can't tell if she is updating things for her $10/month subscription service, or if she has recently moved. Can't find the handout referred in the video, so it must be behind the subscription. There doesn't seem to be an index of what the titles are in the subscription or how her whole system works.  : ( Might be able to buy or check out her books where she has written out the information. Not my Grandmother's Log Cabin might be one of the books she mentions that has the directions.
  • https://www.youtube.com/watch?v=Vci9-li3aYU&t=20s Bindings for different angles, shows non-examples and examples. WELL DONE! From http://quiltwithmarcibaker.com
  • https://www.youtube.com/watch?v=lwPe_84GBfY Shows how to add facing to the back of really irregular edged pieces (her example grandmothers garden).  First stay stitch a little closer to the raw edges than the facing will be applied.  Then line up the facing and pin to the top of each point. Sew with contrasting to the back colored thread.  Trim keeping 1/4 inch of the front but remove the batting and back.  Flip over and adjust the fabric, then hand stitch closed. WELL DONE! From http://quiltwithmarcibaker.com

https://www.youtube.com/watch?v=Be9dzI_X41w

  • Stay stitch with basting stitch a little closer to raw edge than where the binding will be sewn on. Sew on front, flip to back to finish by hand. 
  • Instead of pulling to straighten at the pivot point she pivots then pulls the fabric back to make it straight again when you sew. 
  • Clip a V in the the quilt and binding after it's sewn on so excess fabric is removed and the piece will lay flatter. 
  • She uses a large scissor to do this clipping and isn't particular about the order that she folds the corners.


MY ATTEMPT

I cut an old FMQing practice piece to be the shape in the Marci Baker demo.    My binding strips are 3.5 inches.


I marked the quilt to show the pivot point, but for a beginner like me will also mark on the binding when I get near the inner corner.  When folded the binding strip is 1.75 inches.  I will sew half an inch so the binding should end up being half an inch on both the front and the back.

The first actual quilt that I am going to have the inner corners in the binding will have the half inch binding or maybe even wider binding as the color will be part of the design.


Decided I might as well get extra practice with the regular 90-degree corners too so I started at the corner of the practice piece.  It's only been a short while since I did my set of binding practices, but I still had to go back to remind myself how to do things!  I'm glad I have the entries on the blog to remind myself.  I went back to the post and adding the time in the video where the part was that I really wanted to refer to...  

But just in case those videos go away...


Here are my notes to help my future self with regular 90-degree and less corners in bindings.

First 90-degree corner.  I set up so I could see where to place the fabric so I would be joining things 1/2 inch from the raw side. Started sewing the end, and turned to the point when I got near the corner.

Pinched the fabric at the end and brought it up so the fold was even with the side of the corner just sewn.  (Next time remember, it is easier to pinch when the point at the outside is actually a little above or short of the corner of the unseen quilt.) This makes a 45 degree fold on the inside.

Then sewed again with needle the same distance (half inch) away from the raw edges. Used stack of fabric to help the pressure foot stay even.

At this point I stopped to double check that I had done it correctly.  Looks right on the side where I am sewing...

And when I wrap to the other side it looked correct there too!

So now I could see where the inner corner was going to be so I marked the binding.  Double check to be sure the intersection is in the correct place!

I continued sewing the binding on the practice piece until the binding strip ended.  With the pivot points marked and the cut to help the piece be pulled straight it was pretty easy sewing.

Here is the side I sewed onto. (I think for a real project one first sews to the front and then wraps to the back for the hand finish!)

Here is the other side. I did not do the stay stitching that was recommended by several bloggers.  And notice the notch on the left is a little too close for comfort to the stitching...

Enlarged view of notches.  Next time will do the stay stitching! And use smaller scissors. And look for sharper scissors too!

I was excited to see how things were looking.  I could pin the 90-degree corners to check them, but I need to cut the inner corners so they will be flat when the binding is folded for the miter there.
Cut a V shape out of inner corner, to allow the fabric to lie flat.
This photo shows the notch after more angle was removed.
I was trying for a 90-degree notch. This was difficult to do in the 1/2 inch space I had, hard to believe it can be done in 1/4 inch!


Flip it over.  Fold down left then right then hand stitch from center to the seam to create the miter. This will then match the order of the 90-degree corners (so maybe it's right and then left depending on orientation of the piece.)

Here is my hand stitching - need to work on how to do this!  I felt like a little kid when I was sewing the sample binding. My stitches are too loose or long and show too much.


On the back side pull the folded fabric to the left. Then pull down the right side of the binding and then the left side of the binding.  After fiddling, you'll see a nice miter. Pin to hold in place while hand stitching.
For this practice piece, I did hand stitching to for two 90-degree corners and one of the inner corners. Then I did the rest with the machine.

In this photo the hand work is on the left.  Clicking should enlarge the photo.
On the right is the side finished by machine.


In this view the hand work is on the right.  On the left side done with machine, you might notice no miter, the buckling, and the ugly bobbin thread showing so clearly too.  The lady who only does with machine stitching does not cut a notch so that might help with having the fabric be flat for her.


Just in case you missed it, in this photo the machine stitching is on the left.

Okay, so now I can finally appreciate hand finishing a binding.  Even with my primitive stitching it's very nice to not see the bobbin stitching on the back.

But I need to learn how to do the stitching so it doesn't show as much before I do on real projects. I need to learn a consistent way to knot the thread at the beginning and end too!  This exercise though makes me think I can go ahead with my plan for having inner corners on the project I'm working on.

I'm working on my project for the weekly class I take.  (I only did one of the teacher's blocks as I didn't plan correctly and didn't have all the fabric I thought I had but I didn't feel like starting over and doing it all.)  The students who thought ahead are ending up with a lovely quilt.

I'm aiming now to make a small lap size quilt featuring the one teacher block in the center.

I thought I had mastered regular 90-degree binding, so didn't want to just add regular strips to make the project larger.  I practiced half seam construction and added six inches to the width and height.

I decided to add sort of woven frame to the piece, and then one more piece and the binding.  I could of course make a regular square quilt as I have been doing, but scallops or angles in borders is on my list of things to learn, so decided to add inner corners in with this project.

I found the interwoven frame idea in the Labyrinth block design at The Spruce.  Her directions for around a 3-inch center block and my class project block was 18-inches (plus 6) so I had to do some figuring to get her labyrinth frame to fit!

The Labyrinth block is similar to the quilting motif I did in the Leah Day project in 2012 that I really liked.  Leah's design has more background showing and I may prefer that look.  However, I think the Labyrinth block design was easier for me to adapt for finishing this class project.


Leah Day Motif
The Spruce Labyrinth Block


You can see in the Labyrinth it's just a matter of doing the math so the center of the outer orange points are even with the center of the dot in the inner block.

My inner block was 24 inches due to the additional frame I added to the teacher's block.  So it was pretty easy to do the math - I used 6 inches finished as my starting point. (Each of the squares stands for 3 inches.)  My project is now 36 inches square.  So I have the orange points to add, and another something before I'm ready to make the back and binding.

In class we were given a block to enlarge on graph paper and then show at least six different ways to piece.  Then we had a diagram of the block in a plain setting for a quilt, 6 blocks by 6 blocks.  We had to use any shade of red for one feature in each block, and then use the same background in each block - but could change the colors.  That was pretty limiting.  We had to do 6 times.  Our homework for next week is to do (6 times) and new setting - this time we can change the background colors within a block and we can change the way the pieces are cut to add more of them. Still limiting but I bet people will come up with dazzling papers!  We are also supposed to bring real fabric to consider using in making the quilt. And that will be my downfall.  I can enlarge and do the math to determine the size, and I can even dream about colors or shades of colors to add interest.  But once I have to bring the fabric it's really, really hard as that brings the exercise back to reality.

I guess the other people in the class all know how to do the mechanical part of making a quilt, they really enjoy picking out colors and fabric and working with that part of the hobby to sew up the teacher's designs. And most of them actually end up with a finished quilt by the end of the class.

It seems a little like coloring by the numbers when we just make the teacher's quilt.

The fabric/color part isn't that much fun for me now.  Perhaps because I have so much fabric here so don't want to buy new.  I prefer scrappy looking quilts anyway. But don't have the color sense to end up with beautiful items...  Yet!  

But really, I'm feeling like I want to master the total part of making a quilt and to do it enough so I don't have to keep such detailed notes for myself.  So I need to master and practice to keep the skill!


Friday, February 24, 2017

WIP: QFK Square Quilt Part 2

When I last wrote, I had finished quilting the major parts of the quilt.

I went back and added a wavy line of quilting so the light green inner square had stitching on both sides.


And I added the outer borders to the piece!  This makes it so it's the correct size for Quilts for Kids.

I just placed the border, and stitched it down.  If you remember I was having a ballooning effect so the borders were removed, so when I replaced the borders I did not go by the edge of the quilt, but rather went where the border strip went when it was placed, this meant that I lost a little of the quilt, but not much.  And now the quilt is flat!

I added a line of stitching so on the back it looks like there is a square in the corners of the piece.

As soon as I put the piece on the table to bury the threads, my friend jumped on the quilt to keep me company.
(She is getting almost too comfortable in the sewing room!)

I do not usually pin, but pinning every three inches helped me keep the border so it covered the quilt seam.  (I didn't pin the second seam and after adding the third border saw that there were a few places where the fabric was not joined correctly.  So I removed the stitches and did it correctly.)  The pinning also helped keep the fabric in position under the batting.


I added a line of stitching just in the batting and backing so there is a corner square. Here you see one corner undone.

I added the stitching so it did not show on the front.  I think the corner on the back will disguise that the extra lines of thread were added when the final border was added.  Will make it more symmetrical.

Here is the front.  The extra stitching doesn't show.   
In this case I knew I had borders to add, but I think this technique could be used to enlarge a quilt when there is extra batting showing at the sides.

Now the piece is ready for the binding.

I named this post Part 2, but there have been many starts with this project.  I'm glad to be closer to finishing it up!

Sunday, October 16, 2016

Procedure Reminder: Quarter Circles * 2 = Bullseye!

I'm just documenting the way that seems to work for me to make the three piece bullseye or target block.

Background square has the template cutting lines drawn. The ring fabric will be not be used in this block.
Be sure the top of the templates is on the top of the fabric.
These templates can be used on a variety of sized squares, it just changes the location of the ring.

Template for ring is placed in a square piece of fabric, then traced and cut.
Then the fabric will be aligned correctly with the grain of the fabric.
It's important to get the grain line correct, I tried without doing this and the result included a lot of pleats!

Check to be sure the pieces are placed correctly.

Press to show the center of the curves.

Flip the fabric so right sides are together and pin the centers together.

Pin the edges, and then add additional pins.
When pinning the larger piece is below, then it will be easier to pin with matching edges.

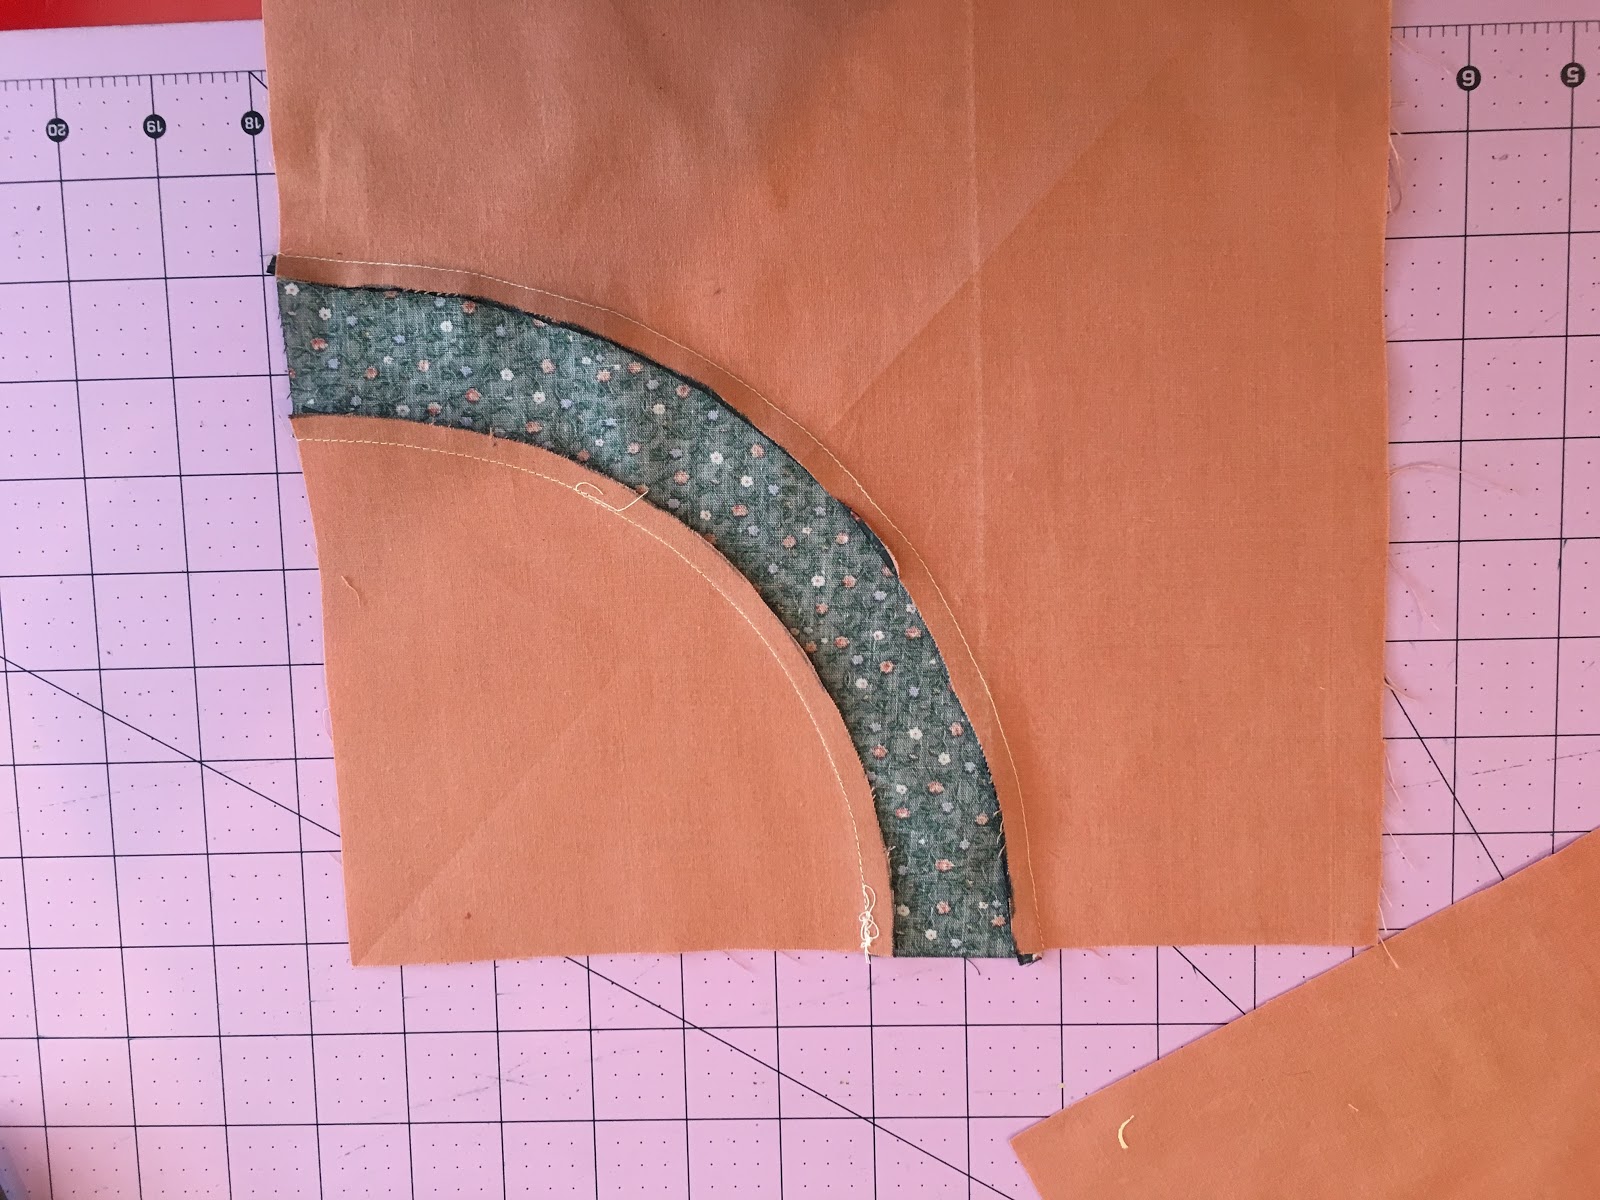
Bring to the machine and sew with the larger piece on the top.
Slow sewing and realize perhaps some adjusting of the  top fabric will be needed.

The seam will be done!

TaDah!  The edges match and there are no pleats.

Press to show the center again.

Flip the pieces so the right sides are facing and pin the centers together.

Pin the edges, then the center of each side. And repeat!

When pinning it seems to be easier to put the larger piece below.

Take the piece to the machine and sew so the larger piece is on the top.

The second seam is done!

Press so the seams go toward the ring.

If you place the extra ring fabric within the sewn ring you will see how it all fits together!

Pressed with no pleats and the edges match.
In this case with the larger blocks pinning on one side and sewing on the other seemed to work. I'll check later to see how it works with smaller blocks...

This block was made as part of the Block Lotto in January 2012.

Templates and cutting list for making a full quilt are here:  https://www.modernquiltstudio.com/patterns/Eclipse%20mqs.pdf