Pages

Showing posts with label Getting Ready. Show all posts

Saturday, February 18, 2012

Getting Ready: Cutting Fabric

My strips!
I don't know why it took me so long to do this, but here it is just a few days before my workshop and I spent most of the day cutting fabrics.

I decided to cut at least one full strips from most of the fabrics in at least one of these sizes: 1.5', 2', 2.5"

Then I cut a 9.5" square.

Then combinations: 5.0", 4.5", 4.0", 3.0" and sometimes even a 1".

I have cut my purples and most of my white and black - started some green and blue but will continue tomorrow.

I still need to sew up HST, geese and strata for the workshop!

I did some exploration with different ways to do HST and geese that I wrote about in previous posts (that helped me decide what sizes to cut the strips)....

So tomorrow I will continue with strips and will sew up a few of each of the parts just so I have some ready when I get at the workshop.  (I also have some real work to do before I leave too.)


Friday, February 17, 2012

Tips: Getting Ready: HST

Half Square Triangles (HST)

Missouri Star Way
Missouri Star Video
Easy to do even with smaller sized squares....

  1. Put two squares good side facing each other.
  2. Sew around all four sides with a 1/4 inch seam.
  3. Cut the square at the diagonal.
Creates 4 HST - the outside edges are on bias.
5 inch square give 3 inch unfinished HST. (Probably will need to trim to exact size.)

"Whip Up" Blog Post with different measurements.

HST by other attendee
Pinwheels by other attendee
The other attendee used the Missouri star method and made a lot of pinwheels - she started with 9 in squares.  Told me she is going to try to make some more starting with 6 inch squares.  I'm not sure what method she used for her excellent HST!  Aren't her colors beautiful? She has all the pieces trimmed up so nicely too.


Lucy in the Sky - Quilting Board Way
Lucy in the Sky - Quilting Board Directions
This way requires marking - still just have four seams - but there are 8 cutting lines....
  1. Put two squares good side facing each other.
  2. Draw both diagonals on the lighter fabric.  (I also drew the 4 sewing lines.)
  3. Sew 1/4 inch on either side of each diagonal.
  4. Carefully cut the block into four so you see four squares (in the diagram it's the lines that extend out of the square.
  5. Then cut the original diagonal in each of the resulting squares.
Creates 8 HST - the outside edges are on the straight edge of the fabric.
5 inch square gives 2 inch unfinished HST.  (For sure will need to trim to exact size.)


Left Over from Geese Way

Left over made squares and cut apart goose
When making geese the traditional way you can stitch the left over triangles to get HST - they are a little too small but by using a smaller seam I think it would work to get sizes that would fit with other pieces.

I also experimented with just cutting geese in half and then sizing up the results to get HST - seems like a lot of work though - but if the geese weren't going to be used or if they didn't turn out the expected size this would be a good thing to do....


Added 3-15-12:

QuiltingBoard - Rhonda's Really Easy Half Square Triangle Blocks
http://www.quiltingboard.com/tutorials-f10/really-easy-half-square-triangle-blocks-t37915.html

Basically, cut your strips.  Sew together.  Then use template placed on the sew and cut.  She shows two different ways to do it on the  web.  For one way she sews the strips into a tube and alternates where she cuts cut (fewer cuts but she now prefers pressing the seam open, cutting, then going back and sewing long sides together and cutting again.) There is very little wasted fabric as she uses the four large bits to sew together and make an hour glass block. For five 2.5" inch blocks she sews two 2.5" x 11" strips together.

Formula for HST - from QuiltingBoard
http://www.quiltingboard.com/main-f1/formula-half-square-triangles-help-t42546.html


Tips: Getting Ready: Geese

Traditional Geese
Traditonal

I made four geese following the directions in Gwen's books:  2-2.5" squares, 1-4.5" by 2.5" rectangle.

To 'save' the extra triangles I sewed them down too before cutting off from the goose.  The results are an odd size and would need to be trimmed up.  I think using a smaller seam would give a results with a better size.

I also experimented with cutting one of the geese in half and trimming to get two HST - this is a lot of work - I don't like this method for getting HST. And I think it's to much work to get one goose block - I like the way I've been doing it better - two cuts and get two geese!

One seam geese by other attendee.

Additional Methods to Try:


My Way

My Way Geese - Freehand
Original My Way Geese - Directions
Then I went back to making a few geese 'my way'.  I now take two pieces of fabric the same size, then free hand cut a triangle.  Swap the fabric and sew it up! (I used to do with two different sizes of triangles but Benta's  comment on my original post pointed out I could be making two geese at the same time if I used the same size rectangles - so that's what I do now!

I like this way as I always have enough seam so I would not loose the points, and there is enough side fabric that I could more the triangle around.

Note: The way I originally did the cuts ended up with triangles that were different sized and shaped - very wonky... (and pleasing to me!)

Since my other parts for the workshop are not done in a wonky fashion though I thought I should try again - but this time use a ruler so the shapes would be consistent and in the center of the fabric.....
My Way Geese done with ruler.

I meant to take notes, but forgot to.  I think I started with 6 inches by 3 or 2.5 inches.

I just eyeballed the center of the fabric, but used the ruler to cut the triangle.  The first cut I went beyond the ruler to the edge of the fabric.

When was sewing I matched the edges of the fabric for the first seam - but for the second seam I pulled the side piece up so when the seam start the fabric would be at least 1/4 inch.

I like the way these look - need to move the ruler down to be sure I have 1/4 inch at the top all the time - and perhaps 5.5 would be better width as I don't need so much fabric at the side of the block.  But since I didn't write down the measurements I started with I really can't say.  Arranged this way would be an interesting design to put at the edge or sashing of a quilt.... Could make two with the same arrangement for the the geese and then it would be a square on point - could be very dramatic!

I decided to try again using 2.5 by 4.5 fabric....

My Way Geese with ruler and traditional size.
These are very cute.  They are smaller than the traditional size, but I really like them.  This I think will be the size I make for the workshop!

It's fun to have a variety of geese though - don't this look neat?  In fact, I think I will skip making HST for the workshop and instead try to make a bunch of these - they  would perhaps make neat sawtooth variation!

Assorted geese lined up.


Geese arranged for sawtooth replacement.
Geese as a design
Geese arranged for sawtooth edge
It's funny, Leah today was discussing the importance of testing before doing a big project (and I realized I have never washed my batting, or checked to see if the pencil would bleed thru, and am not really sure how I'm going to get my Wonky Shoo Fly or LibRR connected so they are quilts) but I did explore different ways to get my parts made.  The directions in Marston/Moran books for flying geese just seemed so time consuming (and traditional!) - I had to find quicker ways to get the parts in order...

It's been awhile since I first played with my liberated geese - but I was very pleased with the method.  Used in my LibRR but gave the rest of the geese away to a BlockLotto lady who was ill.  The first time I made a batch using the BlockLotto directions there were so much wasted fabric I didn't like making them that way at all.
 

Wednesday, February 15, 2012

Tips: Getting Parts Ready: 9-Patch


Method Video:  Billie Lauder Basic Nine Patch - Two at a Time!

Having had success with Billie Lauder's method for 4-patches, I decided to do her method to make my 9-patches.  With this method you make 2 blocks with the same cuts.  By preparing several squares at the same time, the fabric could be swapped out so it's more scrappy looking....
4-patch and 9-patch made with Billie Lauder method!
  1. Cut two squares of fabric Color A and Color B - make it easy and pick a measurement easily divided by three.  (For example 6 inches, 4.5 inches, 9 inches).
  2. Place them right sides together, and then sew up two opposite sides.
  3. Without cutting the seams you just sew, cut the fabric in to thirds.
  4. Sew the loose piece of fabric to a sewn side so you have one set with the color A, B, A and one with color B, A, B. 
  5. Press toward the dark fabric.
  6. Place fabric right sides together - line up to match the seams and sew up two opposite sides of the block.
  7. Press toward the dark fabric.
  8. Cut into thirds, add the loose pieces.
  9. Press toward the dark fabric.
I made mine starting with blocks that were 4.5 inches square.  I did in black and white so I wouldn't have to think about color.

I couldn't decide what colors to make the next set of 9-patches in so I cut some 4 inch white fabric and sewed my 2 inch strips (cut into 4 inches) on the sides.  Cut that in half so the seams were not cut, then sewed short end to short end in a ring.  Measured to cut one in half - then used that one as the cutting line for the rest of the 4-patches.  This was a fun way to use those pieces of fabric and to end up with some randomly colored 4-patches.  These were some of the fabric used in the spikes parts.  The dark green looks out of place - but I really like the other colors - these will be great additions to a quilt.  I even like the way in this quick layout there is extra white (or black) to make a random triangle.....

Both blocks (at least in theory) are the same size! They will finish in a quilt as 3-inches.

My husband is very curious to see what I come back with from the Marston/Moran workshop.  He says he can't picture it at all....!  (Neither can I!  I'm wishing I knew someone in the class and that we could be collaborating during the workshop - that would add so much to the learning experience!)

I think I'll do more 9-patches after I get some sawtooth and wild geese prepared...


From Homework for the Marston/Moran workshop:

  1. Making “Parts” in advance.  You will see in their book that they used, black and white Sawtooth, Wild Goose Chase, Four Patch and Nine Patch blocks for fillers, borders and sashing.  They also used Strata in a number of quilts.  You can make a bunch of these parts before you come to class if you want.
    1. Sawtooth: made with 2” squares or 3”squares cut diagonally
    2. Wild Goose Chase: made with 2 ½ x 4 ½ rectangles and 2 ½ squares
    3. Four Patch: Strip pieced with 2” wide strips
    4. Nine Patch: Strip pieced with 1 ½ wide strips
    5. Strata: Cut long strips of fabric between 1 ½ and 2 ½ wide and sew together to make new fabric which will be cut up in different ways.  Make a new fabric 45” wide and about 25” long.

Tuesday, February 14, 2012

Tips: Getting Parts Ready: 4-Patch

Four Patches
Chagrined after my misstep yesterday with the spikes, I used fewer fabrics this morning while creating my 4-patches.

I cut 4 inch squares - then sewed up two opposite sites, then cut in half, pressed, changed direction of one of the pieces of fabric, and sewed the final seam.  This is a variation of the Billie Lauder method.  This method is genius!

I first picked a black and a purple, the I picked white and turquoise, and because I had a few left over I made some in black and white too.  I really like the black and white!

It makes a very nice design when they are all lined up.

Think I will make some with green in them too.  Maybe green and purple?  I'm not sure.
 
When I was sewing I tried to sew in the same order - but doing the final pressing I can see I was not consistent after all.  I wonder if it will make a difference?

There is a way to make the center seam flatter by cutting a few stitches and then pressing to spread the fabric out - perhaps someone in the class can demo to me.

It's much easier to work with the 4-inch squares rather than working with 2 inch strips.  The finished size will be one inch less than the starting unsewn size (so my 4 inch squares will be 3 inches in a quilt.  If I had started with 5 inch squares it would be 4 inches in a quilt.).

I think when I do start to precut my fabric, I will do 4 inch strips even though that is not a number I have seen in different people who cut fabric when they get it....

Only need to cut one time per
4-patch to finish these up!
Added later same day:

I decided to pick a different turquoise and to add a green for the next 4-patches.  I consulted with A on the color - it looks better in person I think - but now that they are sewn I think I should have picked a darker or brighter green.

Two turquoise 4-patches
I made these follow more of Billie Lauder's steps (after yesterday I didn't go scrappy).  First I sewed two squares together by placing them good sides together, then sewing up two opposite sides.  Cut them in half so the long seam in in the center.  Alternating colors, place the short sides together and sew together (that's what in the photo).  Make  circle of the fabric.  Determine the center point and cut - then continue to do that until all the 4-patches are sewn!

I didn't pick the right colors (again) but think I have enough 4-patches, so will move on to make something else from the list of homework for the Marston/Moran workshop:

  1. Making “Parts” in advance.  You will see in their book that they used, black and white Sawtooth, Wild Goose Chase, Four Patch and Nine Patch blocks for fillers, borders and sashing.  They also used Strata in a number of quilts.  You can make a bunch of these parts before you come to class if you want.
    1. Sawtooth: made with 2” squares or 3”squares cut diagonally
    2. Wild Goose Chase: made with 2 ½ x 4 ½ rectangles and 2 ½ squares
    3. Four Patch: Strip pieced with 2” wide strips
    4. Nine Patch: Strip pieced with 1 ½ wide strips
    5. Strata: Cut long strips of fabric between 1 ½ and 2 ½ wide and sew together to make new fabric which will be cut up in different ways.  Make a new fabric 45” wide and about 25” long.


Monday, February 13, 2012

Tips: Getting Parts Ready: Spikes

I'm finally starting to get ready for my workshop with Gwen Marston and Freddy Moran.

I have had several of their books here (checked out from the library) - and have been exchanging emails with one of the ladies who is attending the workshop too.  She received 100 pieces of fabric (scraps and fat quarters) in Freddy colors from one of her friends and started by washing and ironing.  So I did that too - only I had to buy fabric but that was okay.  I thought I was clever as I cut a 2 inch strip from each piece of fabric....

What I didn't remember was that I should have been cutting a variety of width strips....

I re-read the books and looked on line to see how to quickly do some of the parts - and what size people cut their strips and pieces.

I decided the spike part was what I would start with as Gwen suggests starting with 2" x 6" pieces - I figured I could use the strips I already had made.

Spikes made by other attendee.  Notice
she has same theme fabric or black and white in all.
Then I had to decide what colors to use.  I'm going to bring the log cabin blocks I won in the Block Lotto - they were to be made with blue, green, purple and then black & white or white & black or white and black.  Rereading the directions and looking at the blocks I can also see grey - and sometimes orange or pink.  The eye really goes to the different colors - unfortunately they aren't always the best looking fabrics - but at least a I had something to work on.  My new friend made all her spikes with either a red or black and white on one side and then an assortment of colors on the other.  I decided to make mine so they were blue, green or purple one side and black or white on the other.  I hope there will be enough variety - some of my purple is sort of pinkish so it's really more than just the three colors. I suspect many of the attendees will be coming with red and I'd like my project to look a little different..... But oh the colors she picked look so rich - especially compared with my colors below.....

Now I spent a ton of time looking at the pattern.  I didn't like the way it seemed so much fabric would be wasted.  Why couldn't I just put the fabric together, draw a  line and sew?  Seemed then I would get two spikes.  Maybe the second one would be oriented the other way so I could just save them for another project.

I found some scraps and tested my plan - it would not work.  Doing that there are two wide pieces at the bottom and it sort of forms a V...
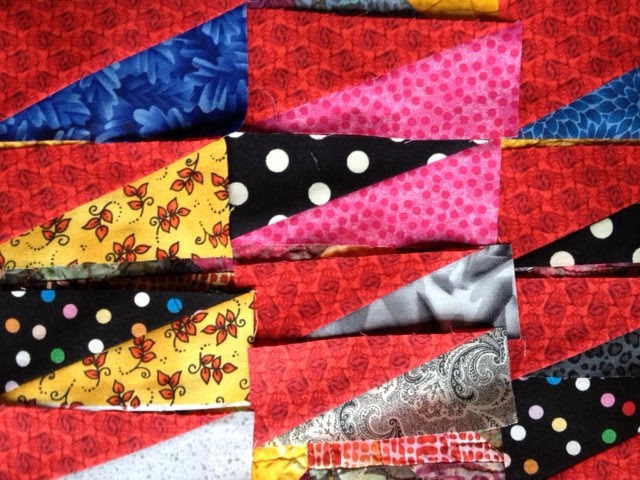
My Untrimmed spikes
So I thought I'd cut the fabric, move the fabric and still sew both pieces up - still thinking I'd have to save one set for another project.  But it turns out that it results with two spikes!  I've relooking at Gwen's books and it doesn't not clearly say you will end up with two pieces - no wasted fabric.  So I'm letting anyone reading this know it will result in two usable spikes!

The books does say to be sure to cut the fabric in the same orientation - it doesn't say to not put the fabrics good sides together as usual - but one has to be sure to cut the individual or the groups of fabric so it's all facing the same direction.  I messed up on one piece (most of my fabric does not have a right or wrong side).

These pieces are ending up being very small...  Looking at the examples I can understand why the spikes are put in as accents not as something that goes along the full quilt.  I've done a bunch doing the pretty much 2" x 6" pieces - I'll have to cut these down so they are useable....  In one of the books Gwen says they will be 4.5" inches wide so that is what I will shoot for.

And I just relooked at the class list and spikes aren't even on the list of parts to premake.... Ugh!

A non-example of using too many varieties.....
I decided to pick some that are the nearer to being the same length already and to pair them up - so I have several done now.

I'm thinking I made a mistake and should have used less variety for the background parts.  I was so pleased that I had so many pieces of black and white/ white and black.  I think I should have only used black or black on white - the spikes are not showing up as much I thought they would.

Hmm I'll have to think of how to proceed...
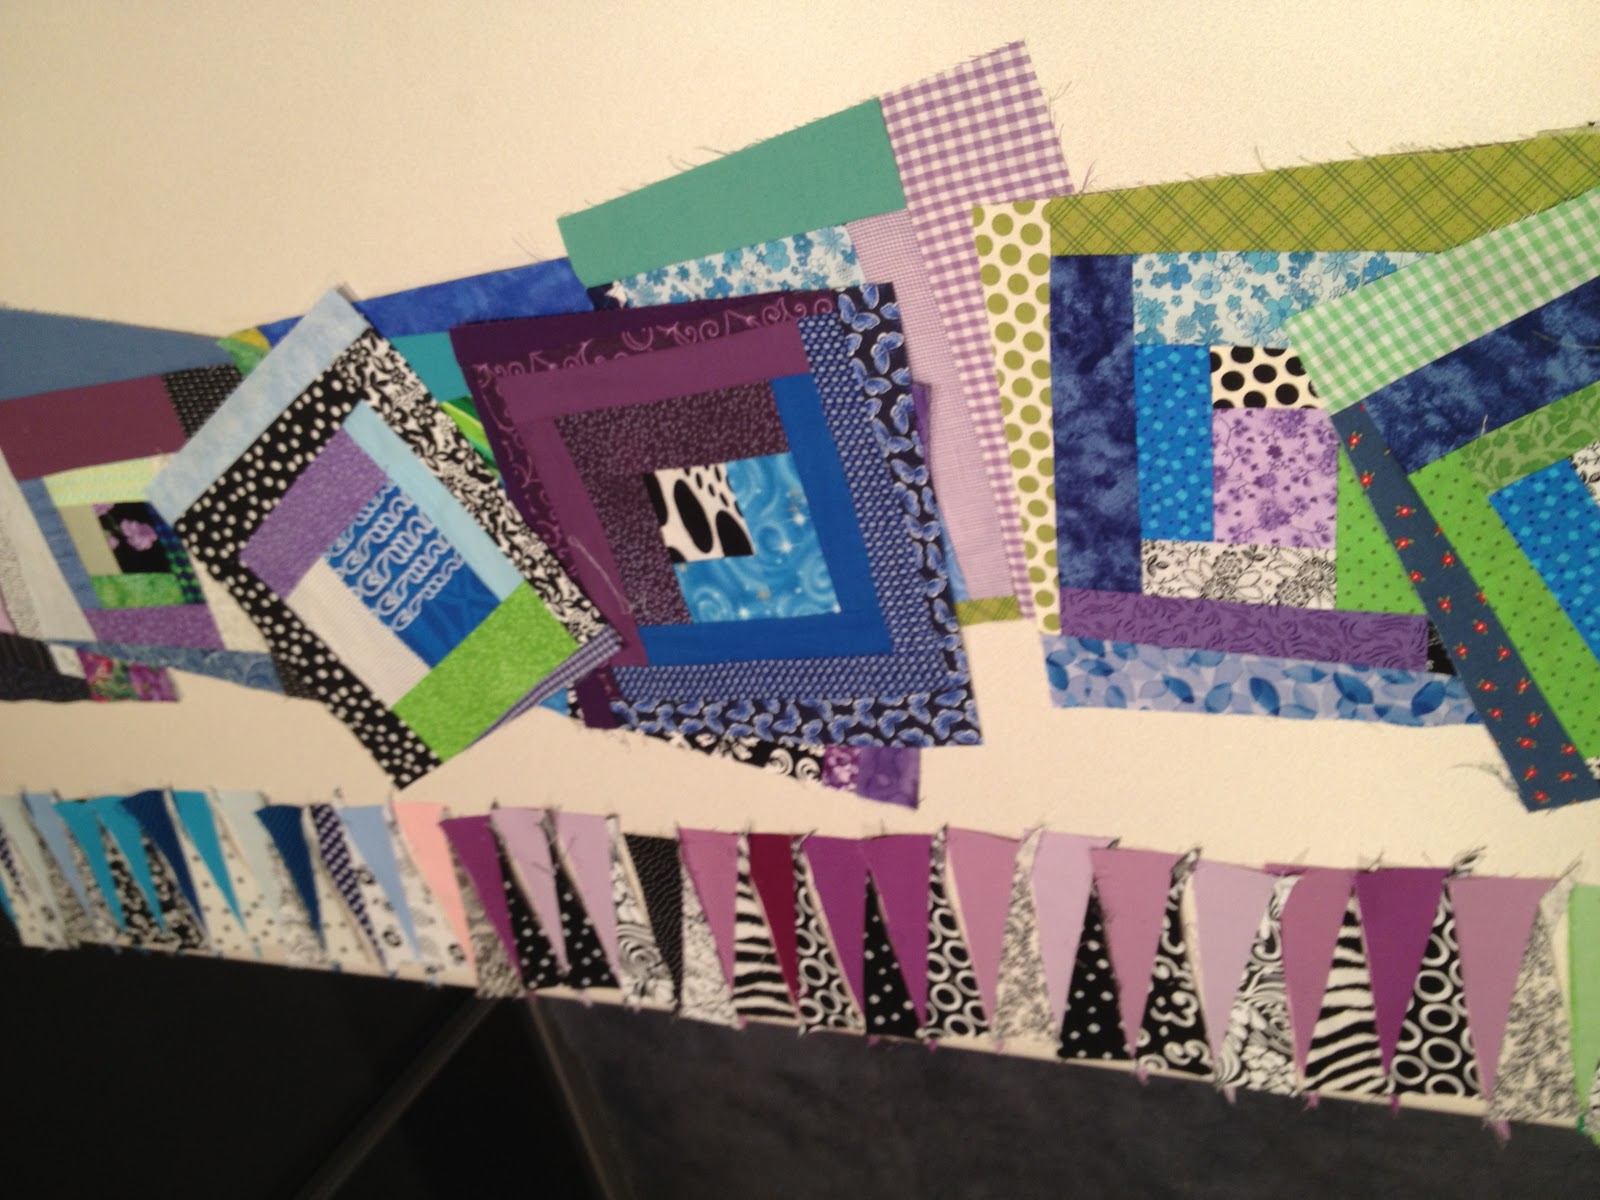
Purple spikes

Green spikes
Blue spikes
My husband and son came back so I asked their advice.  They both agree that there is too much variety.  They thought I should try doing them with just two colors/fabrics.  I thought that might be a good thing to try - but asked myself what I was going to do with the pieces.  After cracking his 'jokes' - Aren't there quilting classes for blind people you could give them too? - Isn't it a tradition that they end the quilting class with a bonfire? - he did have the idea to put all the blues together, the purples together, the greens together - so I did that and actually it does make the points stand out....

My color confidence is gone though now - I have only a few days before I leave for the workshop.  I need more parts done before the class meets to make best use of the time.

If I didn't have the log cabin blocks my colors would be yellow, orange, and black or brown - maybe some green and blue in the background a little.  I don't think I have time to prepare parts in all these colors though.....

UPDATE 3-30-21: I found a really nice site with clear directions on how to make these kinds of blocks:  https://seamslikeadream.com/the-half-rectangle-triangle-block/