WSF = Wonky Shoo Fly (in this case the BlockLotto blocks I won last year!)
I went to the 9 am - 3 pm quilting class offered thru San Diego Adult Education. This time prepared with my sewing machine and what was needed to continue on my quilt as you go wonky shoo fly quilt. I already had 16 squares sewn together so I just had to bast them and then I used a walking foot to go around each block and to define the shoo fly designs. Had to wait in line to get to the basting table - next week I will be prepared though to do some FMQ in the blocks if I have to wait for the table again! Feels great to be back to that project!
The demo today was making a pillow cover - but I didn't hear that she was doing the demo as I was in the hallway... The other ladies said they liked it as they could easily replace the covers and change up the look in their rooms,
Showing posts sorted by relevance for query wonky shoo fly. Sort by date Show all posts
Showing posts sorted by relevance for query wonky shoo fly. Sort by date Show all posts
Friday, February 4, 2011
Sunday, February 6, 2011
WSF - FWQ Sampler - Flame Key (Beg)
http://freemotionquilting.blogspot.com/2009/10/day-58-flame-key.html
Before:
The directions are clear - I think this one will be easy to do. I just have to watch my speed so I do not break the thread.
After:
It would have helped if I had a better idea of what a flame actually looks like... But what I did was easy - didn't take very long to do too.
Once I finished it I was in a place to do the stitch in the ditch around three wonky shoo flys - so I am actually finished with this section of the quilt as you go...
Before:
The directions are clear - I think this one will be easy to do. I just have to watch my speed so I do not break the thread.
 |
| Front - Flame Key |
It would have helped if I had a better idea of what a flame actually looks like... But what I did was easy - didn't take very long to do too.
 |
| Back - Flame Key |
- Information that might help me with flame shape next time!
- How To Draw Flames
- Fire Effects
- How to Draw Flames
- How to Draw Flames (pt 3)
Once I finished it I was in a place to do the stitch in the ditch around three wonky shoo flys - so I am actually finished with this section of the quilt as you go...
 |
| Finished Section of Wonky Shoo Fly Quilt - Front |
 |
| Finished Section of Wonky Shoo Fly Quilt -Back |
Friday, April 30, 2010
BlockLotto - April 2010 - Wonky Shoo Fly

- Directions for Blocks:
http://blocksnswaps.blogspot.com/2010/03/three-ways-to-wonkify-traditional-quilt.html - Examples of blocks:
http://blocklotto.blogspot.com/search/label/April%2010%20photos
I finished my blocks up during the week before April (my reward for sending in blocks before the deadline was getting to see the directions early).
These were so much fun to sew! Sophie had really clear directions for doing them using three different methods - made it so easy to just pick two pieces of fabric and cut and sew! really it took longer to design on the fabrics and to verify they were washed and color set than it did to stitch them up!
I learned that sometimes the contrast does not show up as expected (see the purple blocks) - in real life these were really pretty fabrics together - just not the best contrast for the challenge.
When the drawing was held for the lottery, I was a winner!
---
To be Added: The backstory and process of changing these in a quilt!
---
---
To be Added: The backstory and process of changing these in a quilt!
---
I only kept the dark blue with larger floral blocks (blocks 6 and 8 above counting from the top right) and sent the rest off to others who won them.
These will be so fun to quilt - lots of space for stitching to show in the 'plain' blocks!
Friday, February 25, 2011
Quilting Friday: Wonky Shoo Fly Section Basted
The class room was filled to the brim with people today when I arrived. The basting tables and hallway tables were all being used too. So I went home to prepare my quilt sandwich. Since I was there I also put it on the bed to remind myself of the plan for the Wonky Shoo Fly quilt. It's going to be nice. I got another section 5 by 4 blocks set up - then drove back to classroom. Pretty much everyone was gone - so I was able to baste on the good table....
So now I have three sections ready to quilt - so that will be my next project.
Because I lost time and momentum with the extra driving I did not do any sewing on FBP, BL, or the charity blocks. So that will need to be for next week's class....
So now I have three sections ready to quilt - so that will be my next project.
Because I lost time and momentum with the extra driving I did not do any sewing on FBP, BL, or the charity blocks. So that will need to be for next week's class....
Sunday, September 4, 2011
FMQ - Oil Slick
http://freemotionquilting.blogspot.com/2009/11/day-89-oil-slick.html
Before:
I watched the video - design involves creating squiggly loops and filling them in - then tracing back over those areas and starting another loop. There are notes to use thin thread - but I only have what I have. I know the traveling part will look okay on the front, but on the back it will look real ugly.
I do not think this is a beginner pattern at all. So we'll see how I do! (My first thought was to just skip it but I think I will try later on....)
I wrote to Leah earlier about how she codes the beginner patterns and she said something about how she needed to have beginner designs or people would think it was too hard - but I think she has enough patterns now that she could go thru and redo her coding - it would save other beginners frustration. I think the curvy patterns are harder - the ones where you have to move the direction of the fabric are harder - the ones where you have to travel back are harder too. Any design with these three characteristics are not beginner ones they are at least beginner intermediate!
I drew the pattern on a piece of paper to test it out and decided to give it a go.
But then I remembered I had finished the last section of the Wonky Shoo Fly, so I had to spend time getting a new section ready for FMQ. That always takes a while - and since my walking foot isn't working right I first tried with the darning foot - then just the regular 1/4" foot - that worked better to outline the blocks that have a wonky shoo fly....
After:
It wasn't as hard as I thought it would be. I broke the thread two times while doing this block - but it wasn't as scary as I feared. It doesn't really look like an oil slick - but it's what the block was telling me to do....
I think it wasn't hard as I wasn't really doing the pattern as she intended. My result looks more like some sort of modern Danish drawing of people bending and sitting on different things. Looks okay though - I'm moving on to the next beginner design!
Before:
 |
| Front - Oil Slick |
I do not think this is a beginner pattern at all. So we'll see how I do! (My first thought was to just skip it but I think I will try later on....)
I wrote to Leah earlier about how she codes the beginner patterns and she said something about how she needed to have beginner designs or people would think it was too hard - but I think she has enough patterns now that she could go thru and redo her coding - it would save other beginners frustration. I think the curvy patterns are harder - the ones where you have to move the direction of the fabric are harder - the ones where you have to travel back are harder too. Any design with these three characteristics are not beginner ones they are at least beginner intermediate!
I drew the pattern on a piece of paper to test it out and decided to give it a go.
 |
| Oil Slick - Back |
After:
It wasn't as hard as I thought it would be. I broke the thread two times while doing this block - but it wasn't as scary as I feared. It doesn't really look like an oil slick - but it's what the block was telling me to do....
I think it wasn't hard as I wasn't really doing the pattern as she intended. My result looks more like some sort of modern Danish drawing of people bending and sitting on different things. Looks okay though - I'm moving on to the next beginner design!
Wednesday, January 25, 2012
Preparation
For several days now I've been blocked in my sewing. I have been acquiring fabric and thinking...
I started the year with lots of plans for sewing - but just was not getting back on the wagon after our holiday trip... There is always a lot of bookkeeping to catch up on and file away - so I distracted myself with working on that....
I figured out what I needed to do was once I could see what the projects were I could do the preparation for the different projects...I didn't like the first design in the one project, the other required a large piece of fabric, and the third I misunderstood and thought we were just supposed to be making sandwiches for the project. (I didn't know I was behind in that one!)
I want to finish the round robin that I am behind in (and I coordinate) - and the dining room table is full of my tumblers that I really side tracked myself and sewed together before the holiday. (Note: I just rolled those sections up inside the Wonky Sho Fly sections so they are not in my way now - so I can concentrate on what I want to concentrate on!)
 I do not now have 24/7 access to the sewing machine now as our son is sleeping in that room - but I think that was an artificial roadblock. I was stopping myself. I could go on and on.
I decided to try and do two projects in one so made these sandwiches - the small ones I will use for the two free motion challenges. The SewCalGal one will have one design a month, the other Australian* will have several a week with a few catch up weeks (that what this week is now)... In her guidelines, Laura, the Australian had plain fabric in both the center and the border - and that was blocking me - I guess I didn't want to cut up all my lovely new fabric to get different fabric for the centers.... She didn't write back and warn me off of using the patterned material so I guess I'm okay. There is another project that I decided I just didn't want to do after all - too rigid and wouldn't give me the experience I want/need.
I looked at my fabric and saw I had two jelly rolls and some other fabric in this lime/blue/brown line. I also got some lime thread that I had picked up - so I decided to change the borders rather than the center and will use these blocks for the SewCalGal challenge too. I will be able to pick the best blocks to put together to give to He&Ka! And if the blocks are all useable, then all the better as then it will be a larger quilt gift. On the back I alternated using the beige and the patterned fabric. But first, I boiled some water, put a little soap it in and dip and swished charm squares I had for the fabric line. Rinsed and put on white paper towels - success - no bleeding! I decided to not wash the jelly roll fabric.
 Once I made the decision about the fabric for the projects I had to think about batting. I don't have a lot - and am using my warm and natural for my other two in progress projects: Wonky Shoo Fly and Liberated Round Robin. So that took a day or so - then I remembered the first batting I bought - it is some June Taylor polyester - that one is supposed to be able to iron and baste. I had brought that with me to my quilting class and the teacher couldn't see how that could be used for a bed sized quilt - there is no power outlet in that basting room. So I thought it might be good to use for these projects. I have a queen size container of it. So then I had to remember where I had put it... Found it - and then finally was able to get going. I made ten blocks as there are that many fabrics in the jellyroll.
Since I had beige thread in the machine, I also made some larger sandwiches for Leah Day's quilt a long. First, I had to spend time thinking about what fabrics to use - give up - for that project. I'm already three weeks behind so can see the end products. They are really throw aways as she really is guiding us thru doing a lot of practice - in larger scale - so at least a half yard is needed. Again, I didn't want to cut up my new lovely fabric - but I thought at least one side should be nicer fabric - I don't know why I thought that but once I remembered the yards of pink Kona that B gave me - they were all ripped in half long way and were used as decorations for a party - that made me see the light and get going on making sandwiches for Leah's project. I made two just to get started - again using the batting with the stuff that makes the fabric stick when it's ironed.
Once I made the smaller squares I put the walking foot on to do the outline of the square. It worked okay for a few blocks - but then started pushing down on the fabric and I actually have a few pleats in one of the blocks and it looked like it was scratching the fabric on the bottom. I swapped out to my quarter inch foot and finished the stitch in the ditch of the squares and removed the pins I had put in just in case the batting glue did not work....
Leah Day 2012 Project Week 1
I drew the lines as Leah suggests, put the thread on a bobbin and put in a fresh needle. I used one of the new quilting needles. Found my gloves and started. But I had to practice just moving the fabric again. Shortly after starting I could hear the click - so rethreaded - and was able to go a little - then I added speed and heard the click again. I rethreaded, I checked bobbin - I checked and saw the needle was hitting the throat plate - so I googled that problem - and then stopped as son wanted to sleep and I was tired anyway.

 This morning I removed the needle and could see it was clearly bent - so replaced it and did this practice piece.
Leah does a great job of walking us thru the first part of the exercise - but she assumes we know what stippling is - no she assumes we all started with it and can do it (I think). I started by doing Leah's beginning designs and since it seems stippling was not one of her designs, I didn't like it that much so I just skipped it when I was first trying out FMQing. Since then and now I have tried and can't even get a good stipple on a piece of paper with pencil! It was very different to enlarge the design to three inches. I broke several needles on this practice piece. I often draw the designs out - this one was really hard as she has us do the steps in two directions - then at the bottom we are supposed to combine them to get the random design. So I have lots of new things in these sandwiches: the batting, the needles, the thread, and for Leah the size of the design. I wasn't liking the stippling so didn't do the hiding of thread when I broke needle and had to restart - so now I can't really do anything with this piece unless I take care of those different thread ends. On the other pieces I will take the time to hide the thread - could be I can cut the pieces up and practice my QAYG and end up with a (really ugly no doubt) charity quilt?
But it feels good to have these sandwiches ready - and to know I have more batting, fabric and jelly rolls cuts ready to use for these projects.
It's so wonderful to have these projects coordinated by others that I can follow along!
These practices will become a practice in QAYG and a charity quilt:
FMQ: http://freemotionquilting.blogspot.com/2012/01/lets-start-new-project.html Wednesday new challenges with lots of guidance
These practices will become a quilt for He& Ka:
FMQ: http://www.quokkaquilts.blogspot.com/ Once a week with a break week built in so easier to catch up!
FMQ: http://sewcalgal.blogspot.com/p/free-motion-quilt-challenge.html Monthly new design to submit for drawings
Depends on if I win of not:
Piecing - once a month: http://blocklotto.blogspot.com/
Collecting the directions, but saving this for later:
Piecing: http://justtakes2.com/ Twice a month
This will become a quilt for my husband or the house:
Project - http://liberatedroundrobin.blogspot.com/ my seasonal round robin - I'm finished one project - the new one will start in March 2012
I can't decide now though if I will take a walk and have breakfast, go buy some more fabric and thread, or continue with Week two for Leah's project. She has already unveiled week four but Laura has not changed her page so I'm not more behind in that project! And SewCalGal won't change until the first of the month. There is still hope to get caught up....
Sunday, January 10, 2016
2016 Finish-A-Long Q1 - The Dream List
 A finish-a-long! What a great concept!
 I've been noticing the Posts and Links for the Quarterly Finish-A-Long on other blogs, this is the first time I'm creating a list of projects to finish.
Like several of the others who have already posted their lists, I've done a terrific job of starting different projects, but haven't been good with following thru and finishing quilts. For a long time I didn't know how to do more than piece fabric. But I have been learning finally how to finish a quilt. It takes me time, but I can baste and quilt and put on a binding now!
So this year my focus is on following thru and finishing quilts for my family and friends.
Once I decided to join in the Finish-A-Long, I went thru boxes in my new sewing room. I found 24 mostly old, old projects that I hope to finish this year. There are more, but I couldn't find them tonight so they will be pushed to the next quarter/year!


2. Quilt in a Day Tulips (around 1991). This was my second quilt top. I made this for my Godmother, but she only got to see the blocks. She loved tulips and this sort of grey green. I made the blocks from Eleanor Burns' book, but thought the setting wasn't interesting so I modified the sashing so the tulips were more random. It was supposed to look like the seeds for the flowers had been flung on the field. To get just the right shade of the green for the border I flipped the fabric over. People looking at it though thought the I had goofed in my flower placement. Oh well. I pieced a back from left over fabric.
3. My First* Pieced Quilt Top - Stars and Planets (1990) I took a class when our son was three, so I remember the year! I have star blocks in all the colors of the rainbow, but my DH thought I should limit the number of colors so I picked these. I had wanted to make the quilt with solids, the teacher insisted I get fabric with a little design in it. It was boring to make all the blocks the same size so I made some that were smaller and added the HST border and some plain blocks on the top. I finished the extra long twin top and our little son admired it. Then he asked where the planets were! So I took a class to learn how to make circles (see quilt #6 on this list) and searched for just the perfect fabric to represent each of them. This time I only needed a few inches, but again had to buy what ever the minimum was. I either sewed quarter circles together or appliqued circles on the fabric with stars. (Pluto was too small for me to manage with fabric so I painted it on). The planets are sized to be correct relative to a one inch earth. This was going to be the back of the quilt. When I was working on this, our son asked where the sun was. I should have said he was the sun, but that didn't occur to me. I was overwhelmed so I put the quilt away... I could add the other color blocks to make the quilt fit the top of a king bed... * This is my first completely pieced quilt top, after taking a class. In the early 1960's with my mom's help, I started cutting pieces for a quilt with 1/2 inch seams, it was finally put together, quilted and bound in May 2012. The finish is blogged here: huge star quilt. My numbering system is off! : )
4. Husband Quilt - (2013) I cut fabric while we were in Cambridge. I had one idea for the top, my DH had another. Since it's for him it will be made the way he wanted. Hopefully this quarter! This post shows the various versions of the quilt.
5. Irish Chain (around 1991) My third quilt. I liked the idea of an Irish chain, but thought it was too simple so made it a triple! I was surprised that the dark blue ended up being so large in the design. I put it on a table to show off, but a candle dripped on a piece of fabric so I'll have to figure out how to replace that piece in the middle of everything before quilting it. But because of Leah Day' videos, I do believe I have the skills now to finish this one!
6. Farm Scene Sampler (1991) I took a class to learn how to do curves so I could make the planets for my son's quilt. The project was very good as we also did y-seams, applique hearts, miter corners and I also learned that if it doesn't fit to add more fabric or change the pattern!
7. Cultural Fusion - Windmills (2015) I was so fortunate last summer to take a day long class with Shajata Shah! Had so much fun making the windmill blocks from her wonderful book, Cultural Fusion. I hope to make all of the quilts in her book, in a timely manner. These purple windmills will be flying off to a friend in Sweden when the quilt is completed.
8. Tumbler (2011) I sewed these in leader and ender fashion but then it took over as it was so much fun to sew these pieces (cut with a Studio GO from an adult education class) and arrange them so the colors were sort of clumped together. This quilt is being made for our friend in Colorado. This post shows the basted (since 2014) tumbler project. Now I know how to quilt the project, and since it's basted, it will be first on this list to be completed!
9. Large Blocks (2013) When I was in Cambridge, an online Liberated Quilting friend, Audrey, gave me a great Freecycle sewing machine so I was able to sew. I bought fabric and made these large blocks. They were going to be a quilt for my DH but he wanted more black in it. So it will be a quilt for me I think! This post has the image of the blocks on bed top.
10. Chinese Coins or Made Fabric (2011-ish) I found a stack of fabric in my mom's things that was mostly around 6 inches square. I cut strips while in a class, with the intent to make a Chinese Coin quilt. But I might make a Liberated Wedding ring quilt instead.
11. Leah Day Building Blocks (2014) I got started, then things happened and I didn't continue working on this. I found the blocks tonight so they are on the list to finish! These posts show the blocks I've finished. The rest are organized in baggies according to Leah's directions.
12. Marston/Moran Workshop (2012) - I was very lucky to attend a multiple day workshop held by Gwen Marston and Freddy Moran. Before the workshop we were given preparation assignments to make parts for a quilt. In theory I was supposed to have enough I guess that I just put the parts together to create a quilt. That didn't happen for anyone I think in the class. It was so exciting to see the quilts they have in their books in person and to meet them and other quilters. As I recall I have just a few inches to fill in then can put the top together.
13. FMQAYGQAL (2012) - This was an online group organized by Laura/QuokkaQuilts that practiced FMQing, the blocks are all made and quilted. I just have to find them and put them together and finish it up. This quilt is going to be a wedding present for one of my husband's students. Click here to see the posts about this project. This was the first time I used precuts for a quilt!
14. Wonky Shoo Fly (2010) - I won these blocks from the Block Lotto. I had been putting them together with solid blocks and practicing FMQing in sections. Here is a post with a photo of some of the sections that are completed. I have to find the blocks, but they will probably be one of the first projects I work on this quarter after the tumbler is quilted. Each block is a different Leah Day Free Motion Design. I even have a category on my blog to use to show all the progress on this project!
15. Liberated Round Robin LibRR1 (2011) - This was the year I was really getting going with my quilting. I organized an online group - The Liberated Round Robin - and we worked on creating a liberated quilt. I started mine with pieces of blocks that I got in an online liberated quilter fabric swap. Here are my posts about this project. I have two more rounds to add, but I'll have to find the project and pieces first!
16. Paper Pieced Deer Pillow (2015) - My son and his new wife had several pillows with deers on them on their wedding registry. After searching the web, I found a really nice paper piecing pattern from Julianna who lives in Poland that I'm going to use for one of the pillows. I have the orange/grey version finished, but I made a mistake in my piecing so will either correct that one or will make a new one with green/black/brown fabric.
17. Fused or Pieced Deer Pillow (2016) - For the other deer pillow, I may fuse the silhouette of a deer on fabric that will go with the paper pieced version.
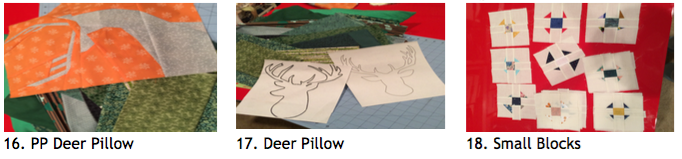
18. Small Blocks (2010) - I made these with left overs after making the larger sized wonky shoo fly versions for the block lotto. These will make a nice little quilt for someone!
19. Fused Circles (2014) - I used a Studio GO to convert some beautiful Kansas City Troubles strips to fused circles. I was going to do my interpretation of ChristaQuilts Abacus - but thought I would used the stitching from the Leah Day Butterfly project to practice FMQing. I have many pieces ready, this might be the time I actually do it!
20. Friday Block Party (2011) - For my contribution, I found free block designs that were in the shape of animals. I made a lot of these blocks, and also some traditional blocks all with the grey background. When I find the blocks, and the time, they would go together pretty easily in to a nice child's quilt. Posted progress here.
21. Quarter Circles (2011) - I had access to a Studio GO so cut a range of solids in blues and yellows with the quarter circle die, so I'm committed to these colors. Perhaps this quarter I will be inspired to finish sewing these together and actually making a quilt!
22. Cow Pillow (1991) - This was FMQed as part of a workshop, the back is perfect but it's done on not very nice looking muslim so would be better as a pillow.
23. Lone Star Pieces (around 1991) - Eleanor Burns is from around here so if you take any adult education classes or quilting classes we are exposed to her sister's great demos and her books all the time. In class I bought a ton of her books as we were given 30% discounts. The lone star seems so complicated but with her directions was really doable even for a beginner like me. Except I got too confident and impatient and didn't double check my angles for the last cuttings, so the angles are off. Maybe this year I can improvise and make a quilt of the pieces.
24. Whole Cloth Pillow (2012) - I followed along for Leah Day's instruction for a lot of the 2012 project. This whole cloth piece doesn't look nice enough on the back to be part of a quilt, but would make a very nice pillow. Blogged here.
Like the rest of you, I have new projects that I'm working on, and like some of you, I have even more WIP lurking in boxes waiting to be found again!
It's been fun for me to go thru boxes with these projects and remember them. I've been so focused on new projects that I sort of just pushed them aside. It's nice to have this finish a long to help me on my way to having finishes.
I'll be happy with any progress on finishing these this quarter!
Thank you all for for organizing the FAL!
Here are the 2016 Finish-A-Long Q1 guidelines:
For those of you who are new to the FAL, it is a place to find motivation and encouragement to complete those unfinished projects that are hanging about becoming UFOs. Every quarter you post a list of projects you hope to finish in the next three months, and then at the end of the quarter, you post a link from your blog, flickr or instagram of each successful finish from your original list.
Each finish is an entry for wonderful prizes from our sponsors. There is no penalty for not finishing a listed project, so feel free to make your list long or short, as you wish. The 2016 Schedule and the Rules for the FAL are on my permanent FAL page, let me know if you have any questions.
Friday, February 17, 2012
Tips: Getting Ready: Geese
 |
| Traditional Geese |
I made four geese following the directions in Gwen's books: 2-2.5" squares, 1-4.5" by 2.5" rectangle.
To 'save' the extra triangles I sewed them down too before cutting off from the goose. The results are an odd size and would need to be trimmed up. I think using a smaller seam would give a results with a better size.
I also experimented with cutting one of the geese in half and trimming to get two HST - this is a lot of work - I don't like this method for getting HST. And I think it's to much work to get one goose block - I like the way I've been doing it better - two cuts and get two geese!
 |
| One seam geese by other attendee. |
- Sophie's four geese at one time - each with the same color arrangement
- One seam method by Ricky Tims The other woman attending the workshop zipped up her geese in a flash she said with that method - I forgot to try that method out.....
- Michelle's Liberated Flying Geese Tutorial A very liberated way that I will try soon!
My Way
 |
| My Way Geese - Freehand |
 |
| Original My Way Geese - Directions |
I like this way as I always have enough seam so I would not loose the points, and there is enough side fabric that I could more the triangle around.
Note: The way I originally did the cuts ended up with triangles that were different sized and shaped - very wonky... (and pleasing to me!)
Since my other parts for the workshop are not done in a wonky fashion though I thought I should try again - but this time use a ruler so the shapes would be consistent and in the center of the fabric.....
 |
| My Way Geese done with ruler. |
I meant to take notes, but forgot to. I think I started with 6 inches by 3 or 2.5 inches.
I just eyeballed the center of the fabric, but used the ruler to cut the triangle. The first cut I went beyond the ruler to the edge of the fabric.
When was sewing I matched the edges of the fabric for the first seam - but for the second seam I pulled the side piece up so when the seam start the fabric would be at least 1/4 inch.
I like the way these look - need to move the ruler down to be sure I have 1/4 inch at the top all the time - and perhaps 5.5 would be better width as I don't need so much fabric at the side of the block. But since I didn't write down the measurements I started with I really can't say. Arranged this way would be an interesting design to put at the edge or sashing of a quilt.... Could make two with the same arrangement for the the geese and then it would be a square on point - could be very dramatic!
I decided to try again using 2.5 by 4.5 fabric....
 |
| My Way Geese with ruler and traditional size. |
It's fun to have a variety of geese though - don't this look neat? In fact, I think I will skip making HST for the workshop and instead try to make a bunch of these - they would perhaps make neat sawtooth variation!
 |
| Assorted geese lined up. |
 |
| Geese arranged for sawtooth replacement. |
 |
| Geese as a design |
 |
| Geese arranged for sawtooth edge |
It's been awhile since I first played with my liberated geese - but I was very pleased with the method. Used in my LibRR but gave the rest of the geese away to a BlockLotto lady who was ill. The first time I made a batch using the BlockLotto directions there were so much wasted fabric I didn't like making them that way at all.
Tuesday, January 1, 2013
And now for 2013
I'm not sure what I'm going to work on this year. I have plenty of WIPs, but since I'll be leaving them behind since I can't take everything with me on the sabbatical in Boston/Cambridge.....
I still have not recovered my box of quilt tops from when I first tried quilting - they are in a banker's box in the finished part of the garage - or maybe in a closet in the house.
Last night I also wrapped my larger newer projects in a towel, and then put them in a bag in the front closet.
Boy, I have to say I've done some beautiful work this year - just didn't finish much to cuddle under. Even though, thanks to Leah Day I now know how to FMQ an entire quilt, I still have not broken thru the self-blocking doubt and actually do that beyond my samples and practices.
Left out to be used while we are gone:
So it's too bad I won't be near all my stuff, but I can make plans for when I return.
I'm thinking I won't be part of an organized online quilting project. I'm going to pick and choose more carefully. My emphasis will be on learning and finishing - not to finish a challenge.
I'm glad I did the BlockLotto for the liberated year. That got me more comfortable with the machine and with the liberated concept. I won a few times and appreciated the blocks as they freed me from doing all the piecing and I could see how others follow directions. I'm glad I did the SewCalGal challenge too - although it was not what I expected as the different instructors were very scattered in their presentations and did not build on each other. Looking back I wish I had just embraced the Free Motion Quilt Along project Leah was running - I only got to step 22 of the 45 steps. I don't think I'll be able to do the Leah Day 2013 project since I'm not sure if I will even have a sewing machine or space in the apartment to set up a sewing area, but I will read along to learn.
I allow myself to get distracted by other projects and people, have not built in the self-discipline to work on things that are just for me. The online projects I've participated in except for Leah Day have all had major shortcomings. Moderators who started sending emails all in CAPS, changing rules, adding more marketing steps, changing sites, dumping on people, not having correct directions, not updating links, etc. I know it takes time as I also have not followed thru on the Liberated Round Robin as I had planned, for me it's not a business though so I'm not going to kick myself about that. I'll just do better next time!
Well, need to think about things and what I want to learn and how I can grow. Hmm - embroidery* would be easier to carry along and work on, and the results could be put into a quilt later on. Plus, I won a sweet book that has already arrived in an online drawing:
I found the floss that my mom got me, I will be set to embroider while I'm in Boston!
* This year they will hosting a monthly pieced project!
Peter Walsh's Advice for an Organized New Year - Video - Oprah.com http://www.oprah.com/oprahshow/Peter-Walshs-Advice-for-an-Organized-New-Year-Video_1
I still have not recovered my box of quilt tops from when I first tried quilting - they are in a banker's box in the finished part of the garage - or maybe in a closet in the house.
- Evening Star
- Irish Chain
- Log Cabin
- Half Log Cabin
- Farm Scene
- Tulips
- Machine Crazy Quilt
Last night I also wrapped my larger newer projects in a towel, and then put them in a bag in the front closet.
- Liberated Round Robin I - needs rectangles and curves
- Tumbler - all ready to quilt (basted with Pinmoors)
- Wonky Shoo Fly with Leah Day beginner designs
- Gwen Marston/Freddie Workshop - in pieces but wrapped together
- FMQAYGQAL Quilt for Karl and Heather - blocks done, will be difficult to finish joining them together without loosing a lot of fabric Will make pillow cover with the larger Leah square and give as part of the gift.
- Friday Block Party Animal and other Blocks - blocks are stacked so just need to pick how to finish them
- Wonky Log Cabin blocks - stacked together
- Baby quilt with light blue background and different red, white and blue 4-patches. - want to add words to the borders, may need to make larger as the baby will be a toddler by the time they get the quilt. This one would be too difficult to bring along on the trip as I haven't decided on the fabrics for the words - the fabric is still yardage not in strips.
Boy, I have to say I've done some beautiful work this year - just didn't finish much to cuddle under. Even though, thanks to Leah Day I now know how to FMQ an entire quilt, I still have not broken thru the self-blocking doubt and actually do that beyond my samples and practices.
Left out to be used while we are gone:
- Wheel chair sized Sampler
- Giant Star
- Machine Crazy Quilt (tied - put in A's room)
So it's too bad I won't be near all my stuff, but I can make plans for when I return.
I'm thinking I won't be part of an organized online quilting project. I'm going to pick and choose more carefully. My emphasis will be on learning and finishing - not to finish a challenge.
I'm glad I did the BlockLotto for the liberated year. That got me more comfortable with the machine and with the liberated concept. I won a few times and appreciated the blocks as they freed me from doing all the piecing and I could see how others follow directions. I'm glad I did the SewCalGal challenge too - although it was not what I expected as the different instructors were very scattered in their presentations and did not build on each other. Looking back I wish I had just embraced the Free Motion Quilt Along project Leah was running - I only got to step 22 of the 45 steps. I don't think I'll be able to do the Leah Day 2013 project since I'm not sure if I will even have a sewing machine or space in the apartment to set up a sewing area, but I will read along to learn.
I allow myself to get distracted by other projects and people, have not built in the self-discipline to work on things that are just for me. The online projects I've participated in except for Leah Day have all had major shortcomings. Moderators who started sending emails all in CAPS, changing rules, adding more marketing steps, changing sites, dumping on people, not having correct directions, not updating links, etc. I know it takes time as I also have not followed thru on the Liberated Round Robin as I had planned, for me it's not a business though so I'm not going to kick myself about that. I'll just do better next time!
Well, need to think about things and what I want to learn and how I can grow. Hmm - embroidery* would be easier to carry along and work on, and the results could be put into a quilt later on. Plus, I won a sweet book that has already arrived in an online drawing:
Congratulations! You have been randomly chosen as the winer of the C&T Publishing S is for Stitch blog giveaway!
Your winning comment was:
"I do not remember having an alphabet toy or game when I was a child, but the designs are oh so fun. Pls put my name in the hat for the drawing. Thanks!"
I found the floss that my mom got me, I will be set to embroider while I'm in Boston!
* This year they will hosting a monthly pieced project!
Peter Walsh's Advice for an Organized New Year - Video - Oprah.com http://www.oprah.com/oprahshow/Peter-Walshs-Advice-for-an-Organized-New-Year-Video_1
Saturday, August 13, 2011
Back on the Saddle
I set up the machine with my new 1/4" pressure foot and went around the blocks in the pinned Wonky Shoo Fly - it all seems okay now.
I had put on the walking foot and the foot seemed to be pressing down too much - there were a few puckers in the fabric. I'm going to find the other machine my mom left me and get it tuned up and set up for the walking foot - then I will not have to mess with figuring out the set up on this machine. But it might be while before I can go thru the boxes in the garage...
Anyway, I have the five block by two block section all with the blocks outlined. Next step I'll put the quilting foot on and do the stitch in the ditch for the blocks with the Shoo Flies...
So I'm back on the saddle! and will get the other WSF section done too! Or maybe I'll do more piecing on the Liberated Round Robin...
Sunday, February 5, 2012
FMQAYGQAL - Blocks 7 and 8
Directions for Blocks 7 and 8 (AKA Row 2 Blocks 3 & 4)
Block 7: Spiral Illusion
I hadn't done this Leah Day design before as it is the 204th design and I haven't gotten that far in the Free Motion Quilting Project - but Laura suggested we do it this week so I gave it a try. The video was clear. I drew the pattern out then got my block under the needle. I knew starting the second part of the design might make it have an odd center, so when I got there I tried to make it a little symmetrical.... But by starting it where I did the pattern was not in the center - and it ended up being a rectangle shape.
But I did a pretty good job of keeping the lines straight, so I'm pleased with it. I think I would do this in two passes next time though, then the second box could be totally symmetrical.....
This is one of the first blocks I prepared - the walking foot wasn't set up correctly and there are puckers that I had hoped would settle down. Hopefully once it's all together the puckers will not stand out....
Block 8: Pointy Paisley
I watched the video - it seemed clear. I watched the regular paisley design too and then went back to the pointy version. I drew a few on a scrap of paper and then went to the machine.
This is not an easy design for me to sew. I really wanted the points to be pointy, but it was the in between places that really stood out. I went back after I finished the block and added some additional lines to fill in the holes. Now that it is done, it looks pretty good - but it wasn't a fun design to sew.
A triangle design that I really like to do is Trippy Triangles. I've done that in both my Wonky Shoo Fly and the Liberated Round Robin.
Ah, and I used a 1/4 inch foot for block 7 so I can't take credit for the straight lines....
 |
| Front |
Block 7: Spiral Illusion
 |
| Back |
But I did a pretty good job of keeping the lines straight, so I'm pleased with it. I think I would do this in two passes next time though, then the second box could be totally symmetrical.....
This is one of the first blocks I prepared - the walking foot wasn't set up correctly and there are puckers that I had hoped would settle down. Hopefully once it's all together the puckers will not stand out....
Block 8: Pointy Paisley
 |
| Front |
 |
| Back |
This is not an easy design for me to sew. I really wanted the points to be pointy, but it was the in between places that really stood out. I went back after I finished the block and added some additional lines to fill in the holes. Now that it is done, it looks pretty good - but it wasn't a fun design to sew.
A triangle design that I really like to do is Trippy Triangles. I've done that in both my Wonky Shoo Fly and the Liberated Round Robin.
Ah, and I used a 1/4 inch foot for block 7 so I can't take credit for the straight lines....
Friday, February 11, 2011
Quilting Friday: BL Hearts and Basting
I was all prepared to make my Block Lotto and Friday Block Party hearts today - but I goofed and made my first heart so instead of having the fabric in the shape of a V it was an upside down - frowning heart....
So I went for lunch and when I came back I decided to baste another section of the Wonky Shoo Fly quilt. (5 x 2)
So it wasn't as successful as last week's sewing session, but I did get a start on things.
So I went for lunch and when I came back I decided to baste another section of the Wonky Shoo Fly quilt. (5 x 2)
So it wasn't as successful as last week's sewing session, but I did get a start on things.
Tuesday, January 3, 2012
Shut Up and Quilt!
The Free Motion Quilt Project: Let's Start a New Project
Out of order, but when I read Leah Day's post today I realized that I needed to go back to her January 1st entry - and what a wonderful surprise that was!
She is changing up her blog and now will be having a Wednesday Quilt A Long - with follow up questions answered on Thursday. We can use what ever we have handy to do the practice...
Seems she was reading my mind. In her entry she mentions being bored on her end with doing designs in isolation on little 4 inch squares and how she wants to work on sizing the stitching up to what most people use in their quilts...
I've been doing her beginning patterns as part of my Wonky Shoo Fly quilt - instead of the 4 inch squares I wanted to end up with something useable It's been working fine - but even though I'm not finished I've been feeling like it's not quite enough. I'm not bored but it wasn't feeling 'real' to me.
So when Sara described how she did QAYG for adding borders I decided to baste what I had done for the Liberated Round Robin and to change things up and to divide the result into sections. I challenged myself to not quilt in the places with piecing - it was very successful for first try. (Next time I want to work on adding more stuffing or something to the pieced areas so they stand out more.)
I listened to the first entry for the SewCalGal FMQ Challenge (one expert a month sharing a video with tips) and found the first one to easy to follow but I bet very hard for the beginners to figure out how to do. Still it won't take a lot of time for me to do one sample per month listening to a different teacher....
I sort of feel like I've been on the FMQ bandwagon ahead of others - ever since I started practicing I've been thinking how I like the actual quilting as my favorite part of the process. Not the planning, the design or picking out of fabrics, colors or patterns. Not the cutting and piecing or ironing. I like what happens after the basting -> getting to actually start quilting!
There is something to be learned from everything so I'm going to be going back and forth between different projects so I don't get entirely rusting on one part of the process.... but this year I will be working to finish projects - not just work on them.
Leah ended her video post with the pitch that she was going to Shut Up and Quilt (she used to say Let's Go Quilt) but has changed it as she wants to develop the resources and foundation for our quilting - but really wants us to quilt a little everyday so we improve at our craft/ hobby.
Sunday, September 11, 2011
FMQ - River Path and WSF Section Completed
http://freemotionquilting.blogspot.com/2010/01/day-121-river-path.html
 Before:
The video is pretty clear - it shows how to start and then how to fill in on one side. Looking fotward to doing this design.
 After:
I thought this was going to be a really easy pattern to do - but I lost track of how many times the thread broke or even worse the needle skipped and then picked up again. I understand now why she had the curve arranged so the foundation line goes almost up to the edge - then the remaining stitches are just in the small area - it's hard to try and make several large curves - easier to do in the sections. The end result is nice looking - I need more practice to really like doing these large curves though.
================================================
I have now finished another basted section of the Wonky Shoo Fly quilt!
 Now I will be finding the rest of the blocks and sewing them together so I can baste them together so I can practice more free motion quilting....
 But first I'm going to switch over to working on my Liberated Round Robin project. I want to sandwich what I have done now and quilt it - then use the QAYG border method for adding my yet to be sewn rectangle and curved borders.

The video is pretty clear - it shows how to start and then how to fill in on one side. Looking fotward to doing this design.
 After:
I thought this was going to be a really easy pattern to do - but I lost track of how many times the thread broke or even worse the needle skipped and then picked up again. I understand now why she had the curve arranged so the foundation line goes almost up to the edge - then the remaining stitches are just in the small area - it's hard to try and make several large curves - easier to do in the sections. The end result is nice looking - I need more practice to really like doing these large curves though.
================================================
I have now finished another basted section of the Wonky Shoo Fly quilt!

 But first I'm going to switch over to working on my Liberated Round Robin project. I want to sandwich what I have done now and quilt it - then use the QAYG border method for adding my yet to be sewn rectangle and curved borders.
Monday, August 29, 2011
FMQ - Stomach Lining
http://freemotionquilting.blogspot.com/2009/11/day-88-stomach-lining.html
 Before:
Watched the video and saw that she did not change the orientation of the fabric while she sewed this center out design. It's been a while since I did FMQ - we'll see how many needles I break while doing my block!
12:08 AM
After:
The design sewing went a lot better than I thought it would. I broke the thread one time - but did not break a needle! Hurray! Turns out I didn't have the start in the center of the block so I sort of did u-turns to fill in the space. I don't think it looks like a stomach lining, it doesn't look like Leah's model. But it is a pretty nice design. This is my first center out design to FMQ. 12:35 AM

I have now finished another section of the Wonky Shoo Fly Quilt.


Wednesday, February 8, 2012
FMQAYGQAL Row 2 Summary
 |
| Front |
I have linked to Laura's site - I'm #2 this time!
At the end of the project we will have 24 quilted blocks - she is going to give suggestions for how to get the blocks together so we end up with a quilt.

 |
| Back |
Laura says she will keep the guidelines up for this FMQAYGQAL so you can join in anytime!
I'm coding all my entries on this with FMQAYGAL - so clicking on this link will show all the related posts. (Most recent will appear first.)
My Other QAYG Quilts
- Wonky Shoo Fly - FMQ on plain blocks of a quilt
- Liberated Round Robin - FMQ done in sections
Saturday, January 19, 2019
Was Menu for Process Posts
This was a blog page, copied and moved to post format.
I am using this blog to document my thoughts and ideas about different (probably mainly quilting) projects.
The link to posts on this is (showing the most recently posted first):
http://quiltquest.blogspot.com/search/label/Process
http://quiltquest.blogspot.com/search/label/Process
When there is a photo - double click to see the enlarged version.
Posts about WSF - Wonky Shoo Fly Quilt
http://quiltquest.blogspot.com/search/label/WSF%20Sampler
Posts about QFK - First Machine Quilt
Posts about QFK - First Machine Quilt Sampler (Quilt 2)
I took the Process pledge from:
http://r0ssie.blogspot.com/2010/05/process-pledge.html
Since I don't have that many finishes this will be what I do naturally - show my thoughts about the projects, planning steps, etc.
I might also have Process posts on other things - I'll code them differently so people who just want fabric thoughts can go to those screens...
Saturday, January 15, 2011
More Challenges...
I've been noticing that several bloggers have issued different challenges for finishing UFOs during 2011.
Patchwork Penquin Challenge for 2011. Has 38 participants when I just checked. (listed on sidebar)
Participants are asked to pick 10 projects they have started - put the numbered list on your blogs sidebar and send Nancy an email so she will add you to her sidebar. Nancy will draw a number and you work on that project. (Nov and Dec there is no drawing - that's time for holidays)
Patchwork Times Challenge for 2011. Has 197 participants when I just checked.
Participants are asked to pick 12 projects that they have started - send in a numbered list with photos - then each month Judy will draw a number from 1 to 12 and participants are to work on that project.
I've been doing online quilting groups for a year now - still learning the ins and outs of things. But just like keeping a food journal or exercise log - or reading log - time can slip away with no products so it is good to keep track to see progress!
I mainly have blocks - nothing as finished as the participants I clicked on. I would like to continue with my weekly and monthly challenges and to finish at least two bed sized quilts this year.
I am really committed to going thru all drawers and closets in the house this year too so I know that will take away from my time and energy that could have been sewing...
1. Current - BlockLotto Wonky Shoo Fly blocks - I have started sewing the top together for Quilt as You Go as I want it to be a bed sized project. Need to go to adult ed classroom on Fridays so I can finish basting the sections so they are ready for me to quilt.
2. Current - BlockLotto Log Cabin with Attitude blocks - I just have the blocks. My husband likes these blocks so they also need to be a bed sized project (or at least a chair quilt for him).
3. Current - Friday's Block Party - I have two blocks done - they are revealed one a week. Right now they are 10 inch blocks, but I think later on they may be different sized blocks.... There would not be enough blocks to make a bed sized quilt for a few months.
4. Current - BlockLotto - Make the monthly challenge blocks. Depends on luck whether these become a quilt by me!
5. Current - Chinese Coin - I have some sewn - not enough for anything yet though.
* Find in the garage my previously finished quilt tops and backs and get them sandwiched and quilted. The ones I remember are:
6. The Barn Scene - lap or baby sized. Can't remember if I did backing - if not any color/fabric would be good. This was a fun quilt - did in a class - there was sort of a pattern but it was more of a technique sampler that ended up with pictures made of fabric. My first mitered corners, y seams, applique, liberated sky. Fun.
7. The blue and yellow log cabin - baby sized. I have material that could easily become backing. I loved the fabric for this quilt - I used to make pants for Al too so nice memories for me. The pattern though is very strict - I think I did with 1.5 inch strips so not a very big quilt - but not fun to sew so I just want to finish it up.
8. The half log cabin - king. I don't think I finished all the blocks and know I didn't do a backing. This was a blast to sew. A local store organized a strip exchange so I got a bunch of strips. One bad of lights and one of darks. We used Sharon Craigs method of sewing the blocks - I enjoyed it so much.
9. The stars and planets - extra long twin - for Al - still need to finish the planets and make the backing. The front is my very first quilt - done in a class. The teacher told me I should not use plain fabric and that yellow was not used in quilts. So I picked fabric that was plain with little black designs - in the colors of the rainbow. I made two different sized stars. Be thought I should stick with just the primary colors so I was getting advise from all corners. Then when I showed baby Al the quilt top he said where are the planets? So I took the farm scene class to learn how to make round shapes and I made planets out of materials that were the same colors as in the poster Al had in in his room and I made them to scale with the earth being one inch. I showed Al the planets and he said where is the sun? I was over whelmed with trying to figure out how to show the sun and put the blocks and all my sewing away. I think now I'll just say he is the son!
10. The green and orange tulips - full. Can't remember if I prepared a backing. I think any small flowered fabric would be good. I used the pattern from Eleanor Burns but did a different setting - I was going to a look to make the tulips look like they were random on the field but people looking at it thought I had made a mistake. I was making this for Aunt Ju who has since passed away so I could give to her daughter or to a charity.
11. The crazy quilt - baby. This will be easy to finish once I find it. I did do the first one of these and finished by hand tying.
12. The triple Irish chain - table cover size. The backing is beautiful - I ended up liking it more than the front! I put the flimsie on table and some candle wax dripped down so some repair work has to be done before I can finish it up.
13. I found some large stars on white background in the garage. King plus sized. Either my mom started it or it was purchased at a garage sale. I'm not sure if the fabric is strong enough to finish the project up. Some repair work would be needed.
14. Oh my gosh, I forgot the blocks that I had the Friday Group do when they were 2 and 3 years old - I remembered labeling them before boxing them up.. Maybe I can add some photo blocks as I finish them and do the sashing and borders.
15. Friday Group
16. Friday Group
17. Friday Group
Gifts to make that are not even a gleam in my eye:
Ka and He Wedding Quilt (Married October 20th, 2007) She likes lime and brown and I've grown to like those colors in fabrics too...!
Would be nice to make something as a gift for Ja's wedding quilt (to be married Apr 2011)
Subscribe to:
Posts (Atom)