Pages

Showing posts with label leah2018. Show all posts

Sunday, March 25, 2018

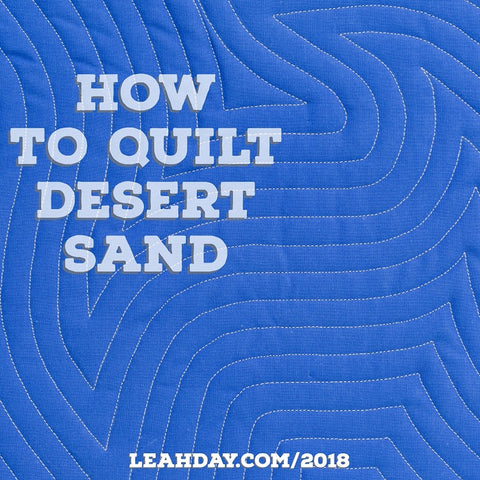
Leah Day's Explore Walking Foot Quilting: Desert Sand

Leah's new design is called Desert Sand.  She has words and video on her website @ https://leahday.com/pages/how-to-quilt-desert-sand-walking-foot-quilting-tutorial

Took a couple of looks at the video, and the book to plan out my initial quilting line.  Although mine looks different than Leah's, I'm really pleased with it.

It took me longer as I misplaced the fabric I had cut to make the backing so I had to get out other fabric and make up a few blocks.  In the process I straightened up my sewing room a bit so that was good I guess.

I used some new-to-me basting spray to put together these sandwiches, and didn't notice until I was about half done with the stitching that the places where I double sprayed have a different color.  You can see in the photo below...


Doesn't show on the back as far as I can see...


I had prepared two sandwiches at the same time, so I removed the fabric from the unquilted one and put it in the wash with some towels. (thinking the heat and/or soap might melt it away)

But the stain did not go away.  I used 409 to remove the over spray from the counter so I sprayed the fabric and was able to get most of the glue off the back fabric with a  toothbrush, and washed again but there is still some color.  With work I could remove all the glue.

409 won't help the desert sand sample I finished up unfortunately.  That glue will always be in the quilted sandwich. : (

HDX Multi-Purpose Spray Adhesive - Purchased at Home Depot

This is the spray I used for the basting.  A friend uses it and recommended it.  (It's less expensive than the stuff one buys at quilting or fabric store.)  But probably she sprayed the batting instead of the fabric too so there is no problem then.  Also she sprays outside on a piece of plywood that she doesn't care about over spraying, so guess she doesn't double up on the spray.  And she perhaps has only used with dark fabric.  So I still think there is a chance of using this for quilt basting.  

Added: I blogged about my friend's spray basting when she helped in 2016 - in rereading that see that she usually used an unknown to me 3M product.  She sprayed on the backing, applied the batting, then sprayed the batting and applied the top - and the top she was helping me with was all dark fabric.

But I will use Dritz or 505 Quilting Spray Adhesive again for real quilt tops.  I'm glad this was just a block that was wrecked. 

** I just searched for "Quilting Spray Adhesive" and see there are several other brands to try too...


Saturday, March 10, 2018

Leah Day's Explore Walking Foot Quilting: Super Star


From: https://leahday.com/pages/how-to-quilt-super-star-walking-foot-quilting-tutorial

This was pretty easy to finish up!

Leah was thinking this would be good in an open space on a quilt, and I guess it could be.

TIP:  I cut two pieces of fabric the width of space between the stitches and put them on the fabric when I neared the point so I could mark where to sew. (So the fabric was my small ruler template.)


Link to Leah Day's menu link about Walking Foot Quilting in 2018:
https://leahday.com/pages/2018-machine-quilting-party
or
http://freemotionquilting.blogspot.com/p/2018-machine-quilting-party.html
My blocks so far!


Saturday, March 3, 2018

Leah Day's Explore Walking Foot Quilting: Jagged Plain


 Another walking foot design from Leah!

Jagged Plain

This one builds on the practice we have already done.  It's important to keep sharp corners and to keep the lines the same distance apart.

Here is my practice block.

I messed up in the corners of the first two lines of stitching, after the foundation line, so decided to mark the stitching lines instead of using the guide bar for the stitching.  When I wasn't at the correct ending point I found it was best to turn and just keep going.  My earlier mess ups were because I didn't realign correctly to the earlier line.  I think the corners being crisp is more important than the lines being absolutely consistent. My lines are one inch apart. When I was marking I was surprised sometimes at where the lines intersected, so marking is good with this design.

So this is what I did for quilting today. 

Tuesday, February 27, 2018

Leah Day's Explore Walking Foot Quilting: Curving Lines

What fun!  Another Leah Day Walking Foot Design - and I already had a quilt sandwich prepared!  Even so, because I was timing something in the oven, I estimate this block took about 70 minutes for me to stitch.  I did run out of bobbin once and also later ran out of the top thread so maybe with all that stopping and tying threads that amount of time is expected?

I cut the threads a little long when the bobbin ran out, but I wanted to remember where it was so I could find the hidden connection.  And I can if I look closely.  But looks so much better than it had before rewatching Leah's videos!


I used the guide when I was doing the stitching - this kind of repetitive line stitching is so tiring so having the lines farther apart helps me finish things in a more timely manner.  I noticed that sometimes the guide turned away from touching the fabric, resulting in lines that are not parallel.  But I think close enough.

I had already done curved walking foot stitching on my Put a Little Love in Your Quilt project (before I read that curves were supposed to be tricky with walking foot), so I was not intimidated by this design.

In the post Leah shows and discusses again 'whiskering'.  She had mentioned before but I didn't understand what it was.  In looking back at the blocks I have done it seems I may have 'whiskering' on all my samples!

'Whiskering' is all the little waves in the fabric between the stitching - here is her graphic.
https://blogger.googleusercontent.com/img/b/R29vZ2xl/AVvXsEhKNAZu6uXbts8228_PY1ipmz0JeEozCL-c6vQiJVjnsC6dEry9zyLOyWJiN5PvPgtFlPkIDbLOi-8fwrIticgaX0zeYce-kXmLadSq5HtB9uWH7xkPGOR9inZ5_WReMjwpKJZkPXKkV1I/s640/how+to+avoid+whiskering.png

It is unclear to me whether this will disappear once the piece is washed, or if it will forever be visible...

Here are my six completed blocks.  I'm just grabbing solid fabric and making two sandwiches with the same color.  If I had realized how using the walking foot helps make the back look as nice as the front I would have used solid there too - and maybe I would have done the math and figured exactly how much fabric I would need and been more controlled with my color picks.  But then each of the blocks is being done on the samples of the Hobb's batting that I have so it probably okay to be sampling different colors for this project too.

In the beginning I was measuring and marking the squares as Leah had directed, but now I see I am just quilting to the side of the fabric.  So I hope that won't mess me up at the end when it is time to join these blocks.  I have Leah's book but she mentioned in one of her posts that she was looking into different ways to join the blocks.  Whatever, it is nice to have this practice project! And I vow to join it together to make a quilt that we use!

Yesterday I brought the quilt that I am going to use for my larger quilt practice with the walking foot to my group.  Only no one else came, and I forgot ironing pad, and I cut the batting too short, so I just packed things up and brought them home... So that will have to wait for another two weeks...

Monday, February 19, 2018

Leah Day's Explore Walking Foot Quilting: Zigzag Lines

Another walking foot design by Leah Day - Zigzag Lines.

This design was pretty easy to do.  I started by spacing with the edge of the walking foot, then decided to use the walking foot guide to have more space between the lines.

I did draw the lines to indicate when the needle was going to be turned, but in a few cases I overshot that mark.  In those cases I tried to make the corner crisp and just did the line so it was evenly spaced from the guide line.

The bobbin ran out in the middle of the work, but I followed Leah's hints and the end and beginning of the line really does not show any interruption in the stitching - with a magnifying glass I can see, but I doubt anyone else will inspect the block that closely!

The batting this time is black, it was very firm.  I'm going to ask a friend who is going to the Pasadena conference to buy another sample pack of the batting from Hobb's hoping that I'll be able to label what battings I am using for this sampler project!


Leah's Directions are very clear - Hope you will get the book and join in the projects this year!

Started the day with a five mile walk around a local lake with a quilting friend and her dog.  Amazing how much more fun it is to walk with a friend!

Thursday, February 15, 2018

Leah Day's Explore Walking Foot Quilting: Super Wobble

To get back to quilting, today I stitched my version of Leah Day's Super Wobble.

Perhaps today wasn't the best day to try this stitch.  I was impatient and the idea of having lines .5 inches apart was not appealing.

I watched the videos, marked the center and started.
After stitching the first few stitches I realized I had left the needle so it was to the left, and I was unable to see any of the markings.

I thought I could go back and add stitches so the center would be more evenly stitched.

So here is my finish.


It doesn't look anything like Leah's, but it's okay.  Took 35 minutes to quilt this.  Might be fun to try an even circle spiral. Claire said she likes to do those with walking foot.

The batting for this block is very firm.  Sure hope I'll be able to meet a Hobb's rep at a meeting or convention so I can match the batting with the name of the batting!


Thursday, February 8, 2018

Leah Day's Explore Walking Foot Quilting: Gridlines

Another Leah Day Walking Foot Design: Gridlines.

In addition to the videos, I have her Explore Walking Foot book and am finding it to be a good resource too.

With her directions this was easy, although time consuming to do.  The Hobbs batting sample is very firm and I think that made it easier to quilt (although I'm not sure).

Front:


Back:

This design sort of reminded me of a mattress pad or the pre-quilted fabric my mom and I bought for projects.  I know Leah has some exciting places where it will show up!


Leah Day's Explore Walking Foot Quilting: Concentric Squares

Continuing on with learning walking foot quilting designs with Leah Day...

This time it was Concentric Squares.

Here is my front.

And the back.

Each square had a new start and stop that had to be tied off.  I had thought I would do the design 1 inch apart, but then after awhile changed it up.

The directions are clear.  For me, today this design wasn't that much fun to sew.  Perhaps in a real quilt it would help make the quilt sing!  For the project we were supposed to make the rainbow log cabin, but I was working on the Blog Hop Heart project so didn't have time.  I think I may pull put a flimsie and do the stitching on that instead....

But for this sampler,  here are my first four designs....


I forgot to mention that I'm using a sample pack of different types of Hobbs batting for this project.  I got them at the San Diego Quilt Show and must have used a piece for something.  They are all out of order now so I really don't know what batting is what!


Sunday, February 4, 2018

Leah Day's Explore Walking Foot Quilting: Bright Star

Another great Leah Day lesson on Walking Foot Quilting.  Today I worked on quilting a Bright Star!

In the post Leah also included a review for how to deal with broken threads and hiding thread starts and stops.  Every time I watch the videos I pick up new information. First time I missed that we were to tie a knot but did get to bring the threads inside the quilt at least an inch. Then somehow I thought I was supposed to take the two ends and tie two knots! This time I've got it, just loop both threads, insert the end, and put the needle it to control where the knot ends up. And in this video I could see that the two threads do not come out the same hole. I was using a needle to get the threads out of the same hole figuring I had done something wrong. Anyway, I think I have it now!

But to be real in making my bright star I didn't watch the tying and hiding thread video again until I had done a few rays. 

I'm pretty pleased with how mine turned out. For a few of the in-between rays I went from one side to the other carefully checking that the tape was placed in the correct center point. I was slowing down when sewing to be extra careful at that point and now rewatching the bright star video I realize I was also doing what I was supposed to do to cut down on the thread build up. 

Since I started outside the marked square and ended also outside the marked square I missed out on some of the tying off practice, but know there will be other opportunities for that!


Here is the front:


Here is the back:


Thanks so much Leah for these lessons.


http://freemotionquilting.blogspot.com/2018/01/walking-foot-quilting-how-to-quilt.html
This post includes a link to how to do the design with a walking foot, with a quilting foot, how to mark, and how to hide broken threads!

This is all part of her 2018 project on using the walking foot.  She has a book to supplement the videos. So far this has been very fun to follow along!

Saturday, February 3, 2018

Leah Day's Explore Walking Foot Quilting: Crazy Lines

I'm following along, or should I say behind Leah Day's 2018 Project for learning to use the walking foot.  I prepared a few sandwiches to hopefully make it easier to get caught up...

But I have now stitched my second Leah Day walking foot design.  Crazy Lines.

This was pretty quick to quilt.  I think it would be nice in a space on a quilt where there is plain fabric.  Well, it would be good anywhere actually!

Here is the front


Here is the back.

Difficult to see, but I went back and added a few extra crazy lines going the other direction just between a few of the lines....  Not really worth the effort, at least using this gray thread.  But thought it might add to the design..  At least it doesn't take away from the design!

Behind the scenes I've finished the walking foot quilting for my project for the Put a Little Love in Your Heart Blog Hop that will be next week!  I just have to do the binding and then I'll be done!  This will be the fastest I have made a complete quilt!  Guess it's good to have deadlines...


Friday, January 26, 2018

Leah Day's Explore Walking Foot Quilting: Straight Lines

I have Leah Day's Book and I'm following along on her blog - this year we are learning quilting with a walking foot!  When I first started I tried a walking foot for the bindings, and it was really difficult for me to do.  (I think I broke the one that went with my Mom's Kenmore.)

My husband got me a new Brother (because it was rated as a great machine by Consumer Reports) as a surprise a few years ago and I have been now getting used to using it.  It's been great for piecing and has been fun to experiment with some of the extra stitches too.  But I hadn't put a walking foot on it until yesterday.

I pretty much followed the directions for Leah's making straight lines...  Except I didn't measure correctly so there are a few that are not the same distance between them...  Here is the front - where it's easy to see the stitches!

And here is the back!  I was amazed that the center line exactly had a line of stitching.  It wasn't planned but is very nice.


I had played around with the length of the stitches as she advised (but I didn't preserve mine so I can't show it to you).  I liked the 1.30 setting, but then I realized I had turned the machine off when I went downstairs and I forgot to change the setting again - most of this was just done with the default length so I think I will leave it at that!  Looking at the different stitches reminded me of when I rode a bike with different gears.  I really couldn't tell the difference between all the settings... Oh well.

So this foot went on easily.  I marked the first center line then tried to use the side of the presser foot to guide me for the remaining lines, but then decided to use a piece of tape and since my tape was 1 inch wide that is what most of the remaining distances are.  Then I experimented with the quilting guide that came with the Brother and that was great to use.  I could put it in so it was aligned with stitching on the right or the left.  Of course it would have been easier if I hadn't needed to readjust that with each change of direction, but it made it very easy.


I'm using the walking foot for quilting my project for the Put a Little Love in Your Heart Blog Hop that is coming up in about two weeks!  I wish I were done with my quilt so I could take a snazzy photo shoot this weekend, but oh well.  Going up to Pasadena with my son so we can have last sundae and hamburger at Twoheys in Alhambra. We will do other things too of course but I wanted him to remember Twoheys as I have been going there for many years.  Sad they are closing down, after 75 years they lost their lease.  : (

Thanks for coming by!