Pages

Sunday, February 18, 2018

RSC18 - February Purple and Lavender


I've been fiddling with the scraps for a few days, but finally got my RSC18 block for the month completed...

It almost looks like two blocks just sewn together, ah well.  Hopefully will look nice when someday all sewn together!

Linking up to: SoScrappy
Click to see what beautiful things the others are working on!

Thursday, February 15, 2018

Leah Day's Explore Walking Foot Quilting: Super Wobble

To get back to quilting, today I stitched my version of Leah Day's Super Wobble.

Perhaps today wasn't the best day to try this stitch.  I was impatient and the idea of having lines .5 inches apart was not appealing.

I watched the videos, marked the center and started.
After stitching the first few stitches I realized I had left the needle so it was to the left, and I was unable to see any of the markings.

I thought I could go back and add stitches so the center would be more evenly stitched.

So here is my finish.


It doesn't look anything like Leah's, but it's okay.  Took 35 minutes to quilt this.  Might be fun to try an even circle spiral. Claire said she likes to do those with walking foot.

The batting for this block is very firm.  Sure hope I'll be able to meet a Hobb's rep at a meeting or convention so I can match the batting with the name of the batting!


Martha Stewart's Upside-Down Lemon Meringue Pie

Can't remember why we talked about making lemon meringue pie.  Perhaps it was because our nice, new neighbor sent an email that I could/should come to her side yard and pick from her trees...

I've never made meringue before so read several recipes before deciding which version to try.  At least two made mention of making a short bread crust for the pie.  That sounded like it would be too much for me...  Then I found Martha Stewart's recipe for what she calls Upside-Down Lemon Meringue Pie (AKA lemon angel pie).  No crust to make. Sounded perfect.

So yesterday we started our pie making adventure.

The crust was easy to put together.  Her recipe says to bake for 40 minutes or until it was crisp and light golden on the outside.  It took our oven 60 minutes to get to this stage.  Then you are supposed to keep in the unopened oven for another hour.  (Throwing off my plans for dinner so we ordered pizza to be delivered.)


While the crust is baking there is plenty of time to make the lemon curd.  After that becomes thick you put it in a bowl, cover it with plastic wrap so a skin won't form and cool that down.


Then you make whipped cream and fold that into the lemon curd - that mixture is then put into the crust.

Then I noticed the notes in the recipe to 'Refrigerate, loosely covered, at least 8 hours and up to a day.' Had misread before - thought it had said up to 8 hours not at least...

Knew it would take a long time, but had estimated we'd be eating at 11pm.

So sadly, the pie went in the frig. We played some gin rummy and Set and then went to bed, making appointments with each other to have pie and coffee at 8:30 the next morning...


I was first up so I made the final whipped cream to top the pie and got out the fancy tea plates...

The only thing is I misremembered the amount of sugar to put in the whipping cream. I put 1 cup but the recipe calls for 1 tablespoon...

It was a very sweet pie.


But very pretty and the crust was fun to have.  The extra sugar was very apparent, but it was still tasty.  (Although we were thinking it needed rice or something to absorb the sweetness.)


We think it would be good to try with chocolate pudding and bananas too.

Anyway, it was fun to make with my son and enjoy with both he and my husband.  They were pleased I think to get the heart mug rugs - and my son was sweet to make note of how wonderful the 'outside finishing seams' were.  (I had told him about my attempts at binding - he was listening!)

So this extended our Valentine's Day.  No flowers or chocolates or singing like Tu-Na Quilts.  But heart mug rugs, gin rummy and first time ever meringue lemon pie!   : )

------------
My mom used to make individual lemon meringue and grasshopper pies for baby and wedding showers.  I remember how pretty they were, but can it be she made in cupcake pans?  We certainly had enough of those as a regular basis we would make hundreds of cupcakes for Pacific State Hospital when my brother was there.  She got on a kick of making meringue cookies, little scoops of the stuff was put on cookie sheets and left in the oven to bake even after the oven was turned off.  She experimented and put in chocolate chips one time, and mashed strawberries another.  Yummy.  She would ask me to buy her meringue cookies when she was in assisted living.  I'm sorry it never occurred to me to try to make them for her.

I mentioned the other day how we made crepes for the beginning of Mardi Gras. Found out it's called Fat Tuesday in France!  On Wednesday we noticed people with the mark of ash on their foreheads and I was reminded of the delicious Shrove Tuesday buns that I had when I was in Sweden.  We looked up the recipe so this is now on the list to make too.  It's a special bun, stuffed with ground almonds, topped with whipped cream sometimes served in a bowl of hot milk.  I only had it the one time, but it was delicious.  Again something that never occurred to me to make...  But we will now.  In the days when I was in Sweden one only had it once a year, but I was reading that now people are having every Tuesday until Easter.

About Mardi Gras celebrations around the world
https://www.timeanddate.com/holidays/common/carnival-tuesday

About Sweden Semla Buns
https://sweden.se/culture-traditions/the-semla-more-than-just-a-bun/

"The Semla - More Than Just a Bun

Rooted in tradition
The semla – a small, wheat flour bun, flavoured with cardamom and filled with almond paste and whipped cream – has become something of a carb-packed icon in Sweden. The traditions of semla are rooted in fettisdag(Shrove Tuesday, or Fat Tuesday) when the buns were eaten at a last celebratory feast before the Christian fasting period of Lent. At first, a semla was simply a bun, eaten soaked in hot milk (known as hetvägg).


The changing face of semla
At some point Swedes grew tired of the strict observance of Lent, added cream and almond paste to the mix and started eating semla every Tuesday between Shrove Tuesday and Easter.
Today, no such reservations exist and semlor (the plural of semla) usually appear in bakery windows as near after Christmas as is deemed decent – and sometimes even before. This is followed by a collective, nationwide moan about how it gets earlier every year. Shortly thereafter people begin to eat the things like the world will end tomorrow.


But, increasingly, not just any semla will do. Every year, at around the same time that the bakeries fill with semlor, the Swedish newspapers start to fill with semla taste tests. Panels of ‘experts’ dissect and inspect tables full of semlor to find the best in town."


https://www.recepten.se/recept/semlor.html - a wealth of Swedish recipes!  I hadn't thought about this food in so long.  The translations are fun, but with all the photos I think will be easy to follow and make. I didn't really cook when I was in Sweden - I took weekly cooking classes while I was there, but I wasn't a cook.  So the names of things were lost to me.  Oh, but I remember with fondness seeing the food and the taste! What fun we had going to bakeries for coffee and sweets.  I like the way the amounts of the ingredients are listed at the beginning and then again in the directions too.

Martha Stewart on the other hand has a system where the ingredients are listed on the left (with links to lots of ads for different places to buy things) and only the names of things are the directions.  " Topping: Whip cream and sugar with a mixer" is on page 2 when printed out, the amounts are listed on page 3. 


Wednesday, February 14, 2018

Happy Valentine's Day - Mug Rugs

During Carol's Put a Little Love in Your Quilt BlogHop, Karen at Tu-Na Quilts shared a project for making a cute mug rug. (She has the link to the pattern in the caption of the photo.)

So instead of buying chocolate for my husband and son, I made them each a coffee mug from me! I used scraps that were out from the project I did for the BlogHop.


But for the binding, I had to pull out some other fabric.  I cut it 2 inches wide as Leah suggests for machine binding.  I was going to try hand stitching, but chickened out!  The backs are the initial triangles from when I made the binding for the BlogHop project.

Leah Day: Info on applying binding by machine
https://leahday.com/pages/how-to-bind-a-quilt-by-machine

Sew Very Easy:  Folding at start, makes it easy to do the start and end of the binding on a small item.
https://www.youtube.com/watch?v=r8qzeOczXEo  Instead of folding and cutting the initial fold I just folded.
 

I'm working on using the walking foot with Leah Day this year.  For quilting I outlined the mug, handle and heart.  The batting is my first cut into the huge roll of insulated batting that I got a few years ago at a quilt shop fire sale.

Hope my guys will use their gifts at work and think of me!  
They didn't receive this morning as I was still working on finishing them when they left for work. 

Thank you again to Karen at Tu-Na Quilts for sharing her project that inspired me to make these Valentine mug rugs.

Not Quilting


Yesterday made crepes for Mardi Gras.

Used my mom's recipe:

Earlier I had made apple sauce so that and sour cream was inside each one.  I made them in the afternoon then put a sheet of parchment paper (my mom used waxed paper) between each and put in the frig.  When ready to eat just put in a warm oven for a while and serve.

My friend from quilting class told me her family made for Mardi Gras so I decided to make for us too!

Today going to make Martha Stewart's upside down lemon merinque pie.  I've never made before, but this recipe was appealing as I could skip making the crust!


Thursday, February 8, 2018

Leah Day's Explore Walking Foot Quilting: Gridlines

Another Leah Day Walking Foot Design: Gridlines.

In addition to the videos, I have her Explore Walking Foot book and am finding it to be a good resource too.

With her directions this was easy, although time consuming to do.  The Hobbs batting sample is very firm and I think that made it easier to quilt (although I'm not sure).

Front:


Back:

This design sort of reminded me of a mattress pad or the pre-quilted fabric my mom and I bought for projects.  I know Leah has some exciting places where it will show up!


Leah Day's Explore Walking Foot Quilting: Concentric Squares

Continuing on with learning walking foot quilting designs with Leah Day...

This time it was Concentric Squares.

Here is my front.

And the back.

Each square had a new start and stop that had to be tied off.  I had thought I would do the design 1 inch apart, but then after awhile changed it up.

The directions are clear.  For me, today this design wasn't that much fun to sew.  Perhaps in a real quilt it would help make the quilt sing!  For the project we were supposed to make the rainbow log cabin, but I was working on the Blog Hop Heart project so didn't have time.  I think I may pull put a flimsie and do the stitching on that instead....

But for this sampler,  here are my first four designs....


I forgot to mention that I'm using a sample pack of different types of Hobbs batting for this project.  I got them at the San Diego Quilt Show and must have used a piece for something.  They are all out of order now so I really don't know what batting is what!


Just Checking: Was it the fleece, batting or fmqing design?

After finishing the Put a Little Love in Your Heart Project, I was curious to check if the quilting puffiness dimension was a product of the FMQing or the fleece or the batting.  

I pulled out a charity top made with a different quilt pattern and finished it with the same walking foot quilting design and batting.  Not as puffy, but still a great design...


So it was the fleece that make the Put a Little Love in Your Heart Quilt puffy (and I liked the puffiness for that quilt). But with or with out the puffiness I like this variation of the orange peel quilting design!

This quilt had the binding sewn on the front as I thought I was going to try hand stitching it on the back.  But instead I found some thread that almost matches the rust border and sewed the binding on.  These were 2 inch bias cut strips.  Sewn on the front and then the back with 1/4 inch seam.


Wednesday, February 7, 2018

Blog Hop: Put a Little Love in Your Quilt

Welcome to my blog!

Last Christmas I found a fun blog hop where folks shared a Christmas project and a cookie recipe.  Yum!  We ended up making 8 different kinds of cookies for the holidays and I enjoyed the projects everyone shared.  

Carol announced the Put a Little Love in Your Quilt Blog Hop and I signed up to share.  Her requirements were just that we include a heart somewhere in the project...  This is absolutely the fastest I have ever finished a quilt!  I started January 8 and finished February 6. Click on the images to see the details!

My adult ed class teacher challenged us to make a double 4-patch quilt using different fabric for most of the design.  (If we had done this it would have been 30 different fabrics.  She has a huge stash of neat, new fabric so it's easy for her.)  Anyway, I decided to use any heart fabrics I had in my (older, mostly inherited) stash and to make the pattern with that.

Here is my quilt, semi-artfully displayed on a chair in our backyard.....!  

There are some memories sewn into this quilt.  


The white fabric with the large black polka dots (starts at the center and goes up to the right) were from a selection of fabrics I got when our (now almost 30 year old) son was an infant.  Like all new mothers, I had read how exposing the kiddos to high contrast helped developed their abilities.  Our baby ended up with a white paper plate with a black felt pen happy face in the side of his crib (as I got real since I really didn't have any idea how to sew a quilt and it was more fun to hold him anyway!)


The fabric with hearts and words (larger pieces start at the second row and goes down ending with the white heart, this fabric was also used in the smaller 4-patches) is a piece of fabric I got from my Aunt June - probably more than 15 years ago.  It was a design printed on the fabric to cut and make a sort of collar deal.  

In the bottom row is my first paper pieced attempt at a heart.  I was going to make my mom a jacket, but I could only share the sewn together pieces with her.  She felt the seams and appreciated the effort.  She was impressed even though she couldn't see very well.  That red in that heart was in the first set of fabric I ever bought to make a quilt.


Here is how I went about making the quilt:

First I went thru my fabric to pick the colors and patterns...


At first I was going to only use reds and pinks....


I started cutting to get a better idea of how things would look.  I was thinking of adding more colors.  Green and lilac were considered, but black and white became more appealing...

I started with the larger pieces and arranged them on the design wall. I decided to not use all the flower prints and instead went for more graphic fabrics.

I folded and pinned together the narrower stripes to audition how things could look...

Then I made the smaller 4-patches and added them to the design wall...

The piecing of the double 4-patch was challenging.  There were going to be many seams to match so I measured and trimmed if needed each time I got to a square!

The measuring helped.  I think all but one of the intersections is pretty perfect.  I was consistent with how I placed the fabrics when piecing and pressing the 4-patches, but when I put them next to the other blocks they got twisted so the ironing on the back is not consistent....


Ready now for the back.  I have not used fleece before so this seemed a good time to try it out!  My friend found 50" * 60" throws at CVS (3 for $10) and gave me one to use for my backing. 

I took a photo of the front, printed it and doodled to decide how to quilt the project...  (It turned out later that everyone in class did stitch in the ditch in a grid around the larger squares and called it done. But that quilting was right for their beautiful modern fabric and colored projects.)  I added a half row of blocks to the top to not waste the fleece, and added an additional line of quilting going from top to the right intersecting between the two smaller loops when I found that the batting required closer quilting... 

I thought this was going to be really difficult to quilt, but I just spray basted it to some polyester batting and used the walking foot (learning about using the walking foot this year with Leah Day).  The fleece turned out to be easy to quilt. I started and ended the quilting in the batting before I got to the top so didn't have many thread tie offs at all!  I really like the way the design makes the quilt a little puffy!  Click any of the photos to see the quilting!

The binding is my weak spot in the project.  I had hoped to finally be grown up and to hand stitch to the back.  But I decided I really wanted to finish the project in time for the blog hop...  So I cut 2.5 inch fabric on the bias, and joined the pieces together.  Sewed on the back side of the quilt with a .25 inch seam and to the front with a 3/8 inch seam.  This added an extra line of stitching that goes around the back near the edge of the binding.  Looks fine.  

I used these tips from Laura Ann Coila @SewVeryEasy https://www.youtube.com/watch?v=r8qzeOczXEo to help me apply the binding:
  • Minute 0:56 see how she preps the start of the joining part of the binding 
  • Start sewing it on on the bottom middle to distract the eye
  • Minute 4 Mark end of corner, learn foot measurement to help, 
  • Minute 5:23 stop then pinch the fabric at the end of the corner and bring up to the side just stitched.
  • Minute 6:10 use padded nail file or folded fabric to help placement of presser foot
  • Minute 8:08 how to end with her folded method of ending the binding
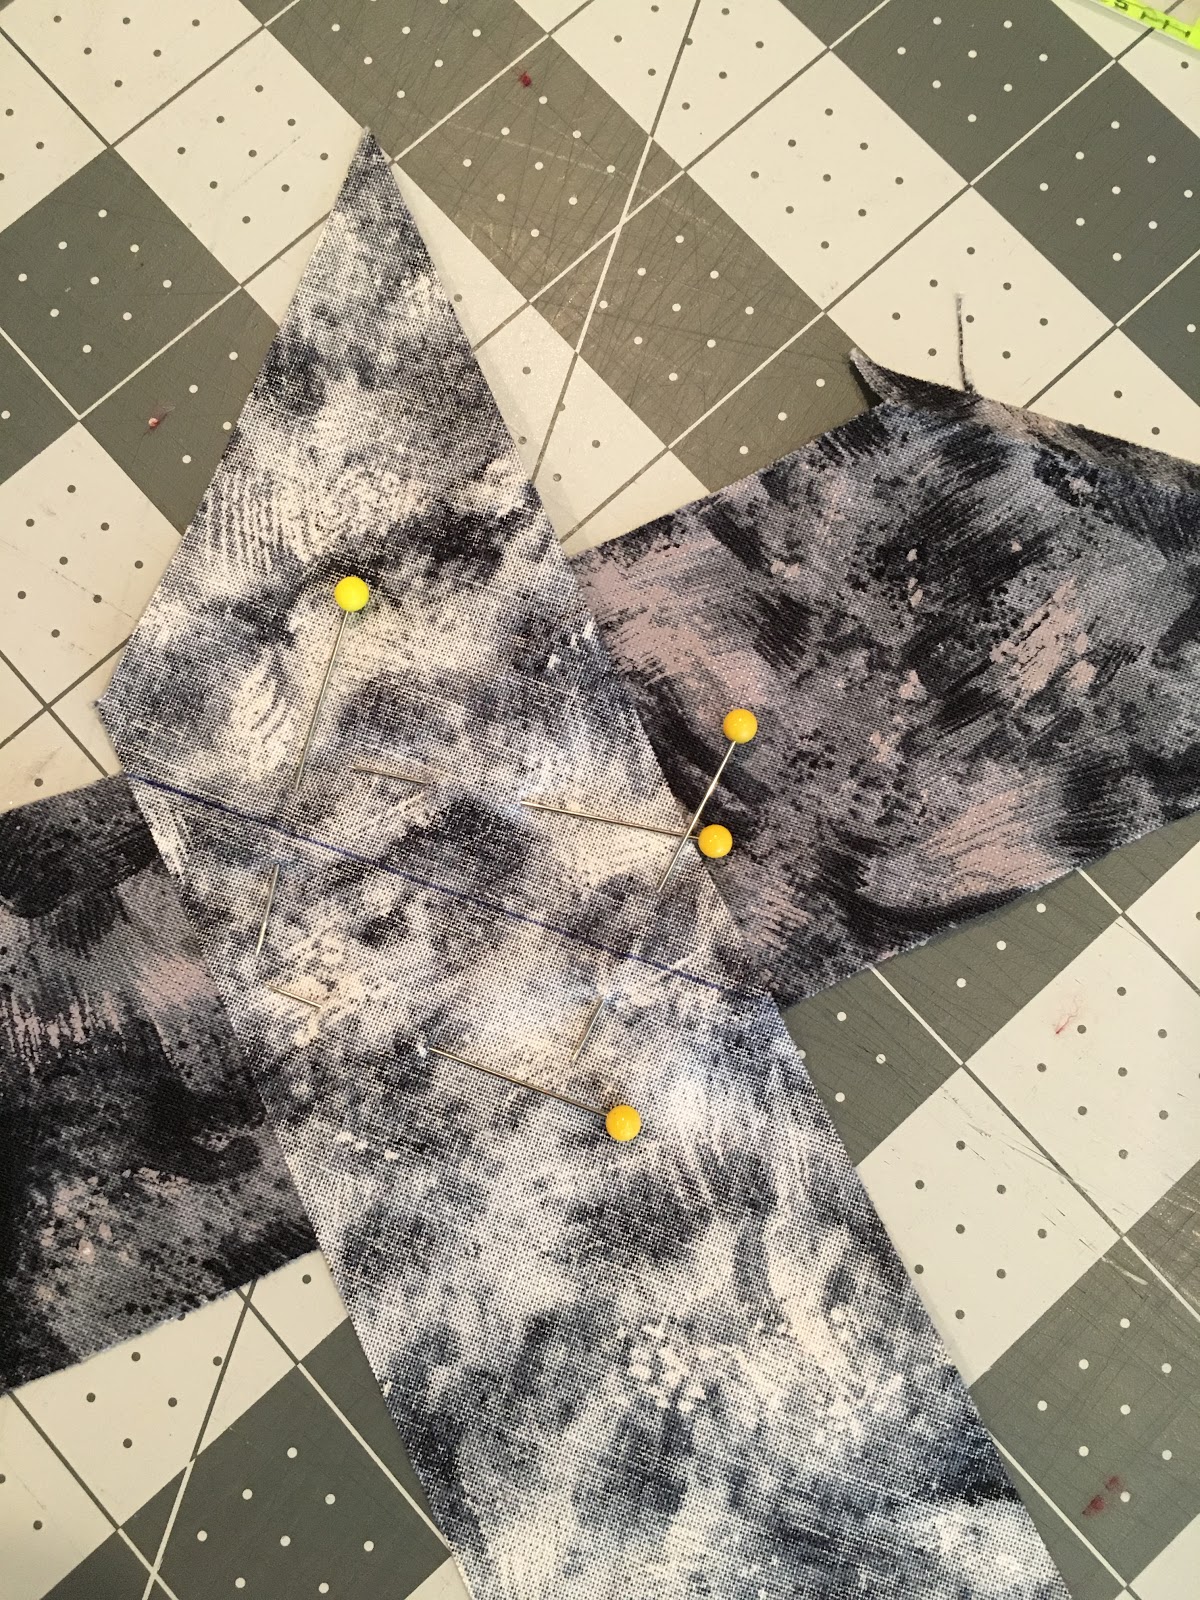
It ended up, I sort of did my cutting the way she describes here: https://www.youtube.com/watch?v=jXvLAHWbyXo except I did more work and cut my fabric into fat quarters first as I didn't notice the video until typing this! I tried making continuous bias strips but lost a portion of the fabric as the way I marked the lines was difficult to see and my cutting went wonky. In my next tries, I did not depend on the angles in the cut fabric to make the seams.  Instead I used a ruler to verify that the intersection was at 90 degrees, put a pin in, drew a line and added more pins. I chain pieced. With this extra effort all the binding fabric strips were usable and straight.

Our son helped me by taking the photos of the finished quilt, and tested the size by sitting with it on a chair.  Little Buffy and he approve, but we decided the quilt will be saved to give as a gift later on. You can really see the quilting in this photo...

I really enjoyed quilting this project and it has been so nice to see everyone else's interpretation of how to Put a Little Love in Your Quilt!

Thank you for coming by and visiting my blog.  Thank you to Carol for organizing the Put a Little Love in Your Quilt Blog Hop.

Please click on the names of the blogs below to visit the other lovely heart projects shared for the event and leave a happy comment!


February 7
QuiltQuest <-- You are here!
And if you missed the first two days.  

February 5

February 6


💕