Pages

Friday, July 30, 2010

BlockLotto - July 2010 - Fireworks

BlockLotto - July 2010 - Fireworks

Directions for making the block:
http://blocklotto.blogspot.com/2010/07/fireworks-in-july.html

Photos of Examples:
http://blocklotto.blogspot.com/search/label/June%2010%20photos

I again got a sneak preview for the BlockLotto pattern - I actually finished these the last week of June - but am on my honor to not spill the beans on the pattern before Sophie publishes the pattern on the BlockLotto blog so am just now releasing photos of my blocks.

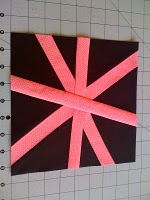
It wasn't until Sophie posted the directions that I realized that she was thinking fireworks - what a clever lady she is!  On other sites this is referred to as * asterisks * - but Sophie realized also that *'s have only three bars....

The requirements were very dark background - bold color - end up 8.5 inch square.

First I did one block:


Then I went to my stash to pick out more bright fabrics. I cut the strips then soaked each in water to check for bleeding. After they dried a bit I ironed. I also cut out the background squares. I followed Sophie's directions and started with 10 inch squares (I think 9 inches would be okay with 2.5 inch strips actually).

I did four blocks - then four more and then took these photos after adding the second and third bars...


I used pins to show me where the top of the blocks were - helped when using Kona black for the background. I think it would be good to start with more centered first two bars - then to go crazy on the last two...

Fun block to make. I can see lots of possible variations too.  Some of these look like dragon flys instead of fire works...

I showed the blocks to A's friend (Ma) - she prefers the ones that are less wonky... (She really liked the baskets for June 2010 though!)

Tuesday, July 27, 2010

WSF - FMQ Sampler - Basic Chevron (Beg)

http://freemotionquilting.blogspot.com/2009/09/day-46-basic-chevron.html

I had sort of used this design in my first FMQ quilt, but I had only one column of chevrons.

Before
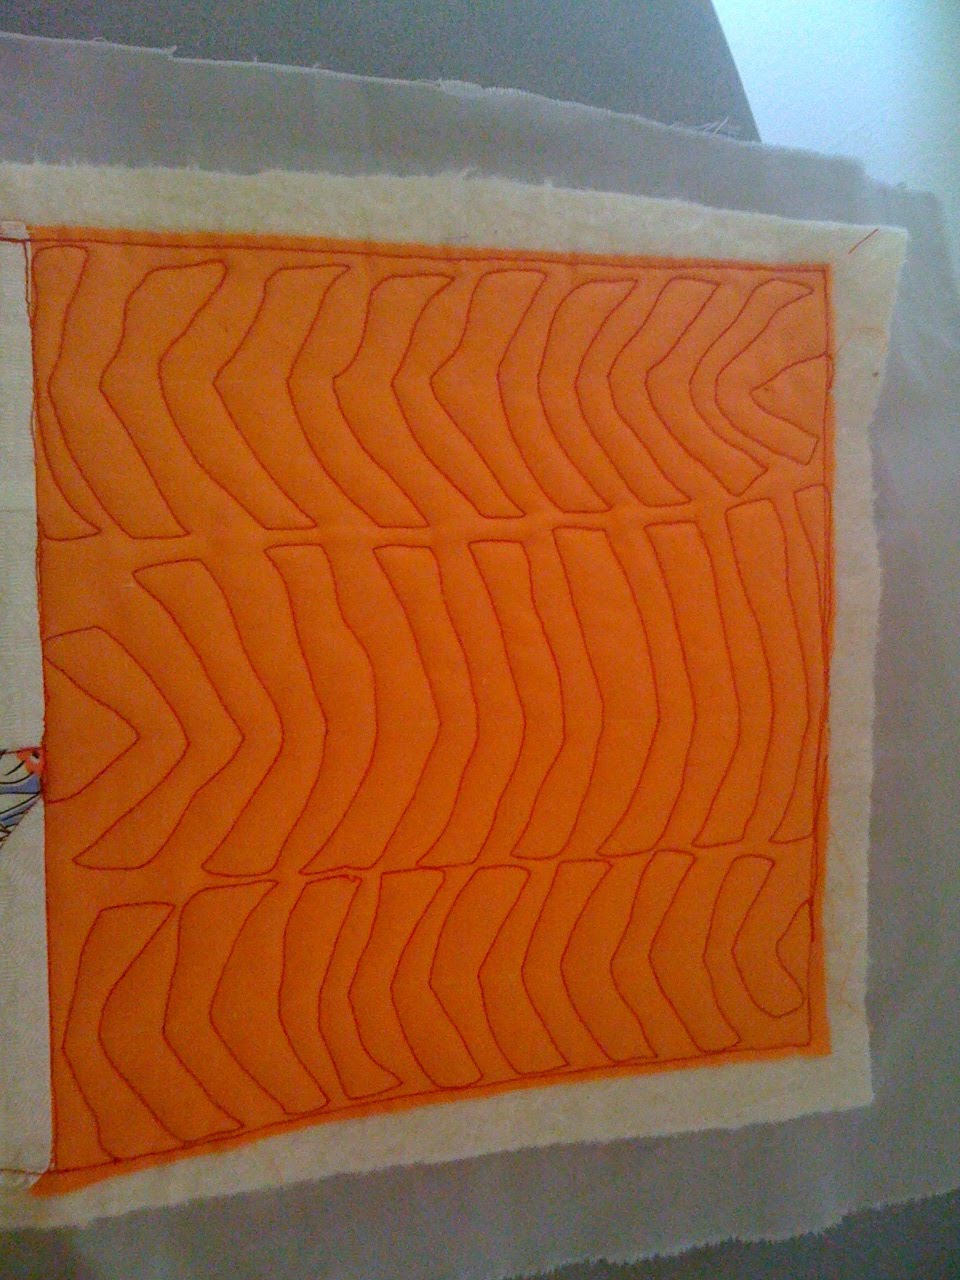
The video is clear. This design is good to do at the end or edge of a quilt as you have to flip the fabric to start the alternating columns of the design. I drew a portion of the design on paper before gong to the machine (one column then did the transition).

Front Basic Chevron

After
Man, I’m just not getting this design. I even used soap to draw a line so I would know where the tip was supposed to be. I just could not get a point to show in my sewing. During the second column I was sure the sides were supposed to go up against each other, but in the third I lost confidence and made them go more so they were in between. This pattern seems like it should be easy to do, but I’m having troubles.

I’m not sure how to correct this.  Next time I will draw a complete block instead of just the first column and transition.  Will be moving on to the next beginning design in the next section of the quilt.
Back Basic Chevron
To be clear, this does not look at all like Leah's Chevron. : (

I have now finished the first section of the WSF quilt (there were two shoo fly blocks that were both treated with SITD).

Monday, July 26, 2010

WSF- FMQ Sampler - Sea Oats

http://freemotionquilting.blogspot.com/2009/09/day-42-sea-oats.html

Before
This pattern is just like the previous one (Sea Algae) except there is a little loop at the end of each off shoot. 

Front Sea Oats

After
My loops are a little stiff looking. Also, I need to work on curving the off shoot. I was so concentrating on the loop and curving the end that I now see that the branches look really straight.

I had to change the bobbin during the last column of this design.

I only made four columns – think I should have done five. And changing the length of the offshoots would make it look more natural.

I also see now that in both this and the previous design I was supposed to have the offshoots all pointing in reverse direction from the question mark ending.  Especially with this one I was really working to get the drops so they were all the same - so it's good to have photos to compare! Amazing that I missed this important part of the designs the first time I tried them!
Back Sea Oats

WSF Sampler- SITD Wonky Shoo Fly

I decided to try just doing stitch in the ditch (SITD)for this block, but it looks awfully plain.  I'm hoping that I will appreciate having some blocks that have less quilting and so are softer in the finished product.


B was very confused about the location of my plain blocks and the patterned ones.  I could tell from him comments that not having a standard setting might not be his cup of tea.  But I’m hoping he will like it once it is done!  If not then I’m making a blanket or something for someone else to keep…!

WSF Sampler - FMQ Sea Algae

http://freemotionquilting.blogspot.com/2009/09/day-41-sea-algae.html

Before Sewing
Watched the video. Since it has been a little while since I have done this, I’m anticipating the curves might be a problem, but maybe not!

The end picture shows the design upside down from how she did the sewing… There is no flipping of fabric so that will make it easier!

Starts with sort of straight line that curves back and forward to the right. Then you go back on that line to the start of the big curve. Go down from that point to make another upside down question mark shape. Once you reach the bottom travel up adding off shoots to the inside of each of the question mark shapes.
Front Sea Algae
After Sewing
Making the upside down question marks were easier than I thought they would be. Traveling on the already stitched lines also didn’t seem as foreign as I thought it would be.

I am working with 8 inch squares so the amount of fabric covered is more than what Leah shows in her videos. I found myself sort of holding the needle while the machine was going and then readjusting where my hands were, so there are globs of thread on the back. I don’t think this is because of the needle or thread or bobbin tension, I think it’s because I’m sewing several stitches while moving my hands. So for the next design I’m going to try to stop the machine with the needle down – then readjust hands.

A bigger issue is that the lines on the bottom do not look the same as the lines on the top. The back has more sort of echoing that shows up as one stitch line on the front. This might be because I removed the pins so they would not catch on the side of the sewing table. So on the next design I will keep more pins in. Since this is a design that is done in a column that will be easy to do I think.

Added: I also see now that in both this and the next design I was supposed to have the offshoots all pointing in reverse direction from the question mark ending.   Amazing that I missed this important part of the designs the first time I tried them!

Back Sea Algae

WSF Sampler - Sandwich Preparation

First I taped the back, then the batting then the top to the table... Then I pin basted.

Showing the securing and pin basting of the sandwich
Then I used a walking foot to sew around each square..

Showing that each block has been stitched around
Then I was ready to start sewing the quilt designs!

Wednesday, June 30, 2010

BlockLotto - June 2010 - Baskets

BlockLotto - June 2010 - Baskets

Directions:
http://blocklotto.blogspot.com/2010/06/may-block-is-liberated-basket.html

Examples:
http://blocklotto.blogspot.com/search/label/June%2010%20photos

Oh, my gosh!  These were really fun!  And another example of something I never would have done without Sophie's BlockLotto!

The blocks were to be on either gold or yellow - with the bottoms and handles out of red.  The baskets themselves could be any shape - had to have at least five fabrics.  The handles had to be the same width and all with a curve.

My favorites are the tall skinny baskets.

Not only were these fun to put together, it was fun to use scraps of fabric from other projects, and oh what fun they will be to quilt - with so much yellow/gold to cover.  I would use red thread for the quilting!  And I would give the result to Pam - she would really like these blocks in a quilt!

I finished my blocks up during the week before June (my reward for sending in blocks before the deadline was getting to see the directions early).

Friday, June 18, 2010

FMQ Designs Used in First Quilt - Red - Long Beads

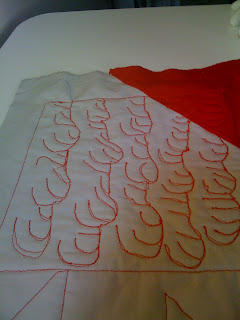
I intended to use a different design in each color - but at the end I saw the long strip of red and I just didn't know what to do. I didn't have control of the fabric at all so I couldn't fathom sewing columns of chevron's there. So instead I just did a long loopy stitch then came back fill it in - like beads...


I was really tired with this effort - pleased but tired. I determined to get new thread - I wanted red as it would stand out - for my second quilt. I also put the quilting aside until the things I ordered from Leah arrived. Having the bobbin glides and gloves really changed things. And I can't imagine sewing with the machine just being on the top of the table now - having it secure in the little desk really helps.

Sunday, May 30, 2010

BlockLotto - May 2010 - Reeds

May 2010 - Reeds

Since I have won the last two months I am donating my blocks to the lottery (I'm lusting after them though). They will make a really modern quilt! ...and the lime green would be perfect for the Karl and Heather wedding quilt.....

I finished my blocks up during the week before May (my reward for sending in blocks before the deadline was getting to see the directions early).

I think I have mastered this block now - but when I was first making it I was fretting about the curves and if it was going to be flat.  I put a warm iron on the block and turned it off - then left that over night - that seemed to do the trick.   I used four different backgrounds and three different greens.  It was easier to sew on the plain kona cotton than the print material. I used a paper template to create the block in the middle - the rest were free cut with rotary cutter.

Friday, April 30, 2010

BlockLotto - April 2010 - Wonky Shoo Fly

April 2010 - Wonky Shoo Fly


I finished my blocks up during the week before April (my reward for sending in blocks before the deadline was getting to see the directions early).

These were so much fun to sew! Sophie had really clear directions for doing them using three different methods - made it so easy to just pick two pieces of fabric and cut and sew! really it took longer to design on the fabrics and to verify they were washed and color set than it did to stitch them up!

I learned that sometimes the contrast does not show up as expected (see the purple blocks) - in real life these were really pretty fabrics together - just not the best contrast for the challenge.

When the drawing was held for the lottery, I was a winner!

---
To be Added:  The backstory and process of changing these in a quilt!
---

I only kept the dark blue with larger floral blocks (blocks 6 and 8 above counting from the top right) and sent the rest off to others who won them.

These will be so fun to quilt - lots of space for stitching to show in the 'plain' blocks!