Pages

Saturday, January 16, 2016

Making Scraps and Combining: Checkerboard Denim Pillow a Reality Now

Update: I finished the pillow on the second version of the block (in denim), the photo is below.  Used the zipper directions from the Moda Bake Shop Site.

 Like all of you, I've been seeing posts about using scraps, not buying fabric, finishing projects starting new projects. This year I'm noticing and determined to increase my sewing time, so I'm making links to these sites!

Here is my hanging scrap collection:
The fabric bits are arranged roughly by color, all ironed and ready to be pulled and used.

But that's not what struck my fancy.  Instead it was my collection of old jeans!

I've never cut into an old piece of clothing, it was easy once I made the cut.  The fabric sort of told me where to cut the strips to make a second checkerboard block for the Play with me Challenge.  I had a set of new jean needles all ready to insert in the machine, but the regular old needle I had in it was working so saved the special needles for later.

Originally I was thinking of turning this into a placemat.  What fun it would be to have them on the table for dinners for our game nights!  But even with out the sashing/borders this would be too large for our kitchen table... (although it does go well with the denim covered seat cushions that I made with an old duvet cover that was way too heavy to sleep under!)


So now I decided to change this into a pillow cover for my first ever sofa pillow!

Tomorrow I go to a sewing session and will get help I hope with deciding which jean fabric to use the the final border and for putting a zipper in the back! 

Update:
Here is the pillow!  Decided to use the same jean material for the borders and the back.
I'm very happy with the results, gave it to my husband!
Play With Me Checkers Pillow Front
Play With Me Checkers Pillow Back


I already posted a different post to these link parties, but I'm participating in these too!

Wednesday, January 13, 2016

RSC16: January Blue with a Purple Accent

I've noticed the So Scrappy Rainbow challenge for a few years.

Last year or the year before I pulled out my smaller scraps, ironed and organized them by color.  Then hung them on a hanger based on color.  This year I've decided to take the assigned color and make it into a piece of fabric that could be cut into a 12 inch square.


Draft Blue Piece
I started with just the blue fabric, it didn't quite measure 12 inches and looked rather blah.  Either my scraps were too large or too small, or again I'm just not artistic with the fabric I have.


This year Angela added a secondary color 'purple accents for January' so I cut this draft square and added a small strip of lilac.  Decided to size it up to be the size of my ruler 12.5 inches.
Blue with Purple Accent 12.5"

I like the way the fabric pieces join and create jagged corners.  And the way some of the strips sort of line up after a break.  Next month I'll work more on lining things up, and will be more mindful of having larger seams at the ends.  

I'm already doing several projects where I measure an follow patterns.  I'm glad though to finally commit to making a scrappy block each month with the Rainbow Scrap Challenge!


So Scrappy: Rainbow 2016: http://superscrappy.blogspot.com/p/rsc16.html  Monthly colors and ideas for blocks designed to end up in one end of year quilt.

Monday, January 11, 2016

Tumbler Progress: 1.5 Bobbins

Yesterday I straightened up the sewing room,  reset up my machine for FMQing, found the thread, half filled a bobbin, changed the needle, put the quilt under the needle and started putting the quilting stitches in the tumbler.

I started by doing one straight line, then turning the piece and going in the other direction with the angles - took 2.5 hours for all that!

Filled the bobbin and left things set up for today.

Today I was able to just start sewing! I think I did one straight and one pass with angles, then decided to only do the straight passes for alternating rows before considering doing more angles.  There were a few places where the fabric puckered, I just kept going.  Hopefully these puckers will not be noticeable once the quilt is washed.   Other than that, things went well.  I decided to go back and put a line at every seam before considering the angles again.

I did remember this second day to change the stitch length so it was shorter at the beginning and end of each line, so I'll be able to trim and not have to hide the ends as I did with the pajama bag!

It like going thru a sea of color and memories.  I'm enjoy seeing the fabrics again as they pass the needle.  I makes me happy to come across the fabric and decide, now that's my favorite.  Only to change my mind with another set of colors appear.


I don't remember why my then future DIL was with me, but I do remember she was with me when I got three different orange fabrics and she helped pick them out. Probably for the Block Lotto year.  And I'm glad when the fabric I used for pants for my son appear and remind me of those times.

I traded tumblers with an older lady in class so there are some really different for me fabrics, like flowers and these little bird houses. I've never noticed fabric like that when I have been to the store.  I can imagine it framing a window or on an apron when she was a young bride.  Fun.

I remembered when I got to a corner that the batting I used had a corner cut out so I had to cut a piece from another side and place it in the quilt sandwich, so there was batting in that corner.  It's secured pretty well I think.  I'll do some extra stitching there, perhaps with a label, before I give the quilt away. I should finish the quilt for my husband before I do that...

This batting a rather flat, it's warm and natural cotton I believe.  With the pins there is a lot of weight to this project so it seems wonderful.  I hope once it's quilted the weight will be nice for our friend.  It's a lot easier to remove the pins than it was to put them in!

Going to stop now after about 4 hours since I sewed thru a bobbin's worth of thread. This time I filled two bobbins so it will be a quicker change out the next time I quilt this. I'm not tired but do have some other work to do before my husband returns from work!

After 1.5 bobbins of quilting, and about 4 hours of quilting.


Sunday, January 10, 2016

2016 Finish-A-Long Q1 - The Dream List

A finish-a-long!  What a great concept! 

I've been noticing the Posts and Links for the Quarterly Finish-A-Long on other blogs, this is the first time I'm creating a list of projects to finish. 

Like several of the others who have already posted their lists, I've done a terrific job of starting different projects, but haven't been good with following thru and finishing quilts.  For a long time I didn't know how to do more than piece fabric.  But I have been learning finally how to finish a quilt. It takes me time, but I can baste and quilt and put on a binding now!

So this year my focus is on following thru and finishing quilts for my family and friends.

Once I decided to join in the Finish-A-Long, I went thru boxes in my new sewing room. I found 24 mostly old, old projects that I hope to finish this year. There are more, but I couldn't find them tonight so they will be pushed to the next quarter/year!


1.  Sharon Craig Half Log Cabin (around 1992).  A local quilt shop (Rosie's Quilt Shop on El Cajon in San Diego) organized around 50 people to each cut strips from a dark fabric and a light fabric.  We brought it to the store and they then organized packets so we all got one of everyone's contribution.  Then we used Sharon Craig's method for making half log cabins (that reminds me I have a regular log cabin too to finish up too - where is that?). Making the half log cabins was so much fun, I went to the store and bought tons of fabric so I could keep making them!  So instead of a twin, this is a king top.  It can't be the first thing I work on this quarter as I have so far only done lap or block quilting, but I found it tonight so it's on the list.  I realize I've been telling people I have fabric from my Godmother and mother, but really it's this quilt that was responsible for me buying and so having a ton of fabric that I'm not crazy about...  I only needed a strip from each, but had to buy what ever the minimum was...

2.  Quilt in a Day Tulips (around 1991).  This was my second quilt top.  I made this for my Godmother, but she only got to see the blocks.  She loved tulips and this sort of grey green.  I made the blocks from Eleanor Burns' book, but thought the setting wasn't interesting so I modified the sashing so the tulips were more random.  It was supposed to look like the seeds for the flowers had been flung on the field.  To get just the right shade of the green for the border I flipped the fabric over.  People looking at it though thought the I had goofed in my flower placement.  Oh well. I pieced a back from left over fabric.

3.  My First* Pieced Quilt Top - Stars and Planets (1990) I took a class when our son was three, so I remember the year! I have star blocks in all the colors of the rainbow, but my DH thought I should limit the number of colors so I picked these. I had wanted to make the quilt with solids, the teacher insisted I get fabric with a little design in it. It was boring to make all the blocks the same size so I made some that were smaller and added the HST border and some plain blocks on the top. I finished the extra long twin top and our little son admired it. Then he asked where the planets were! So I took a class to learn how to make circles (see quilt #6 on this list) and searched for just the perfect fabric to represent each of them. This time I only needed a few inches, but again had to buy what ever the minimum was. I either sewed quarter circles together or appliqued circles on the fabric with stars. (Pluto was too small for me to manage with fabric so I painted it on). The planets are sized to be correct relative to a one inch earth. This was going to be the back of the quilt. When I was working on this, our son asked where the sun was. I should have said he was the sun, but that didn't occur to me. I was overwhelmed so I put the quilt away... I could add the other color blocks to make the quilt fit the top of a king bed...  * This is my first completely pieced quilt top, after taking a class.  In the early 1960's with my mom's help, I started cutting pieces for a quilt with 1/2 inch seams, it was finally put together, quilted and bound in May 2012. The finish is blogged here: huge star quilt. My numbering system is off!  : )

4.  Husband Quilt - (2013) I cut fabric while we were in Cambridge.  I had one idea for the top, my DH had another.  Since it's for him it will be made the way he wanted.  Hopefully this quarter!  This post shows the various versions of the quilt.

5.  Irish Chain (around 1991) My third quilt.  I liked the idea of an Irish chain, but thought it was too simple so made it a triple!  I was surprised that the dark blue ended up being so large in the design. I put it on a table to show off, but a candle dripped on a piece of fabric so I'll have to figure out how to replace that piece in the middle of everything before quilting it.  But because of Leah Day' videos, I do believe I have the skills now to finish this one!

6.  Farm Scene Sampler (1991) I took a class to learn how to do curves so I could make the planets for my son's quilt.  The project was very good as we also did y-seams, applique hearts, miter corners and I also learned that if it doesn't fit to add more fabric or change the pattern!

7.  Cultural Fusion - Windmills (2015)  I was so fortunate last summer to take a day long class with Shajata Shah!  Had so much fun making the windmill blocks from her wonderful book, Cultural Fusion.  I hope to make all of the quilts in her book, in a timely manner.  These purple windmills will be flying off to a friend in Sweden when the quilt is completed.

8.  Tumbler (2011)  I sewed these in leader and ender fashion but then it took over as it was so much fun to sew these pieces (cut with a Studio GO from an adult education class) and arrange them so the colors were sort of clumped together.  This quilt is being made for our friend in Colorado.  This post shows the basted (since 2014) tumbler project. Now I know how to quilt the project, and since it's basted, it will be first on this list to be completed!

9.  Large Blocks (2013) When I was in Cambridge, an online Liberated Quilting friend, Audrey, gave me a great Freecycle sewing machine so I was able to sew.  I bought fabric and made these large blocks.  They were going to be a quilt for my DH but he wanted more black in it.  So it will be a quilt for me I think! This post has the image of the blocks on bed top.

10. Chinese Coins or Made Fabric (2011-ish) I found a stack of fabric in my mom's things that was mostly around 6 inches square.  I cut strips while in a class, with the intent to make a Chinese Coin quilt.  But I might make a Liberated Wedding ring quilt instead.

11. Leah Day Building Blocks (2014)  I got started, then things happened and I didn't continue working on this.  I found the blocks tonight so they are on the list to finish!  These posts show the blocks I've finished.  The rest are organized in baggies according to Leah's directions.

12. Marston/Moran Workshop (2012) - I was very lucky to attend a multiple day workshop held by Gwen Marston and Freddy Moran.  Before the workshop we were given preparation assignments to make parts for a quilt.  In theory I was supposed to have enough I guess that I just put the parts together to create a quilt.  That didn't happen for anyone I think in the class.  It was so exciting to see the quilts they have in their books in person and to meet them and other quilters.  As I recall I have just a few inches to fill in then can put the top together.

13. FMQAYGQAL (2012) - This was an online group organized by Laura/QuokkaQuilts that practiced FMQing, the blocks are all made and quilted.  I just have to find them and put them together and finish it up. This quilt is going to be a wedding present for one of my husband's students. Click here to see the posts about this project. This was the first time I used precuts for a quilt!

14. Wonky Shoo Fly (2010) - I won these blocks from the Block Lotto. I had been putting them together with solid blocks and practicing FMQing in sections.  Here is a post with a photo of some of the sections that are completed.  I have to find the blocks, but they will probably be one of the first projects I work on this quarter after the tumbler is quilted.  Each block is a different Leah Day Free Motion Design.  I even have a category on my blog to use to show all the progress on this project!

15. Liberated Round Robin LibRR1 (2011) - This was the year I was really getting going with my quilting.  I organized an online group - The Liberated Round Robin - and we worked on creating a liberated quilt.  I started mine with pieces of blocks that I got in an online liberated quilter fabric swap.  Here are my posts about this project.  I have two more rounds to add, but I'll have to find the project and pieces first!

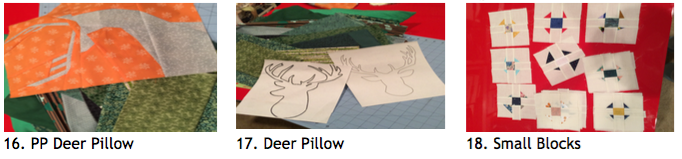
16. Paper Pieced Deer Pillow (2015) - My son and his new wife had several pillows with deers on them on their wedding registry. After searching the web, I found a really nice paper piecing pattern from Julianna who lives in Poland that I'm going to use for one of the pillows. I have the orange/grey version finished, but I made a mistake in my piecing so will either correct that one or will make a new one with green/black/brown fabric.

17. Fused or Pieced Deer Pillow (2016) - For the other deer pillow, I may fuse the silhouette of a deer on fabric that will go with the paper pieced version.

18. Small Blocks (2010) - I made these with left overs after making the larger sized wonky shoo fly versions for the block lotto. These will make a nice little quilt for someone!


19.  Fused Circles (2014) -  I used a Studio GO to convert some beautiful Kansas City Troubles strips to fused circles.  I was going to do my interpretation of ChristaQuilts Abacus - but thought I would used the stitching from the Leah Day Butterfly project to practice FMQing.  I have many pieces ready, this might be the time I actually do it!

20. Friday Block Party (2011) -  For my contribution, I found free block designs that were in the shape of animals.  I made a lot of these blocks, and also some traditional blocks all with the grey background.  When I find the blocks, and the time, they would go together pretty easily in to a nice child's quilt. Posted progress here.

21. Quarter Circles (2011) - I had access to a Studio GO so cut a range of solids in blues and yellows with the quarter circle die, so I'm committed to these colors.  Perhaps this quarter I will be inspired to finish sewing these together and actually making a quilt!

22.  Cow Pillow (1991) - This was FMQed as part of a workshop, the back is perfect but it's done on not very nice looking muslim so would be better as a pillow.

23.  Lone Star Pieces (around 1991) - Eleanor Burns is from around here so if you take any adult education classes or quilting classes we are exposed to her sister's great demos and her books all the time.  In class I bought a ton of her books as we were given 30% discounts.  The lone star seems so complicated but with her directions was really doable even for a beginner like me.  Except I got too confident and impatient and didn't double check my angles for the last cuttings, so the angles are off.  Maybe this year I can improvise and make a quilt of the pieces.

24.  Whole Cloth Pillow (2012) - I followed along for Leah Day's instruction for a lot of the 2012 project.  This whole cloth piece doesn't look nice enough on the back to be part of a quilt, but would make a very nice pillow.  Blogged here.


Like the rest of you, I have new projects that I'm working on, and like some of you, I have even more WIP lurking in boxes waiting to be found again!

It's been fun for me to go thru boxes with these projects and remember them.  I've been so focused on new projects that I sort of just pushed them aside.  It's nice to have this finish a long to help me on my way to having finishes.

I'll be happy with any progress on finishing these this quarter!

Thank you all for for organizing the FAL!

Here are the 2016 Finish-A-Long Q1 guidelines:

For those of you who are new to the FAL, it is a place to find motivation and encouragement to complete those unfinished projects that are hanging about becoming UFOs. Every quarter you post a list of projects you hope to finish in the next three months, and then at the end of the quarter, you post a link from your blog, flickr or instagram of each successful finish from your original list.

Each finish is an entry for wonderful prizes from our sponsors. There is no penalty for not finishing a listed project, so feel free to make your list  long or short, as you wish.  The 2016 Schedule and the Rules for the FAL are on my permanent FAL page, let me know if you have any questions.

Saturday, January 9, 2016

Stash Bee 2016 Hive 8 - January Block

Another new project for 2016.

Here is the block I made for Laura, the January queen bee for Hive 8!

The directions were really clear and result in a 14 inch block.

I had lots of teal and neutrals and sent her a photo so she could pre-approve the fabric.

She reminded me of the trick to change the photo to black and white. There was one fabric that was way too dark that I had in the neutrals, so it was out of the running for her block.

I found out she usually does not pre-wash her fabric so that made the decision on which ones to use easier and the block went together easily!

I'm having fun thinking about what block I will be asking the others to make for me in July.

I had wanted to make two blocks for her, but instead will send along some fabric that she may decide to include in this project or another.

------

I decided to make a block for myself each month too.  I'm going to use polka dot materials and the neutrals as the background.  Hopefully it come together in a nice finish at the end of the year.  I sewed the little HST triangles for myself too.  They may come in handy!

14 inch block


Play with Me QAL: 01-2016 Checkerboard/Bargello

http://alidatweloqdesigns.blogspot.com/p/play-with-me-qal.html
This is one of my new 2016 projects.  Board games in a quilt!

I have finished the first block, here it is sans sashing! Scroll down to see the second version a denim pillow!
Play with Me - Jan 2016 Checkerboard Block
Added 1-17-16: I also made a version out of denim and made it into a pillow:
Play with Me - Jan 2016 Checkerboard Block
Pillow Version
Play with Me - Jan 2016 Checkerboard Block
Pillow Version - Back
This was the first time sewing on denim, I ended up being able to use a regular needle.  I wanted to finished the pillow at my Saturday sewing day so unfortunately missed adding any quilting to this version as I didn't have batting with me.  My plastic pressure foot broke too so the final seams were finished using a zipper foot!

I originally used the teal and neutral fabric I had out for the January Stash Bee block.  I think I have enough to use these colors in the remaining blocks.  I'll decide on the color for the sashing color once we are farther along in the Play with Me adventure.

But the Lori, the first person to post her finish, made her board into a place mat, it looks really nice. And what a great idea too.  I may make another block (in more food friendly colors) so I can do this too.

Alida write really clear directions, just what I needed to be successful! If you want a fun project, go to the site and sign up to get the information!


Friday, January 8, 2016

One Monthly Goal: Jan 2016 Quilt the Tumbler

This is another new project for 2016 - actually committing to work on a particular old project this month!


My January goal is to FMQ this quilt.

Tumbler (started 2011)  I sewed these as a leader and ender project,  but then it took over as it was so much fun to sew these pieces (cut with Accuquilt from adult education class) and arrange them so the colors were sort of clumped together.

This quilt is being made for our friend in Colorado.

This post shows the basted (since 2013) tumbler project.

Now I know how to quilt the project and since it's basted I want to work on it this month!  I've been emailing Candace at Saltwater Quilts to get her tips for quilting it. Click here to see her detail photo of the design.   I'll save the binding and label for another month.


I'm linking up with OMG, a new program by Heidi at Red Letter Quilts.


Here are the guidelines:


Welcome!
One Monthly Goal is open to any quilter who would like to set (and achieve!) monthly goals, and share them in a group environment. This is a social linkup: Participant's are encouraged to spread cheer, encourage, and congratulate one another!

To participate:

Select ONE quilt-related goal and describe it in a blog post, with photo(s) of said project, and what you aim to finish. If you do not have a blog or web site, please join the OMG: One Monthly Goal Flickr Group and post a photo there with a written description of your goal. Be sure and come back to link-up with the goal setting party!

Each month, the goal-setting link-up will be open from the 1st through the 7th, PST. No exceptions!

Once you have achieved your written goal, be sure and come back again, during the last week of the month, to link your post at the OMG: It's Finished Party! It'll be open the last seven days of each month. The linkup will close at midnight the last night of the month, PST, no exceptions!

To be eligible for the prize by random drawing you must linkup here for both linkups; first your goal-setting oath, and again with your celebratory-accomplishment post. All entrants are eligible, worldwide, who have a valid mailing address.

Please link your posts to OMG: One Monthly Goal, with a link here from the post, and/or a button on the site. Please, grab a button (from the sidebar) and join us!


http://redletterquilts.blogspot.com/2016/01/one-monthly-goal-omg-inaugural-launch.html

Sunday, January 3, 2016

Cozy Quilts Demo and Expenses

I went to Cozy Quilts today for the first Saturday demo.

The demonstration was for a pattern called Skyscrapers.

It is another one their easy but very attractive patterns!


I bought some fabric....

The snow globe fabric will be a good backing for a yet unborn/unimagined future quilt for my Godsister.  (She collects snow globes.)

The teal and the neutral were picked out for the January Stash Bee block that I will be making for Laura.  I have enough neutral and teal already but it's hard to not buy fabric....

I received the pattern as I attended the demonstration.

.5 yard neutral     @$10.99 was $5.50
1 yard teal            @$9.99 was $9.99
2 yards snowglobe  @$11.50 but 75% off so was @$2.88 each
With tax = $23.06


Ad Hoc Improv Quilters - Sharing

AHIQ Challenge: Share your previous month's improvisational quilt, top, block, plans, or ideas.

Hmm. Mainly I was working on plans or ideas, and just trying to get myself a little organized and ready to sew and quilt again!

I did push myself to actually finish two charity quilts during December.  My 10th and 11th all time quilt finishes!

For some reason, I also felt confident enough to try out some new-to-me-techniques.

I don't mean creative piecing or even much thought going into the fabrics or to the colors. The quilts I finished were pieced last year and made from charm squares I had hurriedly cut years before at the adult education class when the Accuquilt Studio became available! It's too bad that I wasn't able to plan what fabrics I cut, but blue always looks good with other colors so it's all okay.
We lived in a furnished apartment during most of 2013, and there was the prettiest quilt there. It's funny, I don't remember the design. The colors included blocks with a lot of pink and each had a white background. What I do remember are the beautiful Baptist fans that were hand stitched from edge to edge of that quilt.
My Quilt #10:
My Quilt #10 - asymmetric blue without binding
QFK Practice FMQ (Fabric cut 2012 finished 2015) Blogged
I had dreamt of sewing beautiful feathers in the corners of the first (mainly) charm square charity quilt and then filling it in with the Baptist fan design. The quilting was somehow going to make this project beautiful.

But when I started moving the fabric the feathers weren't really beautiful, and the fabric was not moving with ease on the sewing machine table.

It was very awkward to quilt after taking such a long break from regular sewing. I realized that I should have planned the fans out even more with my paper doodling. With the pressure I put on myself to keep sewing without breaking a needle or the thread, my alternating rows start with different orientations so it looks more like rolling hills than fans. After the middle of the second row, I thought the quilt was awful and the fans would look funny if I continued with them. I wanted to change the design to something that would be quicker to finish just so I could move on.

I decided on trying out an orange peel design. Something I had thought was pretty, but didn't want to have to mark the squares out so hadn't sewn before. With the charm squares to guide me though, the new (orange peel) design was much easier and quicker to sew than the fans. Since I had made this quilt without borders or the need for binding, once I was finished the quilting project was done. And wonderfully and magically, after washing it became something that I would be pleased to donate.

My Quilt #11:
My Quilt #11 - orange peel with separate binding QFK -
one design orange peel FMQ 
 (Fabric cut 2012 finished 2015) Blogged


I decided that I would use the orange peel design to quilt the entire next quilt. When the bobbin ran out, I remembered I had purchased the grey thread I was using for another project. I really wanted to finish these quilts up before the charity group met again, so to continue with the scrap quilt theme I used different colors of thread to finish the quilt top. It was great fun. I would do one line thru the quilt, cut the thread, turn the project 90 degrees and then sew another line. I continued until the bobbin or the top thread ran out. Then I would look for even more colorful thread to partially fill a bobbin and continue sewing the lines. I'm very pleased with how the quilting turned out for this second quilt.

I had planned on doing a binding by bringing the backing to the front, but I made a mistake at the first corner. I wasn't able to rip the stitches out, so instead I trimmed the quilt so the sides of the quilt were even, used a bowl to shape rounded corners and used the remaining fabric for the binding.

I don't love all the fabric decisions I made, but I do really like the way this quilt turned out. Well, really how both of them turned out now. I think they will be good quilts to donate and they will be appreciated.

Let's see....

Here are my all time quilt finishes!

My Quilt #9 - Cultural Fusion hour glass with oversized wrap around binding - group donation Minimal FMQ (Started and Completed 2015) Blogged

My Quilt #8 - Block Lotto 2010 Winnings with oversized wrap around binding - finished with friend for her daughter. Minimal SITD FMQ (Blocks 2010, completed 2015)


My Quilt #7 - green with oversized wrap around binding QFK - Minimal SITD FMQ (Started and completed 2015)
My Quilt #6 - baseball with wrap around binding QFK - one design FMQ (Started and completed 2013) Blogged

My Quilt #5 - large star with separate binding sofa quilt - one design FMQ  (Started around 1967 - Completed 2012) Blogged 
My Quilt #4 - pink practice piece with separate binding for wheel chair - Practice FMQ (Started and completed 2012) Blogged


My Quilt #3 - yellow Quilts with wrap around binding QFK (Different block FMQ) Click photo for detail (Started and completed 2010)
My Quilt #2 - blue/black/red with wrap around binding QFK (Quilts for Kids) (different FMQ by fabric)  Click photo for detail (Started and completed 2010)

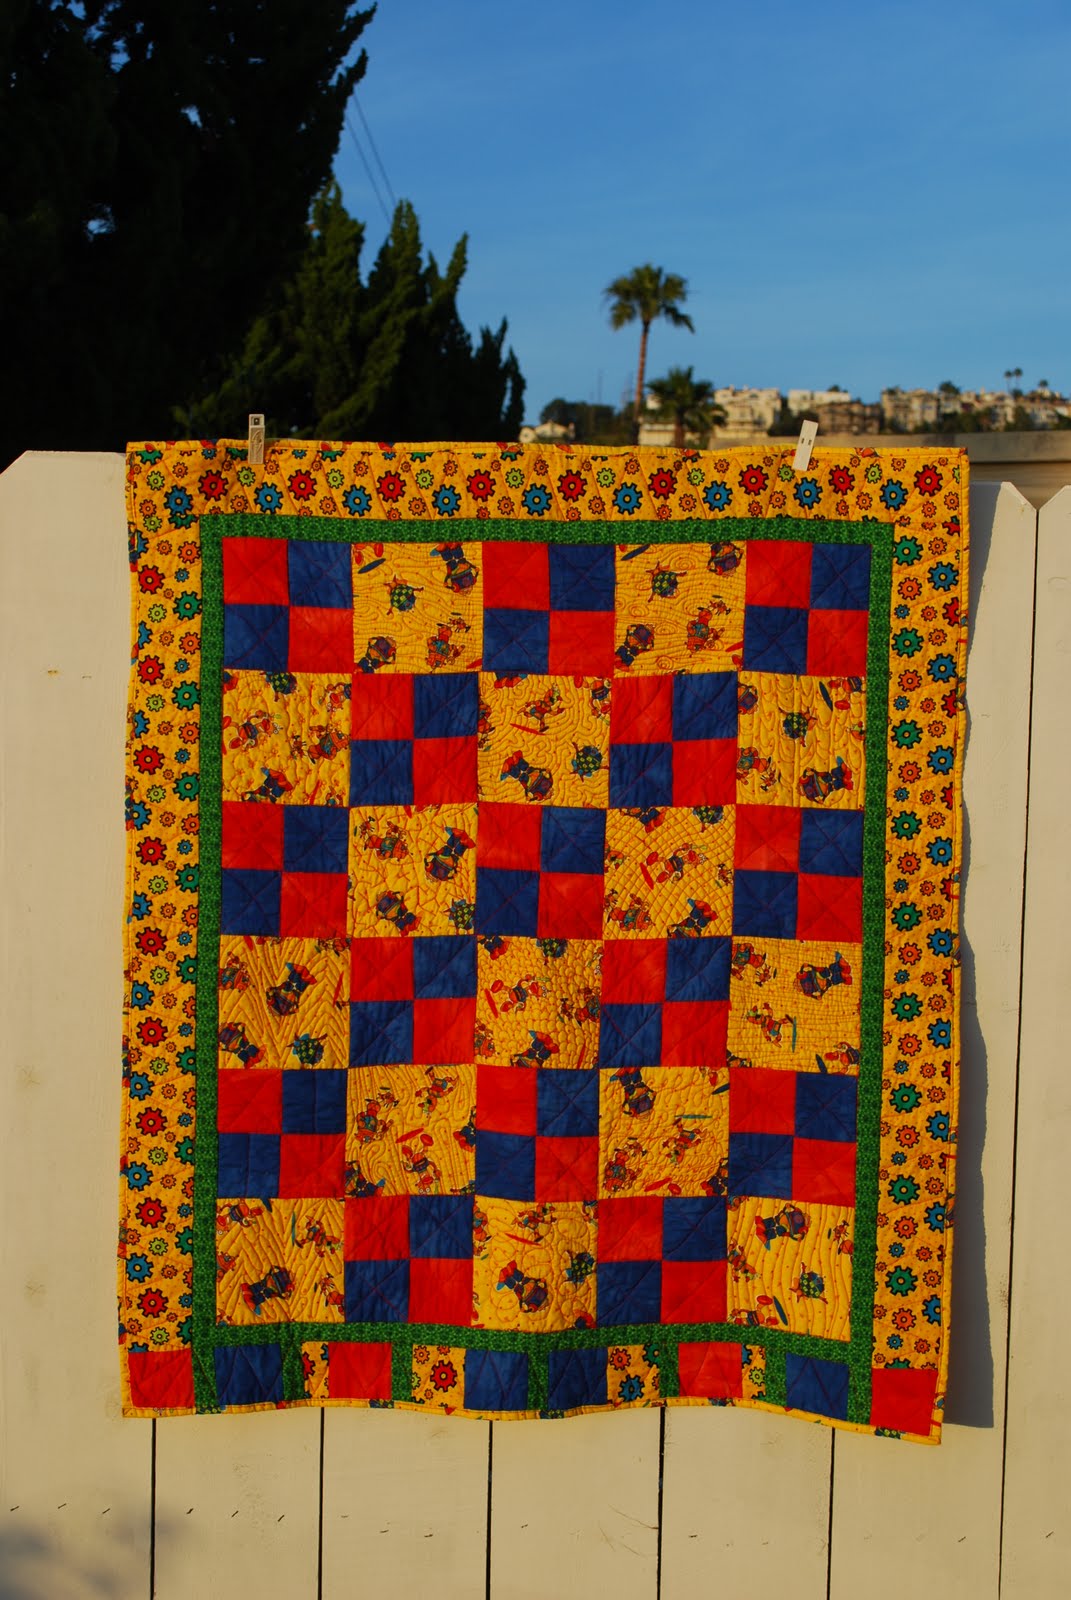
My Quilt #1 - crazy quilt without binding - tied - given as gift to my son (Project Started 1992 - finished November 2009)


Found photo: Shows
quilt in the rented
2013 apartment that had 
Baptist Fans
By the end of 2016 I hope that I go forward and finish more quilts! And that I experiment with projects made up of single blocks of color, but with a variety colors for the thread, and different shaped edges for the perimeter.

and my family and friends, I'm sure, hope I will finish their quilts!

: )

and I'll work on my run-on sentences!

: )

Thanks for visiting!